Most parts of this tutorial are, of course, about tips and tricks for your analysis. However, it’s often underestimated how important it is to set up your screen in a way that feels comfortable to you.
In this part of the tutorial, we’ll show you how a few simple clicks can make your daily training sessions more comfortable.
 I am FRITZ, and I have been redefining the world of chess for over 30 years.
I am FRITZ, and I have been redefining the world of chess for over 30 years. Whether in New York against Garry Kasparov or in Bonn in a 4:2 victory against the then world champion Vladimir Kramnik, millions of chess fans followed my ‘man versus machine’ duels. And even after 30 years, I'm still in top form: in 2023, I won the official chess software world championship and in 2024, I won the vice world championship title!
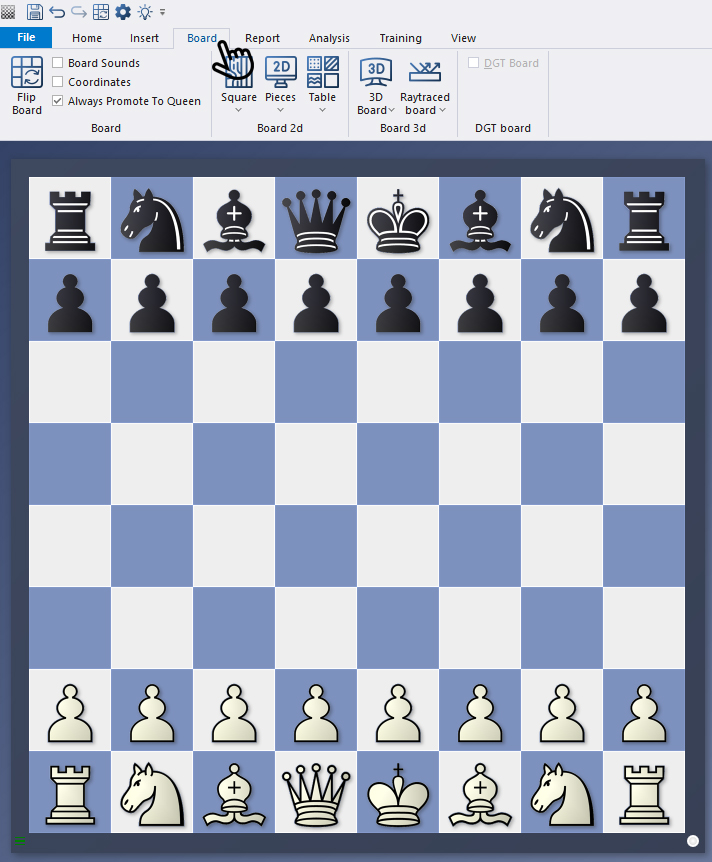
Simply click on the main menu item "Board" in a board window to open the options for customising the board design.
A brief digression:
There are a few points that are not directly related to the design, but are useful to explain briefly in this context:
- With "Flip Board", you can switch the view so that the white or black pieces are at the bottom or top.
- With "Board Sounds" (see next screenshot), you can turn the movement sounds of the pieces on and off.
The Coordinates option is more about appearance. If you tick the box (see next screenshot), the coordinates will be displayed at the bottom and left of the board.
However, this tutorial focuses on the next areas of the menu. First, let's take a look at the "2D Board" area: If you click on the down arrows there, the options will open:
 The premiere chess database with over 11.7 million games
The ChessBase Mega Database 2026 is the premiere chess database with over 11.7 million games from 1475 to 2025 in high quality.
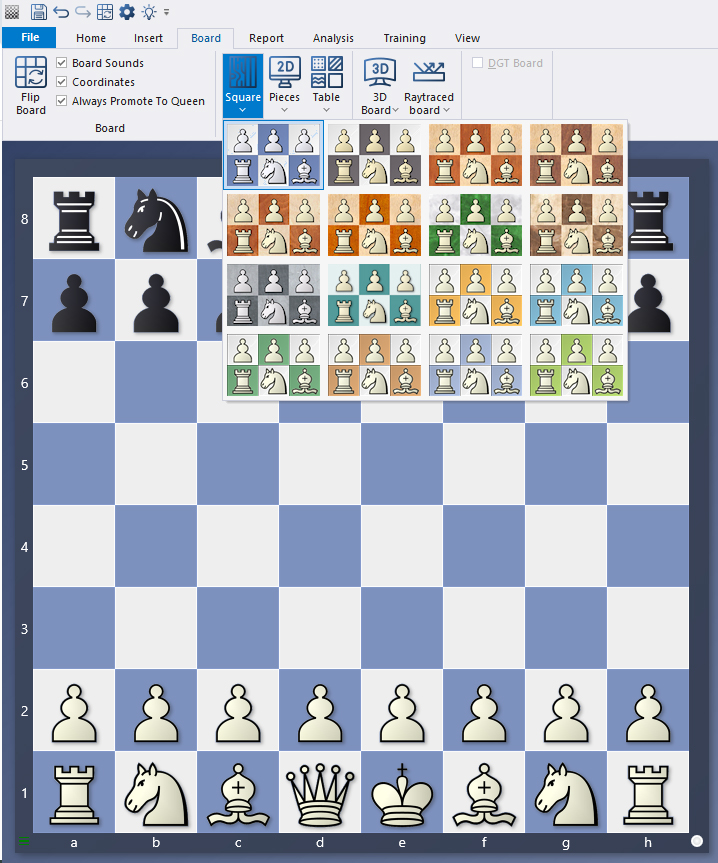
Once again, it's time to experiment. In the following screenshot, we have made selections in the "Square" menu item as well as in the "Pieces" and "Table" options. The layout changes as follows:
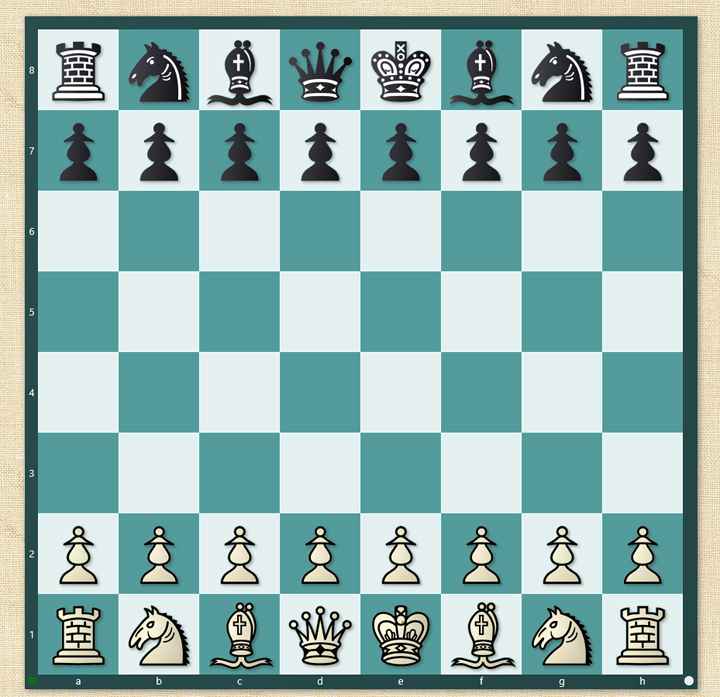 As everywhere else, the same applies here: it's all a matter of taste and personal preference!
In the next example, we have done the same for the "3D Board" area – with the options "3D Board" and "Raytraced Board":
 EXPAND YOUR CHESS HORIZONS
Data, plans, practice – the new Opening Report In ChessBase there are always attempts to show the typical plans of an opening variation. In the age of engines, chess is much more concrete than previously thought. But amateurs in particular love openings with clear plans, see the London System. In ChessBase ’26, three functions deal with the display of plans. The new opening report examines which piece moves or pawn advances are significant for each important variation. In the reference search you can now see on the board where the pieces usually go. If you start the new Monte Carlo analysis, the board also shows the most common figure paths.
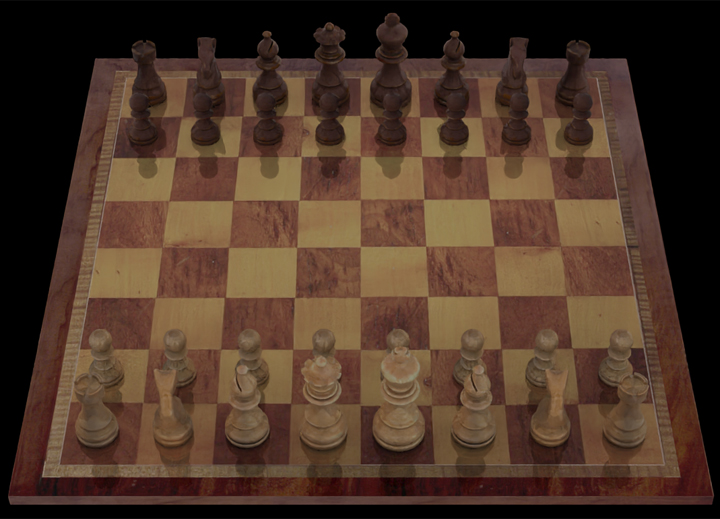
For users who prefer a 3D view, additional graphic effects are available via "ray tracing".
Pro tips:
In part 4 of this tutorial, we already discussed the "Options" menu (shortcut CTRL+ALT+o). Here you will also find a menu item called "Board Design":
 In this powerful new course, endgame expert Karsten Müller teams up with rising star Leon Mendonca to deliver what truly matters: 10 essential rules that every player must know.
Endgames decide more games than any opening preparation ever will and yet they are often the least understood phase of chess. In this powerful new course, endgame expert Karsten Müller teams up with rising star Leon Mendonca to deliver what truly matters: 10 essential rules that every player must know.
Free Video sample: Introduction
Free Video sample: Activate the king
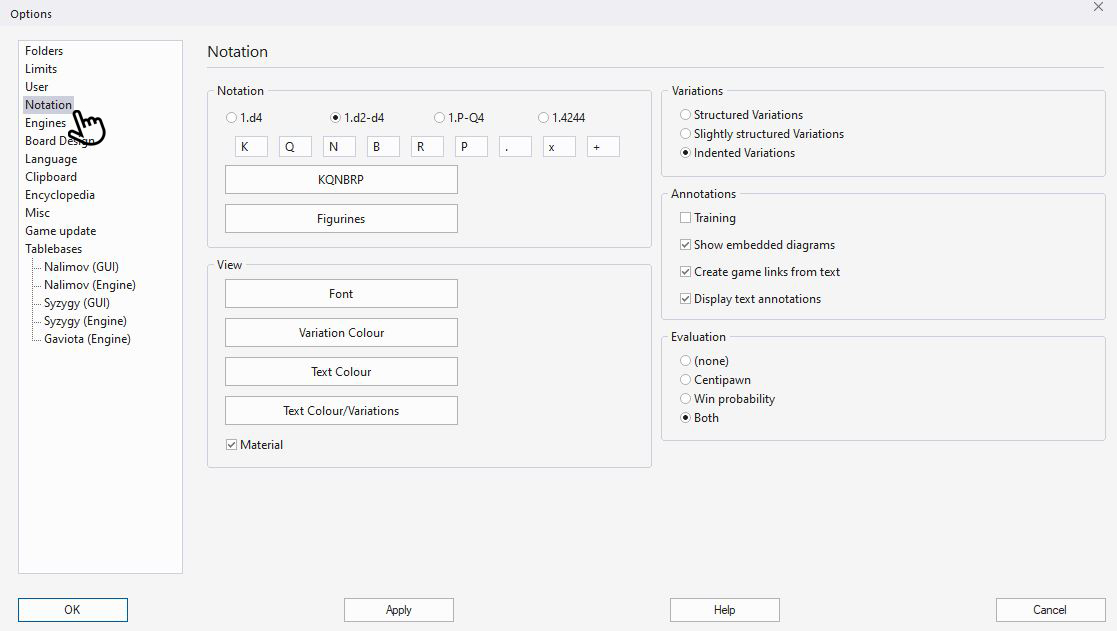
In addition to the options shown above, you can also select a few other settings here. The proportions and dimensions of the board and pieces are particularly important additions.
The menu items "Rating" and "Replay arrows under board", which are not directly related to the design topic, allow you to activate or deactivate these two options. In addition, you can use "Blind All", "Blind White" and "Blind Black" to activate blind mode and, depending on your selection, hide all pieces, only the white pieces or only the black pieces.
Now we hope you enjoy analysing your positions on your customised board design.
------
ChessBase has developed over decades to become what it is now in its 2026 version. The program has countless options, which we will present here in small portions – so you can design your interface for pleasant daily use and keep learning about new options and how to use them to get the most out of ChessBase´26 and save time.
We hope that this tip will help you to have more fun and be more successful when using ChessBase´26. You can find more tips and hints on our support pages and FAQ pages.
All parts of the series and more links:
In this course, Grandmaster Elisabeth Pähtz presents the London System, a structured and ambitious approach based on the immediate Bf4, leading to rich and dynamic positions.
The London System is one of the most popular openings at every level of chess but not all Londons are the same. In this course, Grandmaster Elisabeth Pähtz presents the London System, a structured and ambitious approach based on the immediate Bf4, leading to rich and dynamic positions.
Free sample video: Introduction
Free sample video: 5...cxd4 6.exd4 Qb6 sidelines




.jpeg)