.jpeg)

Most parts of this tutorial are, of course, about tips and tricks for your analysis. However, it’s often underestimated how important it is to set up your screen in a way that feels comfortable to you.
In this part of the tutorial, we’ll show you how a few simple clicks can make your daily training sessions more comfortable.
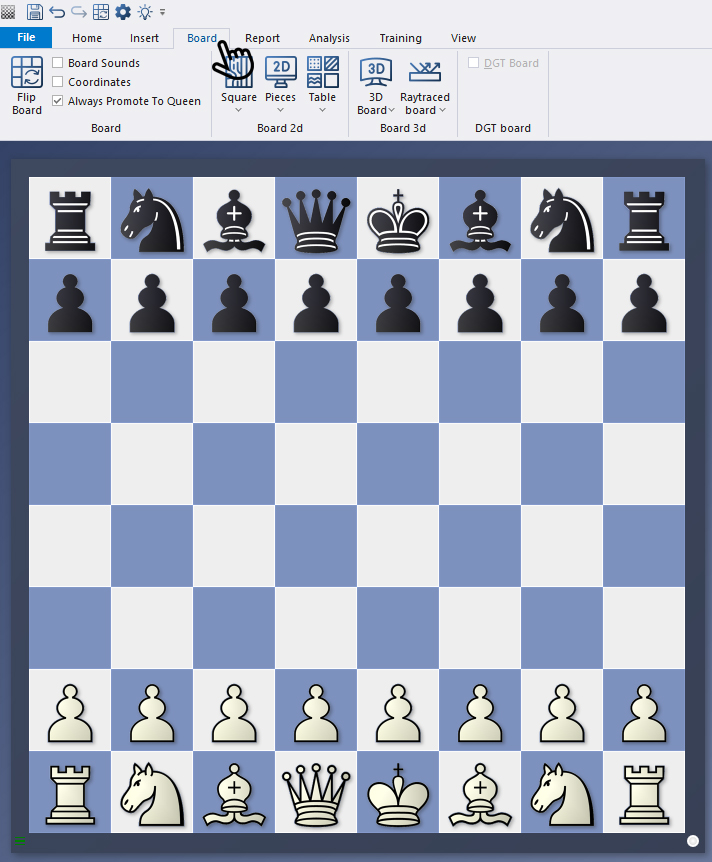
Simply click on the main menu item "Board" in a board window to open the options for customising the board design.
A brief digression:
There are a few points that are not directly related to the design, but are useful to explain briefly in this context:
The Coordinates option is more about appearance. If you tick the box (see next screenshot), the coordinates will be displayed at the bottom and left of the board.
However, this tutorial focuses on the next areas of the menu. First, let's take a look at the "2D Board" area: If you click on the down arrows there, the options will open:
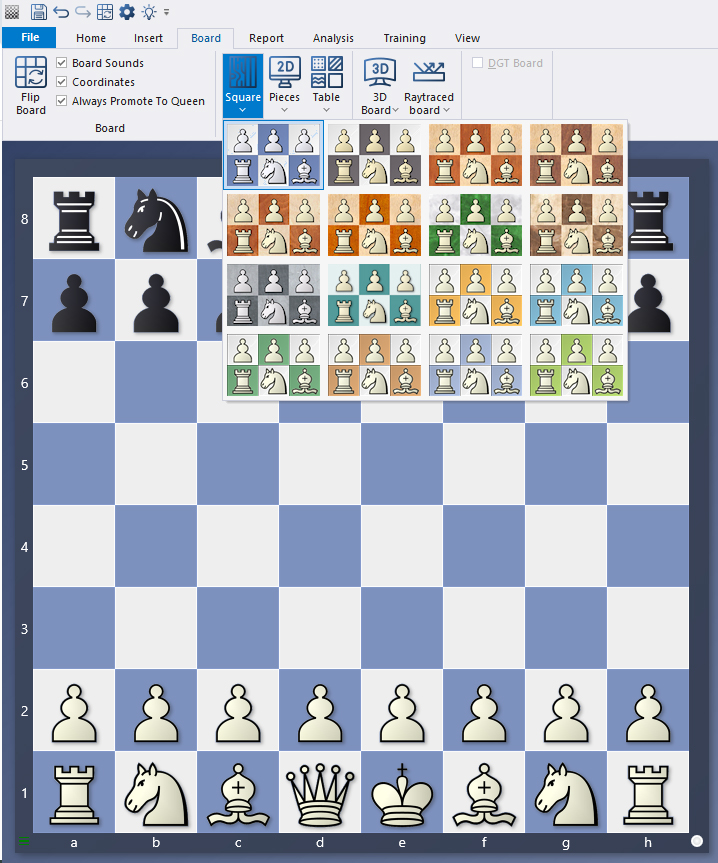
Once again, it's time to experiment. In the following screenshot, we have made selections in the "Square" menu item as well as in the "Pieces" and "Table" options. The layout changes as follows:
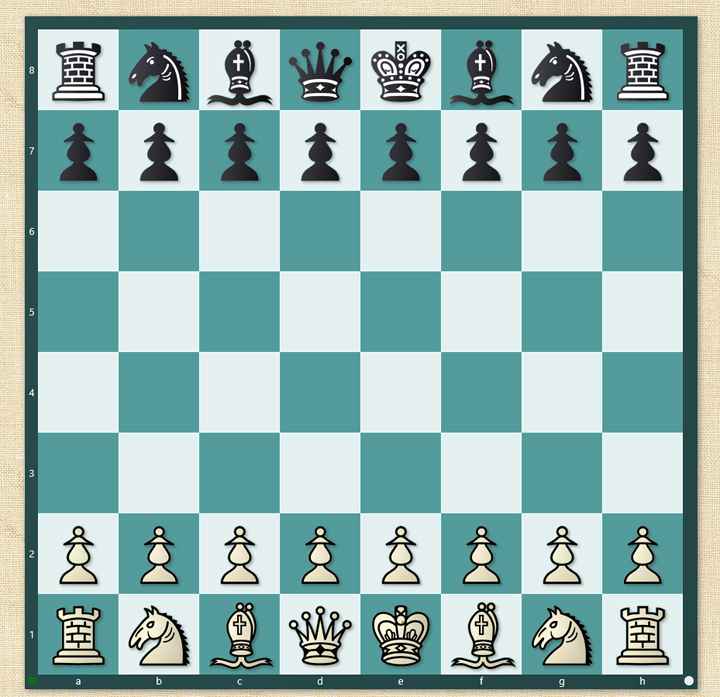 As everywhere else, the same applies here: it's all a matter of taste and personal preference!
In the next example, we have done the same for the "3D Board" area – with the options "3D Board" and "Raytraced Board":
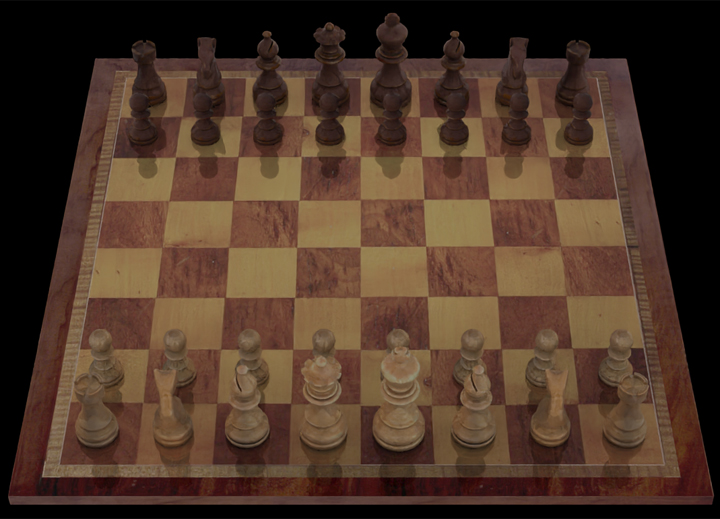
For users who prefer a 3D view, additional graphic effects are available via "ray tracing".
Pro tips:
In part 4 of this tutorial, we already discussed the "Options" menu (shortcut CTRL+ALT+o). Here you will also find a menu item called "Board Design":
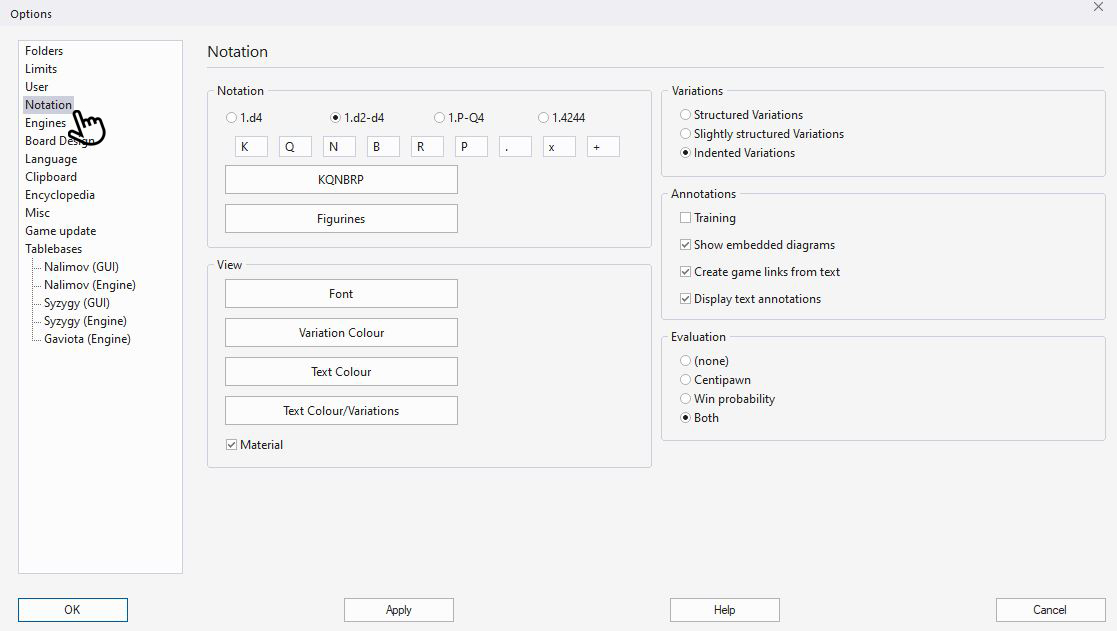
In addition to the options shown above, you can also select a few other settings here. The proportions and dimensions of the board and pieces are particularly important additions.
The menu items "Rating" and "Replay arrows under board", which are not directly related to the design topic, allow you to activate or deactivate these two options. In addition, you can use "Blind All", "Blind White" and "Blind Black" to activate blind mode and, depending on your selection, hide all pieces, only the white pieces or only the black pieces.
Now we hope you enjoy analysing your positions on your customised board design.
ChessBase has evolved over decades to become what it is today with its 18th version. The programme has countless options, which we will introduce here in small chunks – so you can customise your interface for everyday use and continually discover and learn new options to get the most out of ChessBase 18 and save time.
You can find more tips and hints on our support pages and FAQ pages.
All parts of the series:
Beginner's Tips Part 16: Setting up and analysing positions (Part 2)
Beginner's Tips Part 15: Setting up and analysing positions (Part 1)
Beginner's Tips Part 14: Save resources with remote engines
Beginner's Tips Part 13: Powerbooks and Powerbases
Beginner's Tips Part 12: Arrows and marks
Beginner's Tips Part 11: Multitasking with several windows
Beginner's Tips Part 10: "Standard Layout or Custom Layout"
Beginner's Tips Part 9: "Tactical Analysis"
Beginner's Tips Part 8: Putting Together What Belongs Together...!
Beginner's Tips Part 7: Organizing Your Database Correctly!
Beginner's Tips Part 6: Quick Command Bars and Variation Hierarchy
Beginner's Tips Part 5: Annotating
Beginner's Tips Part 4: Figurines and Colours
Beginner's Tips Part 3: Inserting Variations from References and the Engine
Beginner's Tips Part 2: Creating Variations and Activating the Engine
Beginner's Tips Part 1: Entering and Saving Your Own Games