Riddle: Karpov-Hort 1979 - Solution

by Karsten Müller
9/4/2024 – In the final round of a Dutch tournament (in Waddingxveen 1979) World Champion Anatoly Karpov beat the second-placed GM Vlastimil Hort. But could the world-class Czech grandmaster have prevented this happening? This was the question we asked in our last Riddle. Today we provide you with the answer.

ChessBase 18 - Mega package ChessBase 18 - Mega package

Winning starts with what you know
The new version 18 offers completely new possibilities for chess training and analysis: playing style analysis, search for strategic themes, access to 6 billion Lichess games, player preparation by matching Lichess games, download Chess.com games with built-in API, built-in cloud engine and much more.

More...

Deep rook endgame riddle

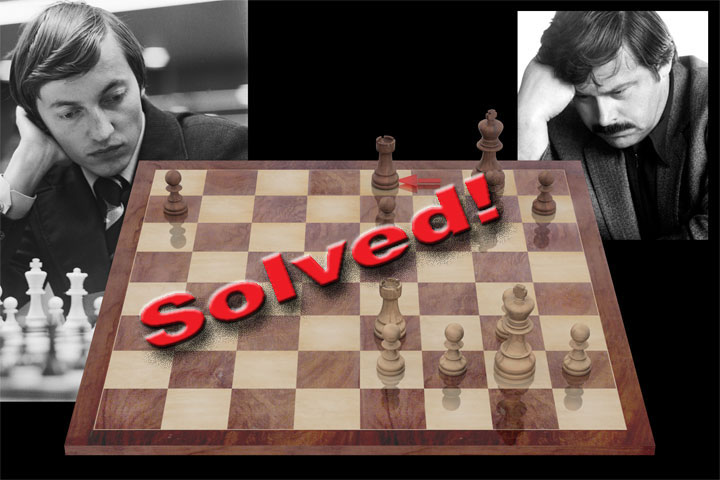
In June 1979, two months after the super event in Montreal, a small double round-robin  tournament for four players was held in the small Dutch town of Waddinxveen near Gouda. The world-class players Vlastimil Hort, Lubomir Kavalek and Gennadi Sosonko were, as expected, dominated by Anatoly Karpov. Going into the final round, the World Champion had already secured victory with a score of 4/5, 1.5 points ahead of second-placed Hort.

In those years, Karpov was famous for his brilliant endgame technique, with which he achieved many technical victories even from positions with only slight advantages. Hort's position seemed extremely difficult, and Karpov did indeed win the game. the positional rook ending after 27.Rxe3 has been analysed and commented on by Jan Timman and Tibor Karolyi.

Their conclusion is that Black should give up a pawn right at the start of the endgame (instead of 27...Re8) to save his position. After this missed chance White is on the verge of victory, the annotators find no errors or significant improvements on either side.

However, analysis with a modern engine shows that a surprisingly high number of mistakes were actually made by both players after 27.Rxe3. We asked our readers if they could find some of the critical moves, or perhaps even all of them. Wolfram Schön sent us the following deep analysis. He wrote:

As we know, the World Champion was able to wrestle down his opponent from this position after 27...Re8 in 30 moves. At first glance, this appears to be another example of Karpov's famous endgame technique. From an advantageous but unwon position, he outplayed a world-class opponent who committed no serious mistakes. Therefore, this positional rook ending has attracted the attention of several commentators over the years, e.g.:

  • Srdan Cvetkovic: Chess Informant 27 (Sahovski Informator, 1979)
  • Jan Timman: "The Art of Chess Analysis" (Everyman Chess, 1997 org. 1993)
  • Tibor Karolyi: "Endgame Virtuoso Anatoly Karpov" (New In Chess, 2007)
  • Daniel Naroditsky: "Mastering Complex Endgames" (New In Chess, 2012)

Timman and Karolyi suggest Hort's first decision (27...Re8) as a possible losing move. Otherwise neither of the authors dares to describe a move by either player as a mistake and Karpov's treatment of the position is highly praised throughout.

Although Timman's analysis is essentially based on the original Dutch version of his 1980 book, it is still the best and provides insight into a number of important factors of this endgame. However, a more detailed analysis with a modern engine reveals quite a number of tactical and strategic details, previously undiscovered. This means that many moves, variations and positions have to be re-evaluated.

Summary

The result of the investigation is that both players committed a total of nine mistakes in the course of the rook ending.

This position is a key for the understanding, as it is a remarkable case of reciprocal zugzwang. In the game it was Black's turn to move and he is lost (see the analysis after 38.Ra6). However, when it's White's turn to move, he cannot lose a tempo, he is in zugzwang and cannot win (see the side line 32...g6 after 36...Rb7).

In the current pawn structure with the black setup of g7/h6, White wins by h4-h5. If then the black g-pawn moves, White has the favourable pawn exchange h5xg6. Otherwise, White gains more space on the kingside, allowing him, after some preparation, to crack Black's defence (see 31.h5).

On the other hand, if Black can play g7-g6 while the white pawn is still on h4, he sets up the line of defence with g6/h6, which is just enough to hold the game. The best White can then achieve is the key position of the previous diagram, but with him to move (see 32...g6).
Both diagrams are the main reason for seven of the errors.

And here is the full analysis. You can start an engine there to help with your analysis.

New ...
Open...
Share...
Layout...
Flip Board
Settings
MoveNResultEloPlayers
Replay and check the LiveBook here
1.c4 Nf6 2.Nf3 e6 3.Nc3 c5 4.g3 b6 5.Bg2 Bb7 6.0-0 d5 7.cxd5 Nxd5 8.d4 Nxc3 9.bxc3 Nd7 10.Re1 cxd4 11.cxd4 Bb4 12.Bg5 f6 13.Bd2 Bxd2 14.Qxd2 Rc8 15.Qd3 Qe7 16.Rac1 0-0 17.Ng5 fxg5 18.Bxb7 Nc5 19.dxc5 Qxb7 20.Qe3 Rxc5 21.Rxc5 bxc5 22.Rc1 Qd5 23.Rxc5 Qxa2 24.Rxg5 Qb1+ 25.Kg2 Qb6 26.Re5 Qxe3 27.Rxe3
A rook ending with 4 pawns each. Black holds an outside passed pawn on the a-file, but it is on its starting square. White's pawns are all connected, while Black's structure consists of 3 pawn islands. The white rook is more active, especially as it can attack the two isolated black pawns. All in all, White has a slight advantage, but Black's position should still be comfortably in the draw zone. 27...Re8 Hort decides to place his rook on the 7th rank to protect his queenside pawn from the side. "As the game shows, this method fails to build a tight defensive line" - Timman. "This may be a losing mistake" - Karolyi. In fact, there are three different systems for Black to hold his position. Objectively, they are equivalent, the choice depends more on practical considerations or personal preferences. The most radical way is 27...a5 , "an interesting idea" according to Karolyi. Black strengthens his passed pawn, but voluntarily gives White a majority of two pawns on the kingside. 28.Rxe6 Ra8 29.Re3 a4 30.Ra3 "Black has chances to draw" - Karolyi. In fact the position of the rooks is now ideal for Black. His rook is behind the passed pawn, while White's is in front of the a-pawn. This is enough to draw the game, even if White can create two connected passed pawns on the e- and f-file. A typical example line is g5 31.f4 gxf4 32.gxf4 Kf7 33.Kf3 Ke6 34.e4 Kf6 The black king is better off simply waiting in front of the white passed pawns, ready to blockade them if they advance. 35.Ke3 Ke6 36.Kd4 h5 37.h4
The setup stage is completed. Now the white passed pawns can't make anymore progress while only supported by their king. As the white rook is busy with the black passed a-pawn, the only idea left is to move the white king over to the queenside. 37...Rd8+ 38.Kc5 Rc8+ 39.Kb5 Rb8+! However, Black can now sacrifice his a-pawn to create counterplay on the kingside. With accurate play this is sufficient to avoid a loss. 40.Kxa4 Rb1 41.Rb3 Rf1 42.Rb6+ Kf7! 43.f5 Rf4 44.Re6 Rxh4 45.Kb5 The white king rejoins its passed pawns, but Black gains time to improve his passed h-pawn. Rg4 46.Kc5 h4! 47.Kd5 Kg7! The square h6 is taken away from the white rook. 48.f6+ Kg6! 49.e5 h3 50.Re8 h2 51.Rh8 Rg2 52.Ke6 Ra2 Side checks will safe Black. 53.f7 Ra6+ 54.Ke7 Ra7+=
Starting with 27...Kf7 most commentators recommend to quickly go for a drawn configuration of 3 vs. 4 pawns on the kingside. 28.Ra3 Ra8 A refinement of the original idea, for the moment Black holds on to his a-pawn. JT and TK spend many pages analysing the consequences of 28...h5 29.Rxa7+ Kf6 30.Ra5 This position is quite interesting in itself and in fact White can't win. 29.Ra6! Fixing the black passed pawn on its starting square. The white rook seems to completely dominate the black rook in the corner. But the combination of Pa7 and Ra8 contains more energy than it initially appears. Kf6!
Black's strategy is to first improve his position on the kingside as much as possible and only then, if necessary, abandon his a-pawn. 30.f4 To prevent the centralisation of the black king via e5. If 30.h4 h5 31.Kf3 Ke5! and White's progress is hampered, e.g. 32.Ke3 Kf5 33.f3 g6 34.Ra5+ Kf6 35.Ke4 a6 36.Kf4 Ra7= Now Black has waiting moves by Ra7-a8-a7 etc. 30...g5! Black offers a pawn to simplfy matters. 31.Kf3 In case of 31.fxg5+ Kxg5 32.Rxe6 a5 Black can use his passed pawn effectively. 33.Re5+ Kf6 34.Re3 a4 35.Ra3 h5= Unlike in the 27...a5-line, White can only create two isolated passed pawns on the kingside, which Black can easily attack if the white king moves to the queenside. 31...h5 32.h3 gxf4 33.Kxf4 If 33.gxf4 Rg8 34.Rxa7 h4!= and Black regains his pawn on h3. 33...Rb8! It is time to give up the a-pawn. White's pawns on the kingside are split, this configuration is completely harmless for Black. 34.Rxa7 Rb4+ 35.Kf3 Rb3+ 36.e3 Rb5 37.Ra4 Rc5=
28.Ra3 Re7
29.Ra5! A rightly celebrated move. Karpov uses the lateral effect of his rook on the 5th rank. In this way he prevents Black from grabbing space on the kingside either by g7-g5 or by h7-h5. A prerequisite for White to conquer the space himself and thus increase his practical chances of winning. Kf7 30.h4! It's worth noting that Karpov starts his pawn offensive with the rook pawn. It is the outermost and least valuable one, and if it is exchanged, White still holds three connected pawns. h6? Black has to choose an arrangement of his kingside pawns in expectation of White's attack, but this is the wrong start.
First of all, if Black doesn't move a pawn at all and just waits, he will lose. 30...Rb7 31.h5 Rc7 32.f4 Rb7? This misses the last chance for a correction. Next, White improves his position to the maximum without making contact. 33.Kf3 Rc7 34.g4 Rb7 35.g5 Rc7 36.e3 Rb7 37.Kg4 Rc7 38.Ra6 Rb7 39.e4 Rc7
40.h6! Only now is White taking concrete steps to crack the black fortress, but a clear victory is still a long way off. gxh6 The closed defence 40...g6 can be defeated by a controlled march of the white king to the queenside. 41.Kf3 Rb7 42.Ke2 Rd7 43.Ke3 Ke7 44.Rc6 Zugzwang Rb7 45.Kd4 Kd7 46.Kc5 Rb1 47.Ra6 Rb7 48.f5! This breakthrough helps to decide. exf5 49.exf5 gxf5 50.g6! hxg6 51.h7 Rb8 52.Kd5 Ke7 53.Ke5 Rb5+ 54.Kf4 Rb4+ 55.Kg5 Rg4+ 56.Kh6+- White wins the rook while the black pawns remain harmless. 41.gxh6 Rc1 42.Rxa7+ Kg6 43.Re7 Rc6 44.e5! Ra6 45.Rg7+ Kxh6 46.Rf7 Kg6 47.Rf6+ Kg7 48.Kg5 Rb6 49.f5 Ra6 50.fxe6 A tablebase win, White's king will go over to the queenside, but he has to keep an eye on the counterplay of h7-h5. Ra7 51.Kf4 Kg8 52.Kf5! Zugzwang. Kg7 53.Ke4 Ra4+ 54.Kd5 Ra5+ 55.Kd6 Ra6+ 56.Kd7 Ra7+ 57.Kd8 Ra8+ 58.Kc7 Ra7+ 59.Kb6 Ra8 60.Kb7 Ra5 61.Rf5 Now White can advance his doubled e-pawns, albeit in slow motion. Rd5 62.Kc6 Ra5 63.e7 Ra6+ 64.Kd5 Ra5+ 65.Kc4 Ra4+ 66.Kb5 Ra8 67.e6 h5 68.Rf7+ Kg8 69.Kc6 With the threat Rf7-f8+. Ra6+ 70.Kd5 Ra8 71.Ke5 h4 72.Kf6 h3 73.Rg7+ Kh8 74.Rg3+-
Best is 30...g6! , the correct starting step to get the right line-up as early as possible. 31.h5 For the main continuation 31.g4 h6! 32.f4 Kf6 see the line 32...g6 to the game. 31...Kf6 32.f4 In order to prevent g6-g5 and h7-h6. e5! However, Black can tactically free himself from the embrace. 33.Kf3 gxh5 34.Ra6+ Re6! 35.Rxa7 h4! Whatever White tries, it is not enough. A key motive is 36.Rxh7 hxg3 37.Rh6+ Kf7 38.Rxe6 Kxe6 39.Kxg3 Kf5!= 31.g4? Karpov stops halfway with his h-pawn. Only the immediate 31.h5! wins, controlling the square g6 and thus exploiting the weakness in Black's setup with g7-h6. Kf6 A waiting defence, as attempts to correct the pawn structure are no longer sufficient. An essential tactical detail is that 31...e5 runs into 32.Kf3! Kf6 33.Kg4! and the possible infiltration of the white king via f5 decides. Rb7 34.e4 Re7 35.Ra6+ Re6 36.Rxa7 Rb6 37.Ra5 Re6 38.f4 exf4 39.Rf5+! Ke7 40.gxf4! Rxe4 41.Re5++- The sequence 31...g6 32.hxg6+ Kxg6 illustrates an improvement in the pawn structure for White. While he still enjoys a compact pawn mass, Black has two isolated pawns at maximum distance on the kingside. Together with his strong rook on the a-file, which holds the black passed pawn on a7, this gives White a decisive advantage. 33.f4 Rc7 34.Kf3 Rc3+ 35.e3 Rc7 36.g4 Rb7 White wants to push f4-f5 next, but he has to avoid the black king coming to g5. For that he needs zugzwang, so he has to manoeuvre a bit. 37.Ra3 Kf7 38.Kg3 Kf6 39.Ra5! A tempo losing move on the way to a6. Kg6 40.Ra6 Kf6 41.Kf3
Zugzwang, if Black doesn't want to lose his a-pawn, he has to accept f4-f5. 41...Rc7 42.f5 Re7 43.Kf4 Kg7 44.e4 From here on White wins easily with his active pawns and pieces against Black's passive setup. exf5 45.gxf5 Rb7 46.Kg4 Rc7 47.e5 Rf7 48.Kf4 Rb7 49.Rg6+ Kh7 50.e6 a5 51.Ke5 a4 52.Kf6+-
32.f4! Rb7 33.g4 Rc7 34.Kf3 After some natural setup moves, White has to be a bit careful with his next concrete step forward. Kf7 35.Ra6!
But not 35.g5? g6= 35...Kf6 The only way to prevent g4-g5. If for example 35...Rc3+ 36.e3 Rc7 37.g5! and Black is left without counterplay. So White is able to improve his position on the kingside and finally to go for a decisive transaction. Rb7 38.e4 Ke7 39.Kg4 Kf7 40.gxh6 gxh6 41.f5! exf5+ 42.Kxf5 The white passed e-pawn and his pawn weakness on h6 are too much for Black's defence. Kg7 43.Rg6+ Kh7 44.e5 Rf7+ 45.Ke6 Rf1 46.Rf6+- 36.f5! Re7 37.Kf4 Kf7 38.e3! White has to be patient and work with a zugzwang. Not 38.e4? e5+!= 38...exf5 Now if 38...Kf6 39.e4 Kf7 40.e5+- and Black has to exchange on f5 as well. 39.gxf5 The white passed e-pawn is going to be really strong. However, White has a long way to go to completely break down Black's defences. Kf8 40.e4 Rb7 41.Rc6 The white rook changes position to the back of Black's a-pawn. Ke7 42.Rc8 Kf7 43.Rd8! A tempo losing move. Ke7 44.Ra8 Another zugzwang. Kf7 45.e5 Now this advance is possible because the white king can run to d6 if necessary. Rb4+ 46.Kf3! Ra4 47.Rb8 After the black rook has left, the white rook takes control of the 7th rank. Ra1 48.Rb7+ Kf8 49.Ke4 Ra5 Preventing at least the further advance of the white king via d5. 50.e6 a6 51.Rc7 A waiting move, creating zugzwang. Rb5 52.Rf7+ Kg8 53.Ra7 Kf8 54.Rxa6 Even after winning the a-pawn, White has to find a way to crack the black fortress. Ke7 55.Ra7+! Kf8 56.Rf7+ Kg8 57.Rd7 Kf8 58.Ra7! One more zugzwang for the black rook. Rc5 This significantly reduces the distance for side checks. 59.Ra8+ Ke7 60.Rg8 Rc4+ 61.Kd5 Rg4 62.Ke5! Rg1 63.Rxg7+!+-
31...Kf6 Hort improves his king, but it is easy for White to prevent the space grabbing idea of g7-g5.
Simpler is 31...g6! to reduce White's options. For the position after 32.f4 Kf6 see the line 32...g6. 32.f4 "Now that Black cannot exchange pawns, White can build up a mighty pawn front without worrying that his king will be unable to penetrate" - Timman. However, White cannot win on his own. Although 32.h5 does not win this time, it is a critical attempt, forcing Black to react differently. e5! The only move to prevent the winning white set up with f2-f4, as seen after 31.h5. Black is saved by the fact that, unlike in the line after 31.h5 e5, the white king can no longer go to g4. 33.Ra6+ Kf7 34.f3 Rb7 35.Kf2 Rc7 36.Ke3 Rc4! Black has to keep the white king away from an infiltration via e4, even at the cost of his passed pawn. 37.Rxa7+ Kf6 38.Ra6+ Kf7= White can try to get something out of this 4 vs 3 configuration for quite a while, but in the end Black's defence holds. 32...Rb7? For some reason both players and the commentators are under the illusion that Black shouldn't play g7-g6 voluntarily and that h4-h5 is only strong for White after Black's g7-g6, but not before. Here 32...g6! is mandatory. It sets up the defensive line with g6-h6, just enough to hold the game. 33.Kf3 Rb7 34.e3 Rc7 35.h5 After some preparation, this is White's most dangerous attempt to shake the black defence. Now h5xg6 is a strategic threat as seen after 31.h5 g6 32.hxg6. g5! This passing by is the reason why Black has to play g7-g6 before White gets a pawn to h5. 36.Ra6 Rb7!
The most important position of the entire endgame following 27...Re8. Surprisingly, White is in zugzwang. 37.f5 Manoeuvring doesn't help, e.g. 37.Ra5 Rc7 38.Ra4 Rd7 39.Ra3 Rc7 40.Ra6 Rb7! , White is unable to lose a tempo. 37...Rb6! For this blocking move the black rook must be exactly on the b-file. In fact, Timman does find this saving trick, and evaluates it correctly, but he comes across it in a different context. 38.Rxb6 axb6 39.e4 Unfortunately for White, his protected passed f-pawn does not give him a win in this pawn ending. Ke5 40.Ke3 exf5 41.exf5 Kd5 42.Kd3 b5! 43.Kc3 Kc5! 44.Kb2 Kd6 45.Kb3 Kc5 46.Kc3 Kd5! 47.Kb4 Kc6 48.f6 The best moment to give up the passed pawn. Kd6 49.Kxb5 Ke6 50.Kc5 Kxf6 51.Kd6 White gets the opposition, but the outflanking of the black king only results in a drawn queen ending. Kf7 52.Kd7 Kf6! 53.Ke8 Ke5 54.Kf7 Kf4 55.Kg6 Kxg4 56.Kxh6 Kf5 57.Kg7 g4 58.h6 g3 59.h7 g2 60.h8Q g1Q+ 61.Kf8=
33.Kf3? For 33.h5!+- see 31.h5 after 33.g4. 33...Rc7?
For 33...g6!= see 32...g6 after 33...Rb7. 34.Ra6? "Provoking g7-g6" - Timman. "Karpov forces Hort to play 34...g6. This is subtle indeed" - Karolyi. The text move threatens with f4-f5, but this is the wrong objective. Thus Black gets another chance to correct his pawn setup. For 34.h5!+- see 31.h5 after 34.Kf3. 34...g6 The solid way that finally builds up the sufficient defence system already seen after 32...g6. Actually 34...h5 works as well and offers a more aggressive but riskier alternative. 35.g5+ Kf7 36.Ra5 g6 37.Ke4 Rd7 38.Ke5 The position of the white king looks impressive, but Black can handle the coming assault on the kingside. Ke7 39.e4 Rb7! 40.f5 exf5 41.exf5 gxf5 42.Kxf5 Kf7! 43.g6+ Kg7 44.Kg5 a6! In the end, Black owes his salvation to a tiny detail. 45.Kxh5 Rb5+! 46.Rxb5 axb5 47.Kg5 b4 48.h5 b3 49.h6+ Kg8 50.Kf6 b2 51.h7+ Kh8 52.g7+ Kxh7 53.Kf7 b1Q 54.g8Q+ Kh6= The new black queen covers g6. 35.Ra5 The white rook returns to where it came from. Karpov now aims for h4-h5, trying to exchange his h-pawn favourably for the black g-pawn, like in the line 31.h5 g6 32.hxg6. Rd7 36.e3 "Another quiet preparatory move" - Timman. In this moment 36.h5?! is pointless, as Black has Rd5! 37.Rxa7 gxh5= , which instantly equalises. 36...Rb7? An unfortunate mistake, as b7 is a mined square for the black rook in this moment. Even 36...Kg7 is possible. In case of the thematic 37.h5 gxh5 38.Rxh5 Black can set up a defensive line on the 6th rank. a6 39.Ra5 Rd6 40.e4 Kg6! White's position looks promising, but he can't win, for example 41.Kg3 Rb6 42.Kh4 Rc6 43.f5+ Kf6! 44.Kh5 Rc1 45.g5+ hxg5 46.Rxa6 Rh1+ 47.Kg4 Rh4+! 48.Kf3 Rh3+! 49.Ke2 g4! 50.Rxe6+ Kg5! 51.f6 Rf3 52.e5 Kf5 53.Re7 Ke4= The easiest way is 36...Rc7= , a waiting move by the rook on the 7th rank. See 32...g6 after 34...Rc7. 37.h5! "The time is ripe for this strategic advance" - Timman. g5 As before, the passing by is the critical defence. At least it denies White the exchange of his h-pawn. For 37...gxh5 38.Rxh5 Kg7 39.Ra5! Kg6+- see 31.h5 g6 after 36...Rb7. 38.Ra6!
It is the same position as in the line 32...g6 after 36...Rb7. This time, however, it is up to Black to move. Actually, he is in zugzwang and therefore loses. So the current situation is indeed a remarkable reciprocal zugzwang. 38...gxf4 This is not a pawn exchange that Black likes to make, but the alternatives turn out to be even less favourable. The typical waiting move 38...Rc7 runs into 39.f5! With Black desperately lacking the resource Rb7-b6, his position quickly collapses, e.g. Re7 40.e4! Ke5 41.Ke3 Kf6 42.Kd4 Rd7+ 43.Kc5 Re7 44.Kd6! exf5 45.Kd5+ Kf7 46.gxf5+- White's connected e- and f-pawns are too strong. His king can go back to e3 if necessary. The active 38...Rb1 provides little relief, as White can continue straightforwardly. 39.Rxa7 gxf4 40.exf4 Rf1+ 41.Kg3 Rg1+ 42.Kh3 Rf1 43.Rh7 Rxf4 44.Rxh6+ Kf7 45.Kh4+- The white king supports his passed pawns. Timman investigates 38...Rb3 , a refinement of the last side line. 39.Rxa7! But not 39.f5? Rb6!= , as Timman correctly points out. See 32...g6 after 37...Rb6. 39...gxf4 40.Kxf4 Although White has to recapture with his king and thus retains an isolated e-pawn this time, Black can't defend his two weak pawns for long. e5+ 41.Kf3! Rb4 42.Kg3! To deny the black king the square h4. Rb3 43.Ra6+ Kg7 44.Kf3 Rb1 45.Ke4 Rb3 46.Re6+- Winning a second pawn. 39.exf4 Now Black is left with two isolated pawns while White has three connected pawns. His next step is to enforce g4-g5 in a suitable way. However, he must be wary of side attacks from the black rook. Rb3+ 40.Kg2 Rb7 41.Kg3
41...Kf7 This retreat is an inconspicuous but quite tricky defence. Following 41...Rb3+ 42.Kh4 Rb7 White must not rush. On 42...Rb4 43.Rxa7 Rxf4 44.Rh7!+- White wins the h6-pawn to get his passed pawns. 43.Ra5! The white rook first has to restrict the black king. Because after 43.g5+? hxg5+ 44.fxg5+ Kf5! 45.h6 Rb1= Black can hold with his active king. 43...Kg7 44.g5! Not just possible, but necessary. In case of hxg5+ the white king quickly finds a shelter, namely 45.fxg5 Rb4+ 46.Kg3 Rb3+ 47.Kf4 Rb4+ 48.Ke5+- 42.Ra4? "Always systematic. He protects the 4th rank for his king" - Timman. However, any preparatory move is disastrous. Only 42.g5! is correct. Here White has to rush, even if it is uncomfortable as his king is pushed far to the queenside. hxg5 43.fxg5 Rb3+ 44.Kf4 Rb4+ 45.Ke3! Rb3+ 46.Kd4 Rb4+ 47.Kc5 Rg4 This counterattack at least forces White to react tactically. 48.Rxa7+ Kf8 49.Ra8+! Ke7 50.h6 Rxg5+ 51.Kc6 Rh5 52.h7!+- 42...Kg7? But Hort misses the unexpected chance. After 42...a6! Black is surprisingly able to hold. 43.Rxa6 Or 43.g5 hxg5 44.fxg5 Rb5! As the a-pawn has left the 7th rank, White can no longer capture it with a check. 45.Kg4 a5! Thus the black passer on the queenside finally comes to life. 46.Rf4+ Kg8! 47.h6 Rb4! Black uses the same motive in the queen ending as seen after 34...h5. 48.g6 e5! 49.Rxb4 axb4 50.Kf5 b3 51.Kf6 b2 52.h7+ Kh8 53.g7+ Kxh7 54.Kf7 b1Q 55.g8Q+ Kh6= 43...Rb3+ 44.Kh4 Rb4! Only because of the deflection sacrifice of his a-pawn can the black rook now occupy the 4th rank. Since the white g-pawn is only on g4, Black's attacks from the side are now successful. 45.Ra7+ Kg8! 46.Kg3 Rb3+ 47.Kf2 Rb2+ 48.Ke3 Rb3+ 49.Ke4 Rg3! 50.Re7 Rxg4 51.Rxe6 Kg7= Even if Black loses his h6-pawn, he can count on the theoretical draw with rook vs. rook + f- + h-pawn. 43.g5! Now everything is fine again for Karpov. Rc7 The radical 43...e5 is considerable, but offers no solution. White can handle it without any special means. 44.fxe5 hxg5 45.Kg4 Re7 46.Ra5 Kh6 47.Ra6+ Kh7 48.e6 Kh6 49.Rd6 a5 50.Kf5+- Supported by his king the white e-pawn decides. 44.Ra5 Kg8
As before, Hort simply employs a waiting defence, asking his opponent to show a way to overcome this. 45.Rb5?! For now White's rook is still perfectly placed on the a-file, but his king is not. Too hasty is 45.g6? , to create a protected passed pawn. By Kg7 46.Kg4 Kf6 the black king can get into this blocking position and the white rook is not in time to attack it from behind, e.g. 47.Ra6 Rb7 48.Rc6 Rb4! 49.Rc7 e5! 50.g7 Rb8! 51.fxe5+ Kxe5 52.Rf7 Rg8!= Thus with 45.Kf3 Kf7 46.Ke4 the white king should head to the centre first. Kg7 47.Ra6 With Black sitting in a kind of fortress, the white rook manoeuvres either to enable Ke4-e5 or to force another commitment. Not helpful is 47.Ke5?! Rf7! 48.Ke4! Rc7 with a repetition of the position. 47...Kf7 48.Ra4! Zugzwang Rb7 The black rook leaves the c-file. On 48...Kg7 White remains successful with a little trick. 49.Ke5! hxg5 50.Kd6! Rb7 51.fxg5 Rb6+ 52.Kc5! Rb7 53.Ra5+- 49.Ra5! Kg7 To vacate f7 for the black rook anew in order to counter Ke4-e5. 50.Rc5! The white rook takes over the c-file. a6 51.g6! With the more active rook position, this advance is now possible and decisive. Kf6 52.Rc6! Rb4+ 53.Kf3 Rb3+ 54.Kg4 Rb4 55.Rxa6+- 45...Kf7?! This is not a good spot for the black king, as later White can possibly play g5-g6 with an intermediate check.
Very tenacious is 45...Rc8! with the idea Rc8-a8 to push the a-pawn from behind. 46.Ra5! White has to accept a repetition of the position. Rc6 An active defence. For 46...Rc7 47.Kf3 see 45.Kf3. 47.Rxa7 Rc5 48.Kg4 Rc4 49.Kf3 Rc5 50.g6! White is forced to return his extra pawn and to play several accurate moves. Rxh5 51.Re7! Ra5 52.Ke4! Not 52.Rxe6? Kg7= 52...Ra6 53.Ke5! h5 54.Re8+! Kg7 55.Rxe6! Ra5+ 56.Ke4! h4 57.f5! Kh6 58.Re8 Ra7 59.Kf4! Ra4+ 60.Re4 Ra3 61.Kg4 h3 62.Re8+- 46.Kg4 a6 After almost twenty moves Hort gives up on his defensive system Pa7 + R on the 7th rank. He prepares for a counterattack by his rook, abandoning his a-pawn. On 46...Kg7 White can go back to the idea of centralising the king. 47.Ra5 Rb7 48.Kf3 Rd7 49.Ke4 Rc7+- See 45.Kf3 after 46...Kg7. 47.Rb8 Rc1 In case of 47...hxg5 48.fxg5 White wins with his two connected pawns, similar to the line after 42.g5. For example: Rc4+ 49.Kf3 Rc3+ 50.Ke4 Rc4+ 51.Ke3 Rc3+ 52.Kd4 Rc7 53.Ra8 Rb7 54.Rxa6 Rb4+ 55.Kc5 Rg4 56.Ra7+! Kf8 57.Ra8+! Ke7 58.h6!+- 48.g6+! Forced by the black threat of Rc1-g1-h1, but Karpov's timing is right for the creation of the protected passed g-pawn, as seen in the line after 45.Kf3. Kg7 49.Rb7+ Kf8 50.Rb6 It is too early for 50.Rh7 to go for the black h-pawn. Kg8 51.Rxh6? Rc7!= , as the white rook is trapped. 50...Rg1+ 51.Kf3 Rf1+ 52.Ke4 Re1+ 53.Kd4 Ke7 54.Rxa6 In the meantime 54.Rb7+ Kf8 55.Rh7+- , winning the h6 is possible. 54...Kf6 55.Ra7 "Cuts off the black king" - Timman. e5+ 56.fxe5+ Rxe5
57.Ra6+ Black resigns. A little premature, as White still has a few obstacles to overcome. For example he cannot simply transfer into a pawn ending. 57.Ra6+ Re6! 58.g7! An obligatory tactical finesse. But not 58.Rxe6+? Kxe6= 58...Rxa6 59.g8Q This queen vs. rook ending is a clear win for White, although it takes some time to break down Black's last defence with his rook on the 6th rank. E.g. Rd6+ 60.Ke4 Re6+ 61.Kf4 Ke7 The black king has to go away from the remaining pair of pawns. 62.Kf5 Rc6 63.Qg7+ Kd8 64.Qb7 Rd6 65.Ke5+- The black rook has to leave the 6th rank, so the white queen can quickly pick up the h6-pawn.
1–0
  • Start an analysis engine:
  • Try maximizing the board:
  • Use the four cursor keys to replay the game. Make moves to analyse yourself.
  • Press Ctrl-B to rotate the board.
  • Drag the split bars between window panes.
  • Download&Clip PGN/GIF/FEN/QR Codes. Share the game.
  • Games viewed here will automatically be stored in your cloud clipboard (if you are logged in). Use the cloud clipboard also in ChessBase.
  • Create an account to access the games cloud.
WhiteEloWBlackEloBResYearECOEventRnd
Karpov,A-Hort,V-1–01979A30Waddingxveen6

Summary of the most important individual moves:

  • 27...Re8 Black has three different systems of defence. Hort's choice to place his rook on the 7th rank is a bit passive, but fine. A pawn sacrifice with 27...a5 is an active way to hold, but needs some accurate handling in the later stage. The most flexible is 27...Kf7 28.Ra3 Ra8. In some cases Black can rely on his a-pawn, in other cases he can give it up in order to achieve a favourable pawn constellation on the kingside for a draw.
  • 30...h6? A setup mistake for the black kingside pawns. 30...g6 is a correct start.
  • 31.g4? Instead 31.h5! wins.
  • 32...Rb7? Here 32...g6! is mandatory.
  • 33.Kf3? As before, 33.h5! is necessary to win.
  • 33...Rc7? Again 33...g6! is the only right way.
  • 34.Ra6? Another missed chance to 34.h5! for the win.
  • 36...Rb7? Here Black is in the right defensive setup, but with this unfortunate rook move he runs into the key position of reciprocal zugzwang with him to move.
  • 42.Ra4? Surprisingly, a preparatory move is disastrous. Only the direct 42.g5! is correct.
  • 42...Kg7? Although Black's situation seems hopeless, there is a miraculous save with 42...a6!.
  • 45.Rb5?! For now White's rook is still perfectly placed on the a-file. With 45.Kf3 the white king should improve first.
  • 45...Kf7?! By 45...Rc8 Black can force the white rook back to a5.

About the analyst

Wolfram Schön, born 5.6.1967, is an International Master 1987 and a grandmaster in correspondence chess since 2006. Greatest success: third place in the Correspondence Chess World Championship 2003-05.

Wolfram is a programmer and an asset manager by profession.

Previous riddles


Karsten Müller is considered to be one of the greatest endgame experts in the world. His books on the endgame - among them "Fundamentals of Chess Endings", co-authored with Frank Lamprecht, that helped to improve Magnus Carlsen's endgame knowledge - and his endgame columns for the ChessCafe website and the ChessBase Magazine helped to establish and to confirm this reputation. Karsten's Fritztrainer DVDs on the endgame are bestsellers. The mathematician with a PhD lives in Hamburg, and for more than 25 years he has been scoring points for the Hamburger Schachklub (HSK) in the Bundesliga.

Discuss

Rules for reader comments


Not registered yet? Register

arzi arzi 9/4/2024 01:33
"This position is a key for the understanding, as it is a remarkable case of reciprocal zugzwang."

No wonder that Hort did not find that solution in 1979 against Karpov, the human engine. Even today it was not easy do the same with the help of strong silicon engine.

Great analysis, thanks.
tip4success tip4success 9/4/2024 12:50
Fantastic analysis! Even though very complex, so much to learn within such an analysis.
1
We use cookies and comparable technologies to provide certain functions, to improve the user experience and to offer interest-oriented content. Depending on their intended use, analysis cookies and marketing cookies may be used in addition to technically required cookies. Here you can make detailed settings or revoke your consent (if necessary partially) with effect for the future. Further information can be found in our data protection declaration.