Riddle solved: Capablanca missed several drawing opportunities

by Karsten Müller
10/27/2022 – About a week ago Karsten Müller invited readers of his latest endgame riddle to take a close look at the 34th game of the World Championship match between Alexander Alekhine and José Raúl Capablanca in Buenos Aires 1927. It was the last and the decisive game of the match - Alekhine won in an instructive rook ending. Zoran Petronijevic and Wolfram Schön had a very close look at this historically important game and present interesting discoveries. | Photo: Capablanca (right) and Alekhine at the World Championship 1927, the man in the middle is the arbiter Carlos Augusto Querencio | Source: Wikipedia

Winning starts with what you know
The new version 18 offers completely new possibilities for chess training and analysis: playing style analysis, search for strategic themes, access to 6 billion Lichess games, player preparation by matching Lichess games, download Chess.com games with built-in API, built-in cloud engine and much more.

Capablanca missed several drawing opportunities

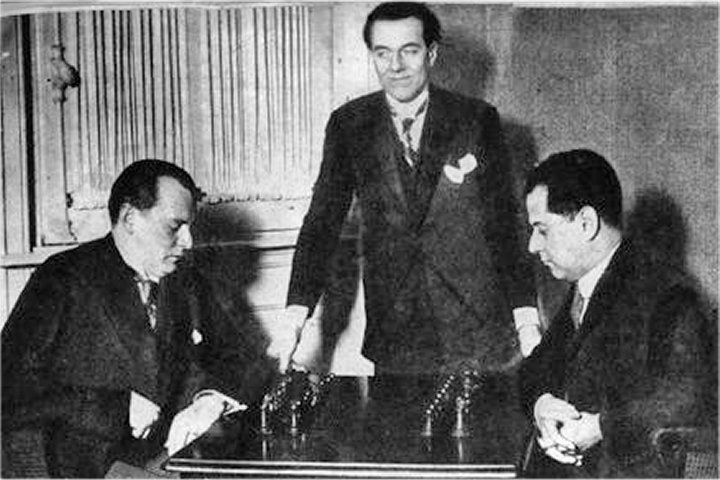
Zoran Petronijevic: Conclusions about the game Alekhine-Capablanca, m/34 – 1927:

  • Alekhine claimed that the position was won after the 23rd move but as Kasparov has shown Black should be able to hold though White is better.
  • 23…Nc4 is a good move, and according to Kasparov "Black has a minimum of three more acceptable moves." Kasparov is correct, but in fact Black has at least four acceptable alternatives to 23…Nc4.
  • Black's first major mistake is 26…Nc4. According to Kasparov it is "the only real mistake of Capablanca in this historical game." White now has an advantage, but it is not yet a decisive one.
  • 29…Nxe4 is a serious mistake (according to Kasparov it is only a dubious move) that leads to a lost position. After 29…Ne8 Black has good chances to save the game.
  • Alekhine failed to take advantage of the position and played 30.Nxe5, which is a mistake. Better is 30.Nxe4, after which White has a winning position.
  • 30…Qd6 is very strong. Another interesting alternative was 30…Nxe5.
  • Superficially, 32…Nd6 seems to be sound, but it is a mistake that once more leads to a lost position. Better was the active 32…Nd2, which should have saved the game.
  • After 35…Rb8 Black is lost. The most stubborn move would have been 35…Ra6, organizing Black's defense on the 6th rank. However, Black is lost anyway but White needs to be very precise to win.
  • 36.Re2 is a dubious one, after which White has to play very accurately in order to win. White has the much stronger 36.a5 after which he should win relatively easily.
  • Instead of the text-move 36…Ra8 36…Rb6 was more stubborn. Still, after precise play, Black should lose.
  • 37…Ra7 is dubious. More stubborn move 37…Kh7 to answer 38.a5 with 38...Ra6. However, Black should also lose after 37...Ta7, although it requires very subtle play by White.
  • 38.Qc7 is a mistake which throws away White's advantage. It is interesting that no one until now has noticed that this move is a mistake. Kasparov’s suggestion 38.Qe1 neither leads to a win – the position is even. But after 38.Qa1! White wins.
  • After 38…Qa6 the position is a draw as Black's pieces are excellently placed. Again, it is interesting that no one has previously evaluated this position as a draw.
  • After 41.Rd7 the game was adjourned. White is better but Black should be able to hold.
  • 41…Qb1, the first move after the adjournment, was a mistake! After 41…Rf5 Black has great chances to save himself. This was Capablanca’s last chance to hold the game. Now, Black’s position remains objectively lost until Capablanca resigned on move 82.
 
New ...
Open...
Share...
Layout...
Flip Board
Settings
MoveNResultEloPlayers
Replay and check the LiveBook here
1.d4 d5 2.c4 e6 3.Nc3 Nf6 4.Bg5 Nbd7 5.e3 c6 6.a3 Be7 7.Nf3 0-0 8.Bd3 dxc4 9.Bxc4 Nd5 10.Bxe7 Qxe7 11.Ne4 N5f6 12.Ng3 c5 13.0-0 Nb6 14.Ba2 cxd4 15.Nxd4 g6 16.Rc1 Bd7 17.Qe2 Rac8 18.e4 e5 19.Nf3 Kg7 20.h3 h6 21.Qd2 Be6 22.Bxe6 Qxe6 23.Qa5
Sources: 1. Kasparov Garry, Moi velikie predsestveniki 1st edition, Moscow 2003. 2. Kasparov garry, Moi velikie predsestveniki 2nd edition Moscow 2020 3. Aleksandr Alehin, 100 sahmatnih partij s avtorskimi komentarijami, Moscow 2020. red. Notkin,M. 4. Avtoprotret genija, Moscow 2006. red. Sergey Voronkov. 5. Vukovic, Vladimir, Od Steinitza do Botvinika, Zagreb 1950. One of the biggest matches in chess history was undoubtedly the one between Capablanca and Alekhine, from Buenos Aires in 1927. This can be said for several reasons. The first reason is the belief from both chess fans and experts, that Alekhine had no chance in the match. Capablanca was the clear favorite in the match, so the only question was, what will the end result be. In support of this, was the fact that Alekhine never won a single game against the invincible Capa before the match. He defeated him five times prior to this match-up. Capablanca was nicknamed the “chess machine” and few believed he could be defeated. Another reason is the different approaches to the game from both players: this was a battle of two different styles. Capablanca based his play on deep logic and long strategic plans, while Alekhine was a supporter of combinations and fierce attacks. Capa built the game on small positional combinations, and Alekhine built the game from attacking and bringing fire in his games from the beginning to the end. The last but not least reason is the fact that Capablanca and Alekhine were undoubtedly the strongest players of the era. A surprise followed in the first game - Alekhine won - in his typical aggressive style. We can say that a large number of high-quality games were played in this match. Plenty of games played were masterpieces and even to modern chess standards many will enjoy and learn from them. Before this game, the result was 5: 3 in favor of Alekhine.This game is undoubtedly one of those games which changed the course of chess history. After the game, Alekhine would be named the new world champion and the myth of Capablanca's invincibility was shattered. This game was one of those where many generations learned the depth of chess thought. Alekhine analyzed it in great detail (view source 3), and his comments were quoted very often. Capablanca gave a brief review of this game for the newspaper (see source 4) and stated, “I think the last game of the match, which Alekhine won, is - his best game.” However, he added, “We could consider her model if it weren't for the last, very weak moves of my opponent at the end of the game.” (source 4). It should be said that Kasparov in his famous book My Great Predecessors (sources: 1, 2) gave great importance to this game, and analyzed it in great detail. The Rook endgame itself has been analyzed by many experts, you can find this example in almost every respectable endgame book. The question is, despite detailed analyses from a large number of renowned analysts, do we know everything about this game? Has everything been analyzed in detail? Is it no longer possible to discover something new? In my opinion, some moments of the game were not properly analyzed which significantly changes the assessment of the analyses. Therefore, I bring this game to the attention of the reader. Alekhine played this game with inspiration and creativity. In the course of the game so far, he switched his Queen from e2 to a5 with the idea of ​​exerting pressure on the Black’s Queen side, and he thought black was lost. For example, his comment after the 21st move, “Now black loses the pawn and after a desperate fight he loses the game and the match.” Alekhine (3). Kasparov in the first edition of his book gives the following comment, “Here it is, the decisive moment of the game and the match.” Kasparov (1). In the second edition (2) he no longer considers (rightly) that this is the decisive moment. Alekhine underestimated Black's defensive abilities. White's queen puts some pressure on Black's queen side, but that is not enough to achieve an advantage. On the other hand, when the Queen on a5 takes the a7 and b7 pawns it will be the target of the attack, so Black has more than enough opportunity to maintain equality. Objectively speaking, the position is the even. 23...Nc4 From the comments of Alekhine (3), it can be seen that he considered the black's position to be lost, and he cites another variant by which he proves that black stands badly. In the first edition, Kasparov (1) considers this move to be a mistake, while in the second (2) he considers this move to be OK, and that "Black has a minimum of three more acceptable moves." Kasparov (2). Kasparov is absolutely right: Black has more opportunities that give him an equal play. Let us have a look at the line given by Alekhine (3): 23...Qb3 Black immediately tries a counterattack and attacks the b2 pawn. 24.Qxe5 Kasparov (1, 2) recommends Kasparov states: 24.Nxe5 Rxc1 25.Rxc1 Qxb2 26.Nd3 Qd4 27.Qxa7 Qxd3 28.Qxb6 Nxe4= with equal play, Kasparov (1). Source 3 states 24.Qxa7 and says: "it may be better" (3). In fact, Black has an even play after: Nc4 Kasparov (2). 25.Rc3 Qxb2 26.Rfc1 Nd6 27.Rxc8 Nxc8 28.Qc5 Re8= 24...Rfe8 which is really stronger than Alekhin's line: 24...Nc4 (?) This move by Alekhine is actually a losing mistake. 25.Qf4! A very strong move that gives White a strong initiative. Alekhine alleges 25.Qd4 and considers the position "in favor of white" Alekhine (3). This position is, in fact, even: Rfd8 26.Qxa7 Ra8 27.Qc5 Rac8 28.Qb4 Qxb4 29.axb4 Nxb2= Petronijevic 25...Qxb2 26.h4 The move is stronger than 26.Rb1 Kasparov (2). 26...Rfe8 27.Rb1 White combines an attack on the king side with an attack on the queen side. Qxa3 28.h5 Qe7 29.hxg6 fxg6 30.e5 Ng8 It is not better either 30...Nd5 31.Qg4 Kh7 32.Rbd1 Ncb6 33.Ne4 Rc7 34.Qg3 Rf8 35.Rfe1+- 31.Rfc1 Qf7 32.Qd4 Nb6 33.Re1+- White has a strong initiative. Petronijevic. 25.Qd4 25.Nd4 also does not give an advantage: Rxe5 26.Nxb3 Rb5= 25...Rcd8 26.Qc3 26.Nd2 Qb5! 26...Qxc3 27.Rxc3 Nxe4 28.Nxe4 Rxe4 29.Rc7 Rb8 30.Rd1 Rc4= with an even play. Kasparov (2). Kasparov believes that there are other moves that lead to the even play, for instance 23...Nbd7!? 24.Qxa7 Qb3 25.Qe3 25.Rfd1 also does not give much: Qxb2 26.Rb1 Qc2= 25...Qxe3 25...Qxb2? 26.Nh4! 26.fxe3 b5= Khalifman - Source (2). I completely agree with Kasparov that "a pawn up does not give any special role" Kasparov (2). 23...Nfd7 and this move gives an even play: 24.Rxc8 24.Qxa7? Nc5 24...Rxc8 25.Qxa7 Qc6 26.Qa5 Qc2 27.Qb5 Rc5 28.Qb4 Rc4= Source 3. 23...Rfe8 is another possibility that gives Black an even play: 24.Qxa7 Nc4 25.b3 Ra8 26.Qc5 Nxa3 27.Qb4 Qe7 28.Qxe7 Rxe7 29.Rc5 h5= Petronijevic. All these analyzes clearly show that the position is equal. 24.Qxa7 Nxb2 A natural move by which black establishes material balance. According to Kasparov, it is weaker 24...b5 25.b3 Nd6 26.Qe3± Kasparov (1) The move 24...Ra8 is weaker: 25.Qc5! but not 25.Qxb7? Rfb8 26.Qc7 Rc8= equalising 25...Rfc8 Kasparov analyzes weaker: 25...Nxb2 26.Nxe5 Rfc8 27.Qd4+- Kasparov (1). 26.Qb4 Ra6 27.b3 Rb6 28.Qc3 Nd6 29.Qa1 Rxc1 30.Rxc1 Qxb3 31.Nxe5 Qb2 32.f3 Qxa1 33.Rxa1 Rb5 Petronijevic In addition to move in the game, Black could play either 24...Rfd8 or 24...Rfe8= , in both cases with equal play. Petronijevic. 25.Rxc8 To an equal play also leads 25.Rb1 Ra8 26.Qxb7 Nd3 27.Qb3 Qxb3 28.Rxb3 Nc5 29.Re3 Nfd7= the position is even: Pawn a3 is not important. Petronijevic. 25.Qxb7 it also gives no more than equal play Nd3 26.Rb1 Khalifmann, Source 2. Qc4= Kasparov (2). 26...Rb8= Kasparov (2). 25...Rxc8 26.Qxb7
26...Nc4? An important moment in the game. Kasparov (2) considered this to be "the only real mistake of Capablanca in this historical game." It is true that this is a mistake, but is it decisive as Kasparov thinks? And another question: is this Capablanca's only mistake in this game? Analyzes show that this move is a mistake that gives white an advantage, although not a decisive one. Better was 26...Nd3 "The dominance of Black pieces fully compensates for the lack of the Pawn." Kasparov (2). 27.a4 27.Qa7 also does not give much Rc3 28.a4?! Nf4 Kasparov (2). 27...Rc3 28.Qb5 28.a5 Ra3 28...Rb3 29.Qa5 Ra3= Khalifman, source 2. Black has active pieces that gives him sufficient compensation for the Pawn. 27.Qb4 Interesting is 27.Rc1 Nd6 28.Qb2 Rxc1+ 29.Qxc1 Nc4 30.Nd2 Nxd2 31.Qxd2 Qc4 32.Qe3 Kh7 33.Kh2 h5 34.f3 h4 35.Nh1 Nh5 36.Qg5 Qc5 37.Qxh4 Kg7 38.a4 Qa3 39.Qf2 Qxa4 40.Qc5 Qe8± White is up a pawn, but it is hard to convert it - all the pawns are on the same wing. Petronijevic. 27...Ra8 Black immediately attacks the white passed a3 pawn. Although the game move is not bad, interesting is 27...Nb6 28.Nxe5 28.Ra1 with the idea of ​​advancing with the passed pawn. The move, however, is slow, giving Black the opportunity to hold: Rc4 29.Qb5 Nfd7 30.a4 Rc5 31.Qb1 Nc4 32.Nf1 Qd6 33.Qe1 Qb6 34.N3d2 Na5 35.Ra2 Nf6 36.Ne3 Qc6 37.Ra1 Nxe4 38.Ng4 Nxd2 39.Qxd2 g5 - White has a slight edge, but after a proper play, the position should be even. Petronijevic. 28...Qxe5 29.Qxb6 h5 Interestingly, Black can maintain the position down two pawns! 30.Rd1 Rc2 31.Qd4 Qxd4 32.Rxd4 Rc1+ 33.Nf1 Ne8 34.h4 Nc7 35.Ra4 Ra1 36.Ra5 Ne6 37.g3 Re1 38.Kg2 Rxe4 39.Ne3 Rd4 White's pieces are poorly placed and they cannot help his pawn promote. 40.Ra6 Rd2 41.Nc4 Ra2 42.Ra7 g5 The principle is clear: when we are a pawn down, we should change the pawns, not the pieces. 43.hxg5 Nxg5 44.Nd6 Kf6 45.Ne8+ Kg6 46.Ra6+ Kh7 47.Nf6+ Kg6 48.Ne4+ Ne6 49.a4 Kg7 50.Nc3 Rc2 51.Nb5 Rb2 52.Nd6 Ra2 53.Nf5+ Kg8 54.Ra5 Kh7 55.Nd6 Kg6 56.Nb5 Rb2 57.Nc3 Rb3 58.Nd5 Rd3 59.Ne7+ Kf6 60.Nf5 Rd2 61.Ne3 Ra2 62.Nd5+ Kg7 63.Nc3 White cannot advance the Pawn, so this position is only symbolically better for white - the objective result is a draw. 28.Ra1 Kasparov (1) considers that a move 28.a4!? is interesting. Black should survive after Qc6 29.Ra1 Ne8 30.Nf1 Qxe4 31.Ne3 Ncd6 32.Qa3 Ra5 33.Ng4 f6 34.Nd2 Qc6 35.Nb3 Ra7 36.Nc5 Nf5 37.a5 Nd4 38.Ne3 Nc7 39.Qb4 Na6 40.Nxa6 Qxa6 41.Kh2 h5 42.Qa3 Qb7 43.a6 Qb6 44.Nd5 Qc6 and White has only a tiny advantage. Petronijevic. 28.Rc1 is another suggestion by Kasparov (2). Nb6 28...Nxa3? 29.Rc7 Nd7 30.h4 with a threat h4-h5) 29.h4 Ra4 30.Qb5 Rxa3 31.Nxe5 "Although White is a pawn up, all pawns are on the same wing and the position can unfold in a draw." Kasparov (2). 28...Qc6! Regarding the game move, Alekhine says: "Threatening to blockade the a-pawn by 29...Ra4 and also (at least apparently) to win the e4-pawn. But White's two next moves put the situation in the true light." Alekhine (3). 29.a4
Kasparov (1, 2) and Alekhine (3) evaluate this move with an exclamation mark. White simply wants to use his outside passed pawn. 29...Nxe4?
Kasparov (2) considers this move suspicious. A move in the game is actually a serious mistake that loses the game. Better is 29...Ne8 This move was noticed by Kasparov (2) as more stubborn. 30.a5!? Ned6 31.Nd2 Nxd2 32.Qxd2 Nxe4 The line move is a mistake. After better 32...Ra6 keeping defense over 6th rank, Black should survive: 33.h4 Kh7 34.Qb2 Qc5 35.Qb8 Qd4 36.Ra3 Nxe4 37.Rf3 Nf6 38.Qf8 Qd1+ 39.Nf1 Qd7 40.h5 gxh5 41.Ne3 h4 42.g4 e4 43.Rf5 Qe8 44.Qxe8 Nxe8 45.Rxf7+ Kg6 46.Rf5 Nd6 47.Re5 Nf7 48.Rd5 Rc6 49.Kg2 Ng5 50.Rd1 h5= the position is even. Petronijevic. 33.Nxe4 Qxe4 34.a6 Qc6 is certainly stronger and gives black a good chance for salvation. 34...Ra7 This move is analyzed by Kasparov (2). The move is passive and White wins: 35.Qd6 Kh7 36.Qf6 Qd4 36...Qa8 37.h4 Qe8 38.Qb6 Qd7 39.g3 Kg7 40.Ra5 Qe7 41.Qb8 e4 42.Qb6 h5 43.Kh2 Kg8 44.Qb8+ Kh7 45.Re5 Qd7 46.Qb6 Rc7 47.Rc5 Ra7 48.Rc6 Ra8 49.Rc7 Qf5 50.a7 Qf3 51.Qd4 Rd8 52.Qb2 e3 53.fxe3 Kh6 54.Rd7 Rc8 55.Rb7 Qf5 56.Rc7 Rf8 57.Qa2 Qe4 58.Rxf7 Rc8 59.Qg2+- 37.Rb1 Qf4 38.Qb6 Qd4 39.Qxd4 exd4 40.Ra1 Kg7 41.Kf1 Kf6 42.Ke2 Ke5 43.Kd3 Kd5 44.Ra5+ Kc6 45.Kxd4+- The pawn has advanced too much and this position is easily won for White. Petronijevic. 35.a7 Although the pawn on a7 is strong and Black's position seems suspicious, Black should hold. Qb7 36.Qe3 Kh7 37.Qc5 37.Ra3 Qc7 38.Ra6 Qb7 39.Ra1 Qc7 Black has enough resources to make a draw. 37...e4 38.Qd4 h5 39.h4 Qc6 40.g3 Qc7 41.Qe3 Qc6 42.Kh2 Qc7 43.Kg2 Qb7 44.Ra3 Kg8 45.Ra5 Qc7 46.Ra4 Kh7 47.Ra2 Qb7 and it is not visible how white can improve his position. Petronijevic. 30.Nxe5? Kasparov (1) states that this move is "! " while in the second edition (Kasparov 2), he states this move without evaluation. In fact, the game move is a mistake that spoils a win. After the best 30.Nxe4! Qxe4 Kasparov (2) gives this move as a winning 31.a5! (Sources: 2, 3): White has a great winning chance. In fact, White wins: 31.Rc1 Alekhine's (3) line Rc8 32.-- 32.Nxe5? Ne3‼ 33.Qxe4 Rxc1+ 34.Kh2 Nf1+ "followed by ...Ng3+ and ...Nxe4, after which Black could even win." Alekhine (3). 32.Nd2? Nxd2 33.Qxd2 Rxc1+ 34.Qxc1 Qxa4= 32.a5! Black is not able to stop the swiftly advancing a-pawn: Kasparov (1) . Qf4 Kasparov is right 32...Nd6 33.Qxe4 Rxc1+ 34.Qe1 Rxe1+ 35.Nxe1 Nc8 35...f5 36.Kf1+- Petronijevic 36.a6 Kf6 37.Kf1 Ke6 38.Ke2 Kd5 39.Nf3 e4 40.Nh4 Kc6 41.Ke3 Nd6 42.Kd4 Kb6 43.Ke5 Ne8 44.Kxe4 Kxa6 45.Nf3 Kb7 46.Kd5 Kc7 47.Ne5 Nd6 48.g3 g5 49.Ng4 Kd7 50.Nf6+ Ke7 51.Ng8+ Kd7 52.Ke5 h5 53.Nf6+ Ke7 54.Nxh5 Nc4+ 55.Kf5 Nd6+ 56.Kxg5+- Petronijevic 33.Rc3 Rc6 34.Qa4 Rc8 35.a6 Kasparov (1). "Alekhine played more solidly, retaining his extra pawn: after all, what was being decided was a matter of vital importance ... " Kasparov (1, 2). The problem is that after the game move, White can not win. 35.-- 31...Qd5 32.a6+- the Black's position is critical - Kasparov (2). 30...Qd6! 'Taking play into a heavy piece endgame, where, as is known, it is very hard to convert a pawn advantage. ' (Kotov) - Source (1, 2). According to Kasparov (1), Inferior is 30...Nxe5 However, Black has a good chance for salvation: 31.Qxe4 Qc3 This is not good and it loses. Stronger is 31...Qxe4 32.Nxe4 Nc4 33.Kf1 Re8 34.Nc5 Na5 35.g3 Rc8 36.Rc1 Rb8 37.Nd3 Rb3 38.Ne5 Nb7 39.Rc7 Nd6 40.Rd7 Rb6 41.Nd3 Ra6 42.Nc5 Rc6 43.Ne6+ Kg8 44.Nd4 Ra6 45.Nb5 Ne4 46.Rd8+ Kg7 47.Rd4 Nc5 48.Nc3 Re6 49.Rc4 Nb3± Petronijevic 32.Rb1 Kasparov (1). White is clearly better, but it is a question can he win: Better is 32.Qxa8 Qxa1+ 33.Kh2 Nd3 34.Qd5 Nxf2 35.a5 h5 36.Ne2 Qe1 37.Ng1 Qc3 38.a6 Qc7+ 39.g3 Qc2 40.Qe5+ Kf8 41.Qe2 Qc6 42.Qxf2 Qxa6+- Petronijevic 32...Re8 33.Nf1 Qc4 34.Nd2 Qc3 35.Nb3 Re7 36.Qd4 Qxd4 37.Nxd4 Rd7 38.Nb5 Rd2 39.Ra1 Nc4 40.g3 Na5 41.h4 Kf6 42.Nc3 Rd3 43.Ne4+ Ke5 44.Nc5 Rc3 45.Nd7+ Ke6 46.Nb6 h5 47.Kg2 Rc2 48.Ra3 Rd2 49.Rc3 Rd6 50.Re3+ Kf6 51.Nc8 Rd4 52.Rf3+ Ke6 53.Rf4 Rxf4 54.gxf4 Nc4 55.Na7 Nd6= Petronijevic 31.Qxc4 The exchange of Queens gives a good chance to Black for salvation: 31.Qxd6 Nexd6 32.Ne4 Nxe5 33.Nxd6 Ra6 34.Ne4 Nc4 35.Kf1 Nb2 36.Nc3 Nd3 37.Nd1 Nc5 38.Nb2 Kf6 39.a5 Ra7 40.Nc4 Ke6 41.Ke2 Kd5 42.Ne3+ Kd4 43.Ng4 Re7+ 44.Kf3 h5 45.Ne3 Ra7 46.h4 Nb3 47.Ra4+ Ke5 48.Nc4+ Kd5 49.Kf4 f6 50.Kg3 Kc5 51.Nb2 Kb5 52.Rf4 Nc5 53.Nd1 Ra6 54.Nc3+ Kxa5 55.Rc4 Kb6 56.Nd5+ Kb5 57.Rb4+ Ka5 58.Rb8 Rd6 59.Nf4 g5 60.hxg5 Ne4+ 61.Kf3 Nxg5+ 62.Ke3 h4 63.f3 Rb6 64.Rh8 Rb3+ 65.Nd3 Kb5 66.Rxh4 Ne6 67.Ke2 Ra3 68.Re4 Nc7 69.Nf4 Ra2+ 70.Kf1 Kc6 71.Rd4 Nb5 72.Rd1 Nc7 31...Qxe5 32.Re1
32...Nd6? A passive move that loses the game. It is interesting that so far this move has not been evaluated as bad. Better was active 32...Nd2! and Black has a good chance for salvation 33.Qc1 Qd4 34.Ne2 Qb4 35.Rd1 Nc4 36.Nc3 Qb2 37.Qxb2 Nxb2 38.Ra1 Nd3 39.Nd1 Nc5 40.Nb2 Nb3 41.Ra2 Rb8 42.Nd1 42.Nc4 Is another attampt: Rb4 43.Ne3 Na5 44.Kf1 Rd4 45.Ke2 Kf6 46.g3 Ke5 47.h4 Rb4 48.Ng2 Re4+ 49.Kf3 Rd4 50.Ke3 Rc4 51.Kd3 Rb4 52.Ne1 Rc4 53.Ke2 Re4+ 54.Kf1 Kf6 55.f3 Rc4 56.Nc2 h5 57.Ke2 Rc3 58.Kf2 Rd3 59.Na3 g5 Well-known principle: when we are pawn down in endgame, we should trade pawns. 60.Nb5 gxh4 61.gxh4 Rd1 62.Nc3 Rd4 63.Ne4+ Kg7 64.Kg3 Rb4 65.Ra1 Kg6 66.Ra3 Rd4 67.Ra2 Rc4 68.Nd6 Rb4 69.Nb5 Rc4 70.Kh3 Rb4 71.Ra1 Rc4 and White cannot improve his position. 42...Na5 43.Kf1 Rb4 44.Nc3 Rc4 45.Nd5 h5 46.Ke2 f5 47.Ne3 Re4 48.Kd3 Kf7 49.g3 Rb4 50.Kc3 Re4 51.h4 f4 52.Kd3 Rb4 53.Nd5 Rb3+ 54.Nc3 fxg3 55.fxg3 Ke6 56.Re2+ Kf5 57.Re3 Rb2 58.Re4 Nc6 59.Kc4 g5 60.hxg5 Kxg5 61.Kc5 Na5 62.Rf4 Nb7+ 63.Kd5 Rb6 64.Nb5 Kg6 65.Re4 Kf6 66.Rh4 Kg5 67.Nd4 Rd6+ 68.Kc4 Rf6 33.Qc1! Both Kasparov (1) and Alekhine (3) rightly praise this move: "Convincing play" says Kasparov (1), while Alekhine (3) gives an exclamation mark to this move. 33.Rxe5? Nxc4 Kasparov (1) 33.Qb4? Rxa4 Kasparov (1, 2). In both cases, the position is even. 33...Qf6 33...Qd4 Kasparov (1). This move is simply bad due to 34.Rd1 Rc8 35.Qxh6+ Kxh6 36.Rxd4+- Petronijevic. 33...Qa5 Kasparov (1). This does not help either: 34.Ne4 Nxe4 35.Rxe4 Rd8 36.Qe1 Qd5 36...Qxe1+ 37.Rxe1 Ra8 38.Ra1+- 37.a5 Kh7 38.Re7 Rd6 39.Qc3 Qf5 40.Qb3 Kg7 41.Qb2+ Kh7 42.Re8 Rd1+ 43.Kh2 Qf4+ 44.g3 Qd4 45.Qxd4 Rxd4 46.Re7 Kg7 47.a6 Kf6 48.a7 Ra4 49.Rb7+- Very stubborin is 33...Rc8 after which White has a lot of difficulties to win: 34.Qd1 Qc3 35.Ne2 Qa5 36.Qa1+ Kg8 37.Ng3 Rc4 38.Rb1 Kh7 39.Qf6 Qc7 40.Qe5 Nb7 41.Qe8 Kg7 42.Qb5 Na5 43.Nf1 Rc5 44.Qb2+ Kh7 45.Qa1 45.Re1 Rc2 46.Qf6 Rc6 47.Qa1 Qd6 47...Qf4 48.Ne3 Qf6 49.Qa2 Qe6 50.Qe2 Qe5 51.Qd1 Re6 52.Qd7 Qf6 53.Qd2 Nb3 54.Qd3 Qb2 55.Rb1 Nc5 56.Rxb2 Nxd3 57.Rd2 Nc5 58.a5 h5 59.Kf1 Re4 60.Ra2 Na6 61.Ke2 Re5 62.Ra3 h4 63.Kd3 Kg7 64.Kd4 Rg5 65.f4 Rb5 66.Kc3 Rb1 67.Ra2 Re1 68.Nc4 Kf8 69.Ne5 Re4 70.Rd2 Rxf4 71.Rd6 Nc7 72.Rd7 Na6 73.Nc4 Rf1 74.Rd6 Rc1+ 75.Kb3 Nc5+ 76.Kb4 Nb7 77.Rd2 Nxa5 78.Nxa5+- 48.Ne3 48.Rc1 Rb6 49.Qa2 Qf6 50.Qd5 Nc6 51.a5 Ra6 52.Ne3 Nd4 53.Re1 Ne6 54.Nc4 h5 55.Qb7 Ng5 56.Qb5 Rc6 57.Qe5 Qe6 58.Qxe6 Nxe6 59.Ne5 Ra6 60.Ra1 Nc5 61.Nc4 Re6 61...Rc6 62.Ne3 Na6 63.Kf1 Rc5 64.Ke2 f6 65.Kd3 Nb4+ 66.Kd2 Na6 67.Ra4 g5 68.Nc4 Kg8 69.Kc3 Kf8 70.Ra2 Ke7 71.Rb2 Nc7 72.Rb7 Kd8 73.Rb6 Rf5 74.Rb2 Kd7 75.Ra2 Na6 76.f3 Ke7 77.Rd2 Nc7 78.Kd3 Rd5+ 79.Ke4 Rc5 80.Re2 Kd7 81.Rc2 Ke7 82.Kd3 Rd5+ 83.Ke2 Na6 84.Rb2 Rd4 85.Nb6 Ke6 86.Ke3 Rd1 87.Nc4 Nc7 88.Rb6+ Ke7 89.Rc6 Nd5+ 90.Ke4 Nf4 91.a6 Ra1 92.Kf5 Ra4 93.Nb6 Ra5+ 94.Ke4 Kf7 95.Nc4 Ra2 96.Kd4 Rxg2 97.a7 Ra2 98.Nd6+ Kg6 99.Nb5 Nxh3 100.Rc8 Ng1 101.Ke3 Re2+ 102.Kd3 Ra2 103.f4 Nh3 104.fxg5 Nf2+ 105.Ke3 Ng4+ 106.Kf3 Nh2+ 107.Ke4 Ra4+ 108.Kd3 Kxg5 109.a8Q Rxa8 110.Rxa8+- 62.g3 Na6 63.Kg2 Kg7 64.Kf3 Rc6 65.Ne3 Rd6 66.Rd1 Rf6+ 67.Ke2 Nc5 68.Ra1 h4 69.g4 Nb3 70.Ra4 Ra6 71.Nc4 Re6+ 72.Kf3 Rf6+ 73.Kg2 Nc5 74.Ra3 g5 75.Kf1 Re6 76.Nb6 Rd6 77.Ke2 Kg6 78.Nc4 Ra6 79.Kd2 Ne4+ 80.Ke3 Nc5 81.Kd4 Ne6+ 82.Ke4 f6 83.Nb2 Nf4 84.Nd3 Nxh3 85.Nb4 Re6+ 86.Kf3 Ng1+ 87.Kg2 Re4 88.Nd5 Rxg4+ 89.Kh1 Nh3 90.a6 Nxf2+ 91.Kh2 Re4 92.a7 Re8 93.a8Q Rxa8 94.Rxa8 Ne4 95.Ra5 Ng3 96.Ra6 Nh5 97.Kh3 Kf5 98.Rb6 Ng3 99.Nxf6+- 48...Nb3 49.Qa2 Qd2 50.Qxd2 Nxd2 51.Re2 Nb3 52.Rb2 Rc3 53.Kf1 Na5 54.Ra2 Rd3 55.Ke2 Rd4 56.Nc2 Rd7 57.Ne1 Kg7 58.Nf3 Kf6 59.Rd2 Rc7 60.Rd5 Nc6 61.Kd2 Ke6 62.Rd3 Nb4 63.Nd4+ Ke5 64.Rb3 Nd5 65.Ne2 Rc8 66.Kd3 Kd6 67.g3 Ra8 68.Rb5 Nc7 69.Rb4 Ne6 70.Kc4 g5 71.Nc3 Rc8+ 72.Kb3 Nc5+ 73.Ka3 Ne6 74.Ne4+ Ke5 75.Nd2 Kd5 76.Rb7 Nc7 77.Rb3 Kd4 78.Rf3 Rf8 79.Nb3+ Kc4 80.Na5+ Kd5 81.Rf5+ Ke6 82.Rc5 Kd7 83.g4 f6 84.Rf5 h5 85.Nb3 Kd6 86.Nd2 Ke7 87.Ne4 Ne6 88.a5 hxg4 89.hxg4 Nd4 90.Rc5 Nf3 91.Ka4 Ne5 92.a6 Ke6 93.Kb5 Rb8+ 94.Ka5 Ra8 95.Rc2 Nxg4 96.Nc5+ Kf5 97.Kb6 Ne5 98.Kb7 Re8 99.a7 Re7+ 100.Kb6 Re8 101.Kb7 Re7+ 102.Ka6 Re8 103.Rc3 g4 104.Kb7 Re7+ 105.Kb6 Re8 106.Na6 Ra8 107.Nc7 Rxa7 108.Kxa7+- 45...h5 46.Re1 Qd8 47.Rd1 Qh8 48.Qa2 Qe8 49.Ne3 Nc6 50.Qb3 Na5 51.Qa3 Qc6 52.Rd8 Nb7 53.Rd4 Nd6 54.Qb3 Qc7 55.Nd5 Qd8 56.Rd1 Nf5 57.Qb7 Nh6 58.Qe7 Qxe7 59.Nxe7 Kg7 60.Kf1 g5 60...h4 61.Nd5 Nf5 62.Ke2 Rc4 63.Ra1 Rc2+ 64.Ke1 Nd4 64...Rc5 65.Ne3 Nd4 66.Ra3 Nc6 67.Kd2 Ra5 68.Kc3 Kf6 69.Ra2 Ke7 70.Kb3 Kd7 71.Rd2+ Kc7 72.Rd5 Ra8 73.Rd3 Rb8+ 74.Ka3 Ne7 75.Rd4 Rh8 76.Kb3 Nc6 77.Rf4 f5 78.Kc3 Kd6 79.Rc4 Kd7 80.Nc2 Ne5 81.Rd4+ Ke6 82.Nb4 g5 83.a5 Rc8+ 84.Kb3 Ng6 85.a6 Ra8 86.f3 Nf4 87.Rd2 g4 88.hxg4 fxg4 89.fxg4 Kf6 90.Kc4 Kg5 91.Kb5 Rb8+ 92.Ka5 Ra8 93.Nd5 Rd8 94.Nf6 Rc8 95.Ne4+ Kxg4 96.a7 Ne6 97.Kb6 Kf4 98.Nd6 Rd8 99.Rf2+ Kg3 100.Ne4+ Kh2 101.g3+ Kh3 102.gxh4 Kxh4 103.Rf6+- 65.Ne3 Rc7 66.Ra3 Rb7 67.Kd1 Ra7 68.Kd2 Nc6 69.Kc3 Kf6 70.Kc4 Ra5 71.Rc3 Ke6 72.Kb3 Ra6 73.Rd3 Rb6+ 74.Ka3 Rb1 75.Rd1 Rb7 76.Nc4 Ke7 77.Rd6 Rc7 78.Rd2 Ra7 79.Rb2 Ke6 80.Rc2 Rb7 81.Rd2 Ke7 82.Rb2 Rd7 83.Re2+ Kf8 84.Rd2 Rb7 85.Rb2 Ra7 86.Rc2 Nd4 87.Rd2 Nc6 88.Rb2 Kg8 89.Rb5 Re7 90.Ne3 Kg7 91.a5 Re6 92.Rc5 Kf8 93.Ka4+- 60...Kf6 61.Nd5+ Ke6 62.Nb6 Nf5 63.Ra1 Ra5 64.Ke2 Ra6 65.Nc4 Ng7 66.Kd3 Kd5 67.Kc3 Rf6 68.a5 Ne6 69.a6 Nc7 70.a7 Rxf2 71.Ne3+ Kc5 72.a8Q Nxa8 73.Rxa8+- 61.Nd5 Nf5 62.Ke2 f6 63.Ne3 Ne7 64.Ra1 Nc6 65.Kd2 Ra5 66.Kc3 Kf7 67.Kb3 Ke6 68.Nc4 Rf5 69.Ra2 Rc5 70.Rd2 Ke7 71.Ne3 Ke6 72.Rd3 Ra5 73.Nc4 Rc5 74.Rc3 Nd4+ 75.Kb4 Rf5 76.Rd3 Nc6+ 77.Ka3 Ke7 78.Rd2 Rf4 79.Kb3 Rh4 80.Kc3 Re4 80...f5 81.a5 g4 82.Ne3 Ke6 83.hxg4 fxg4 84.Ra2 Na7 85.a6 Rh1 86.Kd4+- 81.a5 Re1 82.Kb2 Re6 83.Kb3 Re1 84.a6 Ra1 85.Na3 h4 86.f3 Re1 87.Ra2 Na7 88.Kc4 Kd7 89.Nc2 Rb1 90.Nd4 Kd6 91.f4 gxf4 92.Nf3 Ke6 93.Kd3 Rb3+ 94.Ke2 Rb8 95.Nxh4+- 34.Ne4 Kasparov (1, 2) rates this move "!". Nxe4 35.Rxe4
Alekhine, as we know, considers this position as won: " The winning procedure consists in combining the threats connected with the passed pawn and an attack against the somewhat exposed black king. First and foremost, White will succeed in controlling the important diagonal a1-h8." Alekhine, source (2, 3). In my opinion, it is really questionable if this position is won. It is, of course, difficult to give an analytical proof, but Black has an excellent chance to save a draw. 35...Rb8
In case of 35...Ra5 Kasparov is right, White should win: 36.Qc4 Qa1+ 37.Kh2 Qf6 38.Qd4+- White wins: h5 38...Qxd4 39.Rxd4 Kf6 40.Kg3 Rc5 41.Rf4+ Ke6 42.Re4+ Kd5 43.Re3 Ra5 44.Ra3 Ke4 45.Rf3 Ke5 46.Rf4 Ke6 47.Kf3 Rc5 48.Re4+ Kd6 49.Re3 h5 50.Rd3+ Ke5 51.Ra3 Ra5 52.Ke3 and White should win in the same way as in the game. 39.Qxf6+ Kxf6 40.Kg3 Rd5 41.Re2 Ra5 42.Ra2 Ke5 43.Ra3 Ke4 44.Rf3 Ke5 45.Rf4 Ke6 46.Re4+ Kd6 47.Kf3 Rc5 48.Re3 Ra5 49.Ra3 Ke5 50.Ke3+- this is technically a won position. Probably, the best defense gives: 35...Ra6 Organizing the defense over the sixth rank, even though he was objectively lost. The way to a win is indeed very complicated. White must combine the gradual improvement of the position of his pieces with a potential attack on the King. It also has the possibility to enter into a won endgame. Let's have a look at just a few possible lines that show how hard the road to win is: 36.g3 Rc6 37.Rc4 Rd6 A Queen endgame would easily be lost. 38.Rf4 Qd8 39.Qb2+ Kg8 40.Qb3 Rd1+ 41.Kg2 Rd5 42.Rf6 Kg7 43.Rf3 Qa8 We have already seen a very similar position: Black's pieces are excellently placed. 43...h5 Black puts his pawns on the most natural squares: f7, g6, and h5. 44.h4 Qa8 Black has placed the pieces ideally so that it is difficult for White to drive them to weaker positions. 45.Kh2 Qd8 46.Rf4 Kg8 47.Kg2 Rd7 48.Rc4 Rd2 49.Qf3 Kf8 49...Qd7 50.Rb4 Qa7 51.Rf4 Qd7 52.Qb3 Qa7 53.Kg1 Rd7 Black should retreat with his Rook. 54.Rf6 Kh7 55.Kh2 Re7 56.Qd5 Kg7 57.Rf4 Rd7 58.Qe5+ Kg8 59.a5 And finally, white advanced with his pawn to the fifth rank. Rd8 60.Qf6 Rd2 61.Rf3 Re2 62.Kg2 Re8 63.Qc6 Re6 64.Qc8+ Kg7 65.Qc3+ Kh7 66.Rf4 Ra6 67.Qc4 Re6 68.Qc8 Kg7 69.Qc3+ Kh7 70.Kg1 Rd6 71.Qe3! Qd7 A Queen trade would lead to the lost Rook endgame. 71...Qxe3 72.fxe3 Kg7 73.Ra4 Ra6 74.Kf2 Kf6 75.e4 Ke6 76.Ke3 Ke5 77.Kd3 Kd6 78.Kd4 Kc7 79.e5 Kd7 80.Ra3 Kc7 81.Rc3+ Kd7 82.Rc5 Ra8 83.Kc4 Ra7 84.Kb5 Rb7+ 85.Ka4 Ra7 86.Rc3 Kd8 87.Rc6 Kd7 88.Rb6 Kc8 89.a6 Rd7 90.Kb5 Re7 91.Kc4 Rd7 92.Kc5 Re7 93.Kd5 Ra7 94.e6 Re7 95.exf7 Rxf7 96.Rxg6+- 72.Kh2 Rd3 73.Qc5 Rd5 74.Qc3 Rd6 75.Qf3 Kg8 76.Rb4 Qe6 77.Qc3 Kh7 78.Qb2 Qf6 79.Qxf6 Rxf6 80.Kg2+- The Rook endgame is won in the same way as in the game. 50.Rf4 Qc7 51.Kh2 Kg8 52.Qb3 Threatening a5. Rd6 53.Qe3 Rd5 54.Rd4 Rf5 55.Qd2 Rf6 56.Rb4 Qc5 57.Rf4 Rd6 58.Qe2 Re6 59.Qb5 Qc7 60.Rc4 Qe5 61.Kg2 Here the Queen trade would be a mistake 61.Qxe5? Rxe5 62.Rc2 Ra5 63.Ra2 Kg7 64.Kg2 Kf6 65.Kf1 Kf5 Black's King is very active which allows him to save the game. 66.Ke2 f6 67.Kf3 g5 68.Ra1 Ke5 69.g4 hxg4+ 70.Kxg4 Ke6 71.Kg3 Kf5 72.hxg5 fxg5 73.Kg2 Ke6= 61...Qd6 61...Kg7 here the Queen trading wins. 62.Qxe5+ Rxe5 63.Kf3+- 62.Rc8+ Kg7 63.a5 Qd4 64.Qc5 Rd6 65.Qxd4+ Rxd4 66.a6 Ra4 67.Rc6 The Rook is excellently placed on the sixth rank. Ra3 68.Kf1 Ra2 69.Ke1 Kf8 70.Kd1 Ke7 71.Kc1 Rxf2 72.Rc2 Rf1+ 73.Kb2 Rf6 74.a7 Ra6 75.Rc7+ Ke6 76.Kc3 Kd6 77.Rxf7 Kc5 78.Rg7 Ra4 79.Rxg6 Rxa7 80.Rg5++- 44.Kh2 Qd8 45.Rf4 Kg8 46.h4 h5 47.Kg2 Rd7 48.Rc4 Rd2 49.Qf3 Qd7 49...Rd7 loses after 50.Qc6 Rd1 51.Re4 Kf8 52.Qb7 Rd7 53.Qb4+ Kg7 54.a5 Rd1 55.Qb2+ Kh7 56.Qa2 Kg8 57.Qa4 Kg7 58.a6 Rb1 59.Qd4+ Qxd4 60.Rxd4 Ra1 61.Rd6+- 50.Rb4 Qa7 51.Rf4 Rc2 52.Qb3 Rc5 53.Rb4 Qa8+ 54.Qf3 Qe8 55.Qf4 Kh7 56.Rb7 Rf5 57.Qc4 Qa8 58.Qb3 Qe8 Is more active, but also can not help. 58...Qf8 Black defends himself passively, but it is hard to break it. 59.Kg1 Qe8 60.Kf1 Kh6 61.Qb2 Rd5 62.Qc1+ Kg7 63.Qc3+ Kg8 64.Kg2 Rf5 65.Rb4 Kh7 66.Qc7 Kg7 67.Rf4 Qe5 68.Qxe5+ Rxe5 69.Kf3 Active King wins. Bad is 69.Rf3? Ra5 70.Ra3 f6= with next g5 and Black has a counter play on the King side. 69...Re1 70.Rc4 Kf6 71.Rb4 Ra1 72.Ke4 Ke6 73.Kd4 Kd6 74.Kc3 Kc5 75.Rf4 f5 76.Rc4+ Kd5 77.Rb4 Ra2 78.Kb3 Ra1 79.Kb2 Re1 80.a5 Kc5 81.Rb8 Re2+ 82.Kb3 Re1 83.Rg8 Re6 84.Kc3 Kb5 85.Kd4 f4 86.gxf4 Kxa5 87.Kc5 Ka6 88.Kd5 Rb6 89.Rg7 Ka5 90.Rf7 Rb2 91.f5 gxf5 92.Rxf5+- 59.Kf1 Kh6 60.Qb2 Rd5 61.Qc1+ Kg7 62.Qc3+ Kg8 63.Kg2 Qe4+ 64.Qf3 Qxf3+ 65.Kxf3 The Rook endgame is lost. Rd4 65...Rd3+ 66.Ke4 Ra3 67.Rb4+- 66.a5 Ra4 67.Rb5 Kf8 68.Ke3 Ke8 69.Rd5 Ke7 70.Kd3 Ke6 71.Rb5 Kd6 72.Rb6+ Ke5 73.a6 Kd5 74.Kc3 Ra5 75.Kc2 Kc4 76.Rc6+ Kb5 77.Rf6 Kc5 78.f3 Interesting is also a sharp 78.g4!? Ra3 79.Kb2 Ra4 80.Kb3 Ra1 81.f3 Kb5 82.Kc3 Kc5 83.g5 Ra5 84.f4 Ra4 85.f5 gxf5 86.Kb3 Rb4+ 87.Ka3 Rb1 88.Rxf5+ Kb6 89.Rxf7 Kxa6 90.Rh7+- 78...Ra4 79.Kb2 Rb4+ 80.Ka3 Rb1 81.Ka2 Rb5 82.g4 Kd4 83.Rc6 Rb8 84.gxh5 gxh5 85.a7 Ra8 86.Rc7 f5 87.Re7+- 36.Re2?! Kasparov in the first edition of MGP (1) gives this move "!", while in the second edition (2) he does not evaluate this move. In my opinion, this is a suspicious move because white had an easy win. After this move, he has to play quite accurately in order to win. 36.a5 In the first edition of MGP (1), Kasparov evaluates this move "?!". In the second edition of MGP (2), Kasparov also evaluates this move as a winning one. Qf5 Stronger is 36...Ra8 37.Ra4 "with Qa1", Kasparov (2). Qe6 38.Qa1+ Kh7 39.a6 Ra7 40.h4 Qd6 41.g3 Qc6 42.Rf4 f5 43.Ra4+- 37.Rb4! 37.Qc3+ Kh7 37...Kg8 38.Rb4! Rc8 39.Qa1+- (2) 38.Re7+- Khalifmann, Source MGP (2). 38.Re1!? Kasparov (2). Actually, White wins: Ra8 39.Re7 Qb1+ 40.Kh2 Qf5 41.Qd4 Rd8 42.Qc4 Kg7 43.Qc3+ Qf6 44.Qxf6+ Kxf6 45.Re4+- 38...Rb1+ 39.Re1 Rb5 40.Ra1+- Khalifmann. (source 2). 37...Rxb4 37...Ra8 is helpless due to 38.Qa1+ Kh7 39.a6 38.Qc3+ Qf6 39.Qxb4 Qa1+ 40.Kh2+- The position is technicaly won for White. Petronijevic. 36...Ra8 Interesting is defense over sixth rank by playing 36...Rb6 It is extremely hard to break it. 37.a5 Ra6 38.Ra2 Kh7 39.Qc4 Rc6 40.Qf1 Ra6 40...Qe6 41.Ra4 Qc8 42.Qd3 threatenning a6. Ra6 43.Qd5 Qc7 44.g3 Qc1+ 45.Kg2 Qc7 46.Qb5 Qa7 47.Qe5 Re6 48.Qd5 Ra6 49.Kg1 Qc7 50.Qb5 Qa7 51.Qb3 h5 52.Qd5 Qc7 53.h4 Rd6 54.Qf3 Ra6 55.Qf4 Qd7 56.Kh2 Kg7 57.Qc4 Qa7 58.Qa2 Kh7 59.Rf4 Kg8 60.Re4 Rf6 61.Kg1 Qa8 61...Kh7 62.Rf4 Rxf4 63.gxf4+- 62.Re3 Kh7 63.Re7 Kg7 64.Qa1 Qf3 65.Qb2 Qd1+ 66.Kh2 Qd5 67.Rc7 Qf5 68.Rc2 Kh7 69.Re2 Qf3 70.Qd4 Qf5 71.Kg1 Qb1+ 72.Kg2 Qb7+ 73.Kh2 Qf3 74.Rb2 Qf5 75.Kg1 Re6 76.Rb8 V. Vukovic (5) correctly claimed that in such kind of positions White wins because of the possibility of attacking the opponent's King. Re1+ 77.Kg2 Qe5 78.Qxe5 Rxe5 79.a6 Ra5 80.Rb6+- And we have an easy won Rook endgame. 41.h4 Qc6 42.Ra3 h5 43.g3 Qa8 43...Qb7 44.Qc4 Qb1+ 45.Kh2 Qb7 46.Ra2 Qa7 47.Qb4 Rf6 48.Qb2 Ra6 49.Qe5 Qa8 50.Ra4 Qd8 51.Qb5 Qa8 52.Qg5 Qa7 53.Qe3 Qd7 54.Qf4 Kg7 55.Qc4 Qa7 56.Qa2 Kh7 57.Rf4 Kg8 58.Re4 Rf6 59.Kg1 Kh7 60.Rf4 Rxf4 61.gxf4 Qd7 62.f3 Qe8 63.a6 Qe3+ 64.Kg2 Qa7 65.Qa5 Kh6 66.Qb4 Qxa6 67.Qf8+ Kh7 68.Qxf7+ Kh6 69.Qf8+ Kh7 70.Qe7+ Kg8 71.f5 gxf5 72.Qg5+ Kf8 73.Qxf5++- 44.Qb5 Rd6 45.Ra1 Ra6 46.Kh2 Rf6 47.Ra2 Qa7 48.Qb2 Ra6 49.Qe5 Re6 50.Qf4 Kg7 51.Qc4 Ra6 52.Qc3+ Kh7 53.Qe3 Qa8 54.Qf4 Qd5 55.Rd2 Qe6 56.Qg5 Qe1 57.Qd5 Qe7 58.Qa2 Qa7 59.Rd5 Rf6 60.Kg1 Rf3 61.Kg2 Rf6 62.Rd8 Qc7 63.Qd2 Kg7 64.Kg1 Qe5 In case of 64...Qc5 White has 65.Rd3 Kh7 66.Qb2 Re6 67.Rf3 Qc7 68.Kh2 Qa7 69.Rf4 Qc7 70.Qb5 Qa7 71.Qd5 Qc7 72.Rc4 Qa7 73.Qc5 Qxc5 74.Rxc5 Re4 75.Rc7 Kg7 76.a6 Ra4 77.a7+- 65.Qb4 Kh7 66.Qd4 Rf5 67.a6 Qxd4 68.Rxd4 Ra5 69.Rd6+- 37.Ra2 Ra5?!
Better is 37...Kh7 38.a5 Ra6 White should apply the methods of the previous analysis here. However, as we know, win is not easy. 38.Qc7? In my opinion, this is one of the most important moments in this game, which not a single commentator I know paid attention to. It is interesting that in the first edition of MGP Kasparov (1) evaluates this move "!". In the second edition (2), Kasparov does not give any evaluation. Alekhine (3) does not even pay attention to this move. My analysis shows that with a move in the game, white spoils the win! 38.Qe1 Kasparov (2) considers this move interesting. And this move is actually a mistake that gives Black a chance for salvation: Qb6 38...Qf5 is a good alternative: also here Black has a good chance to make a draw: 39.Ra3 Qd5 40.Qc3+ Kg8 41.Qa1 Kh7 42.g3 Qc6 43.Kh2 Rf5 44.Qa2 h5 45.h4 Qc7 46.Re3 Qc6 47.Kg1 Rd5 48.Qb3 Rf5 49.Rd3 Qf6 50.Qa2 Qc6 51.Qb2 Rc5 52.Qb3 Kg7 53.Qb2+ Kh7 54.Rd1 Rc2 55.Qd4 Rc4 56.Qe5 Qf3 57.Rb1 Qd3 58.Qb5 Qd4 59.Qb3 Rxa4 60.Qxf7+ Qg7 61.Qe8 Ra1 62.Rxa1 Qxa1+= 39.g3 h5 40.h4 Qa7 41.Qc3+ Kh7 42.Rd2 Rc5 43.Qb3 Rf5 44.Qb2 Qc7 45.Rd3 Qe7 46.Rd1 Qc7 47.Ra1 Qa7 48.Qd2 Ra5 49.Qa2 Qd7 50.Qc4 Rf5 51.Qc3 Qa7 52.Qb2 Rd5 53.Qb3 Rf5 54.Ra2 Ra5 55.Qd1 Qa8 56.Qd7 Qf3 57.Qc7 Qd1+ 58.Kh2 Qd5 59.Ra1 Qf5 60.Kg2 Qe4+ 61.Kg1 Qd5 62.Qf4 Qb3 63.Qe4 Kg7 64.Kg2 Kh7 65.Qf3 Qc4 66.Qd1 Qb4 67.Ra2 Qb7+ 68.Qf3 Qe7 69.Kh2 Qa7 70.Qd1 Rf5 71.Kg1 Ra5 72.Qb3 Qd7 73.Ra1 Qa7 74.Kg2 Kg7 75.Qc2 Kh7 76.Kh2 Qd7 77.Ra3 Qa7= Why cannot White win this position? The reason is simple: Black's heavy pieces stand as best as possible, and White cannot improve the position. Petronijevic 38.Qa1! It is interesting that Kasparov (1) evaluates this move as interesting, while in the second edition (2) "there is no confidence in this move". According to my analysis, this move is excellent and wins the game. Qxa1+ 39.Rxa1 "Such positions are not convincing because of Kf6 White wins in the following way: 40.Kf1! The move is logical: White includes his King into play. And now follows an interesting analysis. Kasparov (2) suggests 40.f3 which is, in fact a mistake after which Black has even play. Ke5 40...Kg5 also leads to an even play - Petronijevic. 41.Kf2 Kd4 Petronijevic: ? Black now makes a mistake after which he is lost. After 41...Kf4! pozicija je objektivno remi: the position is objectively drawn: 42.g3+ Kf5 43.Ke3 f6 44.Ra2 h5 45.Ra3 Kg5 46.Ra1 Kf5 47.Ke2 Kg5 48.f4+ Kf5 49.Kf3 g5 50.Ra3 gxf4 51.gxf4 Kg6= Petronijevic 42.Ke2 Petronijevic: ? One more mistake in this analysis. White should have played 42.Re1 and after a proper play, he should win: Kd5 43.Re4 Rc5 44.Re7 f6 45.Re2 Ra5 46.Re4 Rc5 47.Rg4 g5 48.Re4 h5 49.Re1 Ra5 50.Ra1 Kd4 51.Ke2 h4 52.Kd2 Kd5 53.Ke3 Ke6 54.Kd4 Kd6 55.f4 Ke6 56.Ke4 Kf7 57.Kd3 Ke6 58.fxg5 fxg5 59.Re1+ Kf7 60.Re4 Rc5 61.Rc4 Re5 62.Kc3 Ke6 63.Rd4 Re3+ 64.Kb4 Re2 65.a5 Rxg2 66.a6 Ke5 67.Rd3 Rf2 68.Re3+ Kf4 69.a7 Kxe3 70.a8Q+- Petronijevic 42...Kc3 Petronijevic: ? In this analysis, there are a lot of mistakes, indeed. After 42...h5 Black cannot lose 43.Ra3 h4 44.Re3 f5 45.Ra3 f4 46.Kd2 Kc4 47.Kc2 Rg5 48.a5 Rxg2+ 49.Kd1 Rg1+ 50.Ke2 Rg2+ 51.Kf1 Rb2 52.a6 Rb1+ 53.Kf2 Rb2+ 54.Ke1 Rb1+ 55.Kd2 Rb2+ 56.Kc1 Rb8 57.a7 Ra8 58.Kb2 Kd4 59.Kc2 Kc4 60.Ra1 Kd4 61.Kd2 Kc4 62.Ra4+ Kb5 63.Ra2 Kc4 64.Ke2 Re8+ 65.Kf1 Ra8 66.Ra1 Kc3 67.Kf2 Kd2 68.Ra2+ Kc3 69.Ra3+ Kb4 70.Ra1 Kc3= Petronijevic 43.Rc1+ Petronijevic: ? One more mistake. 43.Ke3+- wins ZP 43...Kd4 43...Kb4? 44.Rc7+- Kasparov (2) 44.Rd1+ Ke5 45.Ra1 Kd4 Kasparov (2) analysed Easier to a draw leads 45...Kf4 46.Kf2 h5 47.g3+ Kf5= the position is even. Petronijevic. White now has few possibilities, but all lead to even play: 46.Kd2 Actualy, Black can hold: 46.Ra3 White is trying to put Black in the zugzwang. This, however, is not possible: the position is even. h5 47.Kd2 f6 48.g3 Kc4 49.Ke2 Black has two ways to make a draw: Kb4 also leads to a draw 49...h4 50.gxh4 Kd5 it is interesting that this position is a draw with two pawns down. 51.Kf2 51.Kd2 also can not win: Kd6 52.Kd3 Kd5 53.Ke2 Ke5 54.Kf1 Kd5 55.Kf2 Kd6 56.Ra2 Ke6 57.Re2+ Kf5 58.Re4 Rc5 59.Re3 Ra5 60.Ra3 Ke6 61.Ra2 Kf5 62.Ra1 Ke6 63.Ke3 Ke7 64.Kf4 Kf8 65.Ke4 Ke7 66.Ra3 Ke6 67.Kf4 Kf7 68.Ke3 Ke7= and the win is not visible. 51...Ke6 52.h5 gxh5 53.Re3+ Kf5 54.Re4 Rc5 55.h4 Rc3 56.Re3 Rc5 57.Kg3 Ra5 58.Re4 58.Ra3 Although White's rook stands ideal, White can not put Black in zugzwang. Kg6 59.Kf4 Kg7 60.Ke3 Kg6 61.Ke4 Kf7 62.Ra1 Kg7 63.Kd3 Kg6 64.Ke2 Kf5 65.Kf2 Kg6 66.Ra2 Kf5= 58...Rd5 59.Rf4+ Ke6 60.Rb4 Ra5 61.Kf4 Kd6 62.Re4 Kd7 63.Ke3 Kd6 64.Kd3 Kd5 65.Kc3 Ra8 66.Kb3 Kd6 67.Ka3 Kd5 68.Rf4 Ke5 69.Rc4 Kd5 70.Re4 Rc8 71.Kb3 Ra8 72.Rb4 Ke5 73.Ka2 Ra7 it is not visible how White can improve his position - it is a draw. 50.Ra1 50.Re3 f5 51.Rd3 51.Re6 Rxa4 52.Rxg6 Kc5 53.Ke3 h4 54.g4 f4+ 55.Kd3 Rd4+ 56.Ke2 Ra4 57.Rf6 Kd5 58.Rf5+ Ke6= 51...Ra6 52.h4 Re6+ 53.Kd2 Kxa4 54.Rc3 Kb4 55.Rc1 Kb5= 50...Kc3 50...Kc5? is a mistake that loses 51.Ke3 Kd5 52.Rd1+ Ke5 53.Rd4 Rc5 54.Re4+ Kd6 55.Kd2 Rg5 56.g4 Rc5 57.Rb4 h4 58.Rb6+ Ke7 59.Kd3 Ra5 60.Rb4 Ra8 61.Re4+ Kd6 62.Rd4+ Ke6 63.Kc3 g5 64.f4 Rc8+ 65.Kb3 Ra8 66.Rb4 gxf4 67.Rxf4 Rd8 68.Rf3 Rd5 69.Kc4 Re5 70.Kb4 Kd7 71.a5 Kc7 72.a6 Kb8 73.Kc4 Re6 74.a7+ Kxa7 75.Kd5 Re5+ 76.Kd6 Kb7 77.Rxf6+- 51.h4 Kd4 52.Kd2 g5 53.Re1 Kd5 Not an only move but it is the easiest way to draw 54.Ra1 Ke5 55.Ke2 Kf5 56.Ke1 Ke6 57.Ra3 Ke5 58.Kf2 Ke6= 46.Kf2 This waiting move also can not give an advantage: h5 47.Kg3 Ke5 48.Ra2 f6 49.Ra3 Kd4 50.Ra1 Ke5 51.Re1+ Kd6 52.Re4 Rc5 53.Kf2 Kd5 54.Re3 Ra5 55.Ra3 Kd4 56.Kg3 Rg5+ 57.Kh4 Ra5 58.f4 Ke4 59.Kg3 Kd5 60.Ra2 Kd4 61.Ra1 Ke4 62.Re1+ Kd5 63.Rd1+ Kc5 64.Ra1 Kd5 65.Kf3 Kd6 66.Ra3 Kd5 67.g3 Kd4 68.Ra1 Kd5 69.Ke3 h4 70.gxh4 Ke6 71.Ra2 Kd6 72.Kd4 Kc6 73.Ra3 Kd6 74.Ke4 Ke6= 46...Rg5 White also has weaknesses. 47.Rg1 47.g4 Ra5 47...h5 48.Ke2 Ra5 49.Ra1 h4 50.Ra2 f5 51.Ra3 f4 52.Kd2 Rg5 This position is really amazing: due to the weakness of g2, the position is a draw. 53.a5 Rxg2+ 54.Kd1 Rb2 55.a6 Rb1+ 56.Kc2 Rb8 57.a7 Ra8 58.Kd2 Kc4 59.Ke2 g5 60.Ra5 Re8+ 61.Kd2 Rd8+ 62.Kc2 Ra8 63.Ra3 Kd4 64.Kd2 Kc4 65.Ra4+ Kb5 66.Ra1 Kc4 and White cannot win. Petronijevic 40...Ke5 41.Ke2 Kd4 42.Ra3 h5 43.Kf3 Black has two ways for the defense, both insufficient, though. Kd5 43...g5 44.Ra1 Step by step, White can put Black into zugzwang: f6 45.Ke2 h4 46.Kd2 Rf5 47.f3 Ra5 48.Kc2 Kc4 49.Re1 Kd5 50.Re4 Ra6 51.Rb4 Re6 52.Kd2 Kc5 53.Re4 Rb6 54.Kc2 Kd6 55.Rd4+ Kc5 56.Rg4 Ra6 57.Kc3 Kd5 58.Rc4 f5 59.Kb3 Ra8 60.Rc2 Rb8+ 61.Kc3 Rc8+ 62.Kd3 Ra8 63.Ra2 Ra5 64.Kc3 Kc5 65.Kb3 Kb6 66.Re2 66.Kb4 is a human move - the Rook behind the pawn. Re5 67.Kc4 Ra5 68.Kc3 Kc7 69.Kb4 Rd5 70.a5 g4 71.Kc4 Rd8 72.Re2 g3 73.Rb2 Ra8 74.Ra2 Rd8 75.Kc3 Rd1 76.Kc2 Rg1 77.Kd3 Re1 78.Kd2 Rb1 79.Ke3 Rb4 80.Kd3 Rb1 81.Kd4 Re1 82.Rb2 Kd6 83.a6 Ra1 84.Rb6+ Kc7 85.Rh6 Ra2 86.a7 Kb7 87.Ke5 Rxg2 88.Rxh4 Ra2 89.Rh7+ Kc6 90.Kxf5 g2 91.Rg7 Rxa7 92.Rxg2+- 66...Rd5 67.Kc3 Rc5+ 68.Kd4 Ra5 69.Rc2 Kb7 70.Rc4 Kb6 71.Kd3 Ka7 72.Rb4 Rd5+ 73.Ke2 Ka6 74.Rb8 Re5+ 75.Kd3 Rd5+ 76.Kc3 Rc5+ 77.Kb3 g4 78.Rb4 gxh3 79.gxh3 Re5 80.Rf4 Ka5 81.Kc4 Kxa4 82.Rxh4+- 44.Ke3 Kd6 45.Kd4+- 38...Qa6 For Alekhine, this is: 'The only way to prevent the advance of the passed pawn.' Alekhine (3) while Kasparov (2) consider this move doubtful. As we know from the previous comment, this position is equal. Black's queen and rook are ideally placed so that white has no chance of winning if Black plays correctly. "But in my opinion, White could have been disturbed more by the attempt to set up a blockade by" 38...Rg5!? 39.Ra3 39.Kh2 Qd4 40.a5 Qd5 41.f4 Qxa2 42.fxg5 hxg5 43.Qe5+ Kh7 44.Qxg5 Qa4= Kasparov (2). 39.a5? Kasparov (2) Qf3 40.g3 Qd1+ 41.Kh2 Qb3= Kasparov (2). 39...Rf5 40.Qc2 Ra5 . Kasparov (1, 2). This position is even. ZP After 38...Qf5 Kasparov (2) Black is organizing the defence on 5th rank, and it seems that the position is even. 39.Qc3+ Kh7 40.Ra1 h5 41.h4 Rc5 42.Qb2 Qe6 43.g3 Ra5 44.Qc2 Qd7 45.Qc4 Qa7 The game move also is not bad. 39.Qc3+ Kh7 40.Rd2! Alekhine gives the following comment: "Skilfully relieving the blockade of the passed pawn. There is a threat not only of 41 Rd8 with an immediate win, but also of 41 Rd7 leading to a sustained harassment of the enemy king." Alekhine, source 1. Alekhine exaggerates the value of his tactical idea. This position is still even. Qb6 The best move. Black is waiting for what White will do. 40...Rxa4? 41.Rd8 g5 42.Qh8+ Kg6 43.Qe5 etc. was hopeless. Kasparov (1, 2) quoting Kostic's analysis. "Here the first time control was reached, and the game was adjourned." Kasparov (1, 2). It is interesting that both players, despite the analysis during the adjournment, evaluated this position as won for White. 41.Rd7
"The sealed move. The following day, during the resumption, Capablanca fought on to the last bullet..." Kasparov (1, 2). It is interesting that no one evaluated this position properly - the position is even. 41...Qb1+? With his first move after adjournment (!) Capablanca makes a decisive mistake, after which he is lost. After the best 41...Rf5 Black has good defence over 5th rank and pressure on f2 that should give him a draw. 42.Rd4 h5 43.Qe3 Qf6 44.Qd2 Kg7 45.Rc4 Qa1+ 46.Qc1 Qf6 47.Qe1 Kh7 48.g3 Qd6 49.Qe2 49.a5 Qa3 49...Qa6 and White cannot improve his position. Petronijevic. 42.Kh2 Qb8+ 43.g3 Rf5 Capablanca believed that with the rook on f5 he was simultaneously defending the f7 pawn and attacking White's f2 pawn. However, this defense is insufficient. 44.Qd4! "with the threat of 45 a5 and Rd8" Kasparov (1). Best move. V. Vukovic was absolutely right: by combining the attack on the King with the advance of the passed pawn, White wins (5). Qe8 In case of 44...Qa8 45.Kg1 Black is forced to play Qh8 46.Qxh8+ Kxh8 47.Rd2 and Black is lost. Petronijevic 45.Rd5! It interrupts Black's defense on the fifth row and allows his pawn to advance further. Kasparov (1) is right when he sais that 45.Rd8? is bad: Rxf2+ (2) 46.Qxf2 Qxd8 47.Qxf7+ Kh8= Kasparov (1). Kasparov (1). 45...Rf3 "Going into the Queen ending was, of course, hopeless." Kasparov (1, 2). Romanovsky believed that such positions are the fifth stage of the chess game and that they are characterized by both middlegame and endgame ideas. In the middlegame, we can see a sharp play, while in the endgame, technique decides. 46.h4?! Although this move does not spoil a win, stronger was 46.a5 i sada je najjace and now the strongest is Qh8 although White should win after proper play. 46...Qe2 47.Kg2 "was also feasible. However, before undertaking anything decisive, White wants to stabilise the pawn position on the kingside." (Alekhine) The quotation from (1). 47.Qb6! 47.Qxh8+? Kxh8 48.Kg2 Ra3 49.Kf1 Ra2= 47...Qc3 48.Rd6 Rf5 49.a6 Qf3 50.Rd2 Rf6 51.Qa5 Rc6 52.Qa1 Rd6 53.Ra2 Rxa6 54.Rxa6 Qxf2+ 55.Kh1 Qf3+ 56.Kg1 Qxg3+ 57.Kf1 Qxh3+ 58.Kf2 Qh4+ 59.Ke3 Qh3+ 60.Kd2 Qg2+ 61.Kc3 Qd5 62.Kb4 Qe4+ 63.Kc5 Qf5+ 64.Kc4 Qc8+ 65.Kb4 Qg4+ 66.Kb3 Qf3+ 67.Kc4 Qf4+ 68.Qd4 Qf1+ 69.Qd3 Qf4+ 70.Kb3 Qb8+ 71.Ka3+- Probably the strongest was 46.Kg2 Ra3 47.Rd7 Kasparov (1). Qa8+ 48.Kg1 Qe8 49.Kh2 Ra2 50.Ra7 Rc2 51.Qf6 Kg8 52.a5+- 46...Qh8!? In the first edition of MGP, Kasparov (1) evaluates the move with an exclamation mark, while in the second edition (Kasparov 2) he does not give any evaluation. Kasparov (1, 2) rightly believes that can not help 46...h5 because of 47.a5! Kasparov (1). Qe1 47...Qc6 48.Rd8 Qf6 49.Qxf6 Rxf6 50.Rd2+- Kasparov (2). 48.Kg2 Qc3 49.Qe4!+- Kasparov (2). 46...Qe1 is another attempt by black, but it does not help either: 47.Kg2 Qc3 48.Qe4 Rf6 A winning move is 49.a5! with the possible 49.h5 Kasparov's suggestion (2) with an exclamation mark. The move, in fact, deserves a question mark, as the following analysis shows: Qc6! Black loses after 49...Kg7 50.hxg6 Rxg6 51.a5+- Kasparov (2). 50.hxg6+ fxg6 51.Kh3 Rf7 52.a5 Qf6 53.Qe3 53.f3 Re7 54.Qd3 Qe6+ transposing to the main line. 53...Qc6 54.Qe4 Qf6 55.f3 Re7 56.Qd3 Qe6+ 57.g4 Qe1 58.Qd1 Qf2 59.Rd7 Rxd7 60.Qxd7+ Kg8 61.Qd5+ Kh7 62.Qb7+ Kg8 63.Qb8+ Kh7 64.Qc7+ Kg8 65.Qg3 Qe3 66.Qb8+ Kg7 67.Qc7+ Kg8 68.Kg2 Qe2+ 69.Kg3 Qe1+ 70.Kf4 Qd2+ 71.Ke4 Qe2+ 72.Kd4 Qf2+ 73.Kc3 Qxf3+ 74.Kb4 Qf8+ 75.Kb5 Qe8+ 76.Qc6 Qe5+ 77.Kb6 Qd4+ 78.Qc5 Qxg4= The position is even according to TBS 49...Kg7 50.h5 Qb2 51.Qe3 gxh5 52.Qd4 Qxd4 53.Rxd4 Ra6 54.Ra4 Kf6 55.Kh3 Kg5 56.Ra1 h4 57.gxh4+ Kf4 58.Kg2 Kf5 59.Kf3 Ke5 60.Ke3 Kf5 61.Ra4 Ke5 62.Kd3 Kd5 63.Ra2 Kc5 64.Ke4 Kd6 65.Kf5 Kc5 66.Ra4 Kc6 67.f4 Kd7 68.Ra2 Ke8 69.Re2+ Kd8 70.Re5 Kd7 71.Rd5+ Ke7 72.Ke5 Rc6 73.Rb5 Ra6 74.Kd4 Rf6 75.Re5+ Kd7 76.Rd5+ Kc8 77.Ke4 Re6+ 78.Re5 Ra6 79.Rf5 Ra8 80.Kd4 Kd7 81.Kc4 Rc8+ 82.Kb4 Rb8+ 83.Rb5 Ra8 84.Rb6 Rg8 85.a6 Rg1 86.Rxh6+- 47.Qb6! 47.Qxh8+ ZP ? The move is a clear mistake. Kxh8 48.Kg2 was premature because of Ra3 , when after 49.a5 Kg7 Alekhine was right that this position was not won for White, while Kasparov says: "it would have been far harder for White to win than in the game: the enemy rook is behind the passed pawn!" Kasparov in both 1st and 2nd editions. In fact, the position is even. 50.h5 Kf8 51.Kf1 Ra2 52.Re5 Kg8 53.Rb5 Kh8 54.Kg2 Ra3 55.f4 gxh5 56.Rxh5 Kh7 57.Rd5 Kg6 58.g4 Kg7 59.Kf2 Kh7 60.Rc5 Kg7 61.Rb5 Rd3= 47...Qa1 In case of 47...Qa8 decisive was 48.Rd8 Tartakover (source 2). Rxf2+ 48...Qxa4 49.Qb2 49.Qxf2 Qxd8 50.Qxf7+ Kh8 51.Qxg6 Kasparov (2) Qd2+ 52.Kh3 Qd7+ 53.Qg4+- Kasparov (1). 48.Kg2 Rf6 After 48...Ra3 White would have won by 49.Rd7 Kg8 49...Kg7 50.Qb7 50.Qc6 Alekhine (3), it is weaker due to Qf6 50...Qf6 51.Rxf7+! Qxf7 52.Qb2+ 49...Qa2 50.Qf6 50.Qb8+ 50.Qd8+ Kg7 51.Qe7 Qa2 52.Qe5+ Kh7 53.Qf6 .Kasparov (1). 50...Kg7 51.Qb7 Qf6 52.Rxf7+ Qxf7 53.Qb2+ Kasparov (2). 49.Qd4! "Now the right moment to exchange has come, as it is the white rook that will get behind the passed pawn." Alekhine (3). Kasparov (1, 2) writes: " White spends the technical stage flawlessly." It is interesting that in the English edition, Kasparov writes exactly the opposite: "White's conduct of the technical stage of the game cannot be praised too highly." It is interesting to know what is the truth? Qxd4 50.Rxd4 And now should folow Wolfram's analysis And now should folow Wolfram's analysis
1–0
  • Start an analysis engine:
  • Try maximizing the board:
  • Use the four cursor keys to replay the game. Make moves to analyse yourself.
  • Press Ctrl-B to rotate the board.
  • Drag the split bars between window panes.
  • Download&Clip PGN/GIF/FEN/QR Codes. Share the game.
  • Games viewed here will automatically be stored in your cloud clipboard (if you are logged in). Use the cloud clipboard also in ChessBase.
  • Create an account to access the games cloud.
WhiteEloWBlackEloBResYearECOEventRnd
Alekhine,A-Capablanca,J-1–01927D51130: World Ch. Match, Buenos Aires34


Wolfram Schön deals with the rook ending. He concludes:

"Besides the two main game commentaries of Alekhine and Kasparov, myriads of endgame books deal with the rook ending. Actually all endgame experts, with the notable exception of Mark Dvoretsky, have annotated it. From Rabinovich in the 1930s to Grivas (2020), including the most famous like Fine, Euwe, Levenfish/Smyslov, Averbakh, Karsten Müller in FCE or John Nunn in "Understanding Chess Endgames".

This game serves as a textbook example how to convert an extra outside passed pawn if the attacker's rook can get behind the pawn. The commentary usually starts with 54.Ra4. With the exception of Averbakh, for 95 years no one criticized any move or mentioned considerable alternatives for both sides before move 67.

So, I think, something is missing here in the endgame literature. With my investigation I think, I am able to present a bunch of new ideas, including evidence of at least 5 inaccurate moves.

  • 50.Rxd4 White has a winning position, that is undisputed.
  • 53.Rd4 It is not mandatory to put the white rook behind the passed pawn. 53.Rb5, ignoring Tarrasch's rule and keeping the rook at the side of the passed pawn, also wins quite comfortably.
  • 56...h5 Criticised by Averbakh as a principle mistake. 56...Kd5 is possible, but should transpose to the game quickly, thus refuting Averbakh's statement.
  • 57.Kd3 As the kings are in opposition, White can play a waiting move e.g. 57.Ra1. This is in accordance with winning plan outlined by theory, but shortcuts the winning process. Also the brute force approach with 57.f4+, with the idea of f4-f5, is possible.
  • 59.Ra2?! The first inaccuracy. Putting the white rook on the 2nd rank causes problems. Better is 59.Ra1.
  • 59...Kb5?! Failing to take the first chance to release the black rook from its miserable state by 59...Rf6!, which forces White to correct his set-up to stay on the winning track.
  • 60.Kb3?! Increasing the problems. Besides the direct 60.Kd4, 60.Rb2+ is also possible.
  • 60...Kc5?! Failing to take the second and best chance by 60...Rf6! This move offers fierce resistance and is a much better version of Capablanca's defensive plan in the game. White can win, but he has to work very hard.
  • 61.Kc3 Connecting the king and the passed a-pawn with 61.Ka4 also wins.
  • 62...Rd6+ The idea to defend the black pawns with the king, starting with 62...Kc6, is a serious alternative. White wins, but he should have a plan.
  • 67.f4 The traditonal commentary only starts with concrete lines. White is clearly winning and he has many ways to do so, as has been pointed out correctly before. Alekhine's self criticsim from 1932 of his play in the last stage is a bit over the top."
 
New ...
Open...
Share...
Layout...
Flip Board
Settings
MoveNResultEloPlayers
Replay and check the LiveBook here
1.d4 d5 2.c4 e6 3.Nc3 Nf6 4.Bg5 Nbd7 5.e3 c6 6.a3 Be7 7.Nf3 0-0 8.Bd3 dxc4 9.Bxc4 Nd5 10.Bxe7 Qxe7 11.Ne4 N5f6 12.Ng3 c5 13.0-0 Nb6 14.Ba2 cxd4 15.Nxd4 g6 16.Rc1 Bd7 17.Qe2 Rac8 18.e4 e5 19.Nf3 Kg7 20.h3 h6 21.Qd2 Be6 22.Bxe6 Qxe6 23.Qa5 Nc4 24.Qxa7 Nxb2 25.Rxc8 Rxc8 26.Qxb7 Nc4 27.Qb4 Ra8 28.Ra1 Qc6 29.a4 Nxe4 30.Nxe5 Qd6 31.Qxc4 Qxe5 32.Re1 Nd6 33.Qc1 Qf6 34.Ne4 Nxe4 35.Rxe4 Rb8 36.Re2 Ra8 37.Ra2 Ra5 38.Qc7 Qa6 39.Qc3+ Kh7 40.Rd2 Qb6 41.Rd7 Qb1+ 42.Kh2 Qb8+ 43.g3 Rf5 44.Qd4 Qe8 45.Rd5 Rf3 46.h4 Qh8 47.Qb6 Qa1 48.Kg2 Rf6 49.Qd4 Qxd4 50.Rxd4
One of the most famous rook endings of all time. For generations it served as a textbook example, how to convert an extra outside passed pawn, if the attacker's rook can go behind it. White is winning, there is nothing new about this. The question is more about how attack and defence should proceed. For years I have been somewhat surprised that the concrete commentary more or less started only at move 67, in a moment when everything is actually already over. While the phase between move 50 and 67 has only been acknowledged with a few words. But it is precisely at this stage that both sides have remarkable alternatives and even some improvements at their disposal. 50...Kg7 Unfortunately for Capablanca his other options fail to impress. 50...Rf5?! 51.Rf4+- 50...g5 Advancing the pawns on the kingside for counterplay is an important typical idea. Here, however, it creates more of a weakness, that White can quickly exploit. 51.hxg5 hxg5 52.a5 Ra6 53.Rd5 Kg6 54.g4 f6 55.Kf1 Re6 56.Rb5 Re4 57.f3 Re3 58.Kf2 Ra3 59.Rf5 A wonderful rook outpost. Kf7 60.Ke2+- 50...Ra6 Trying to hold back the white a-pawn on the 4th rank. 51.Kf3 f5 As Black's king is too late to rush over to the queenside, he can try to advance his kingside pawns just as well. 51...Kg7 52.Ke4 Kf6 53.Kd5+- 52.Ke3 g5 53.hxg5 hxg5 54.Kd3 Kg6 55.Kc3 Kf6 56.Kb4 The white king has arrived at its a-pawn, while the black one still has no target to attack on the kingside. White will therefore prevail shortly. E.g.: Ke5 57.Rc4 Kd5 58.Rc5+ Ke4 59.a5 Ra8 60.f3+ Kxf3 61.Rxf5+ Kg4 62.Rc5 Rb8+ 63.Ka4 Rb1 64.Rc3+- 51.a5 Ra6 52.Rd5 Alekhine: 'A harmless attempt to cut off the black king. White, however, will have to get comfortable with Rd4-a4'. So at the first opportunity Alekhine did not place his rook behind the pawn, but at the side. A fact many endgame books do not mention by simply starting in move 54. Rf6 On a6 the black rook just stares somewhat stupidly at the white a-pawn, so Capablanca takes the first chance to give it a better job, at least temporarily preventing Kg2-f3. 52...Kf6 On the other hand Black can try to prevent the white rook from switching behind its pawn by keeping the a5 under the pressure of the black rook on a6. 53.Rb5 Ke7 54.Kf3 Kd7 55.Ke4 Kc7 56.Kd4 The result is that White can quickly get a dominant king and Black has no other idea than to move his rook anyway. However, it will no longer have rosy prospects, e.g.: Rd6+ 57.Rd5 Re6 58.Rc5+ Kb7 59.Re5 Rd6+ 60.Rd5 Rf6 61.f4 h5 62.f5 gxf5 63.Rb5+ Ka7 64.Rb6+- 53.Rd4 53.Rb5 The idea in this line is to keep the white rook at the side of its passed pawn. Against all advice from classical endgame literature, like Tarrasch's rule or the above stated quote of Alekhine. In fact White can win by this quite clearly. Rc6 53...h5 54.Rb6 Rf5 55.a6 Ra5 56.Kf3 The white king simply walks over to the queenside, while it takes a lot of time to activate the black king somehow. Ra4 57.Ke3 f6 58.Rb7+ Kh6 59.a7 g5 60.Kd3 gxh4 61.gxh4 Kg6 62.Kc3 Kf5 63.Kb3 Ra1 64.Rc7 Ke5 65.Kb4 Kd6 66.Rf7 Next White can either play Kb4-b5 or pick up the kingside pawns. Kc6 67.Rxf6+ Kb7 68.Rf5+- 53...Kf8 54.Rb6 Rf5 55.a6 Ke7 56.a7 Ra5 57.Rb7+ Ke6 The black king is better than in the previous line, but White's passed pawn and his rook are on the 7th, while his king is free. No chance for Black. 58.Kf3 Ra4 59.Ke3 f5 60.Kd3 g5 61.hxg5 hxg5 62.Kc3 Kd6 63.Rg7 f4 64.Kb3 Ra1 65.Kb4 fxg3 66.fxg3 Kc6 67.Rg6+ Kb7 68.Rxg5+- 54.Rb6 Consistently pushing the a-pawn another step further. 54.Kf3 White can also win by this, but with his pawn still on a5 this is a more tactical solution. Rc3+ 55.Ke4 Rc2 56.Kd5+- 54...Rc3 55.a6 Ra3 Here the black rook is good. In the back of the a-passer and preventing Kg2-f3. However, the rest of Black's troops are fairly helpless. 56.g4! Gaining space on the kingside, before the white king swings over. Makes life easier. h5 56...Ra4 57.Kg3 g5 58.h5 Ra3+ 59.Kg2 Ra4 60.f3 Ra2+ 61.Kf1 Kh7 62.Ke1 Ra3 63.Kd2+- 57.g5 Kf8 57...Ra4 58.f4 Rxf4 59.a7 Ra4 60.Rb7 Ra3 61.Kf2+- 58.f4 Ke7 59.Kf2 In fact Alekhine had a very similar position, ten years later in the 23rd game of his re-match with Euwe. The decisive difference is the file of the passed pawn. Against Euwe Alekhine held a b-pawn, reducing the distance of the defending king between the outside passed pawn and the pawn base on the kingside, the f7. That's why Euwe could draw that game, while here Black is totally lost. E.g.: Kd7 60.Ke2 Rh3 61.a7 Ra3 62.Rb7+ Ke6 63.Kd2 f6 64.Kc2 fxg5 65.fxg5 Kd5 66.Kb2 Ra6 67.Kb3 Kc6 68.Rg7 Kc5 69.Rxg6 Rxa7 70.Rh6+- The point of this line is this: The placement of the attacker's rook is just one element. Others are the file + rank of the passed pawn, the activity of the kings and the pawn structure on the kingside. All elements are important for the evaluation and handling of a position. In many situations it is best, if not mandatory, to play the rook ala Tarrasch behind the pawn. In this special case the rook at the side of its passed a-pawn is by no means worse. 53...Ra6 This is probably the position, most people know. 54.Ra4 At the second attempt. Placing the rook behind its passed pawn is considered the most comfortable way to win. To disable a free advance of the a-pawn, the defender's rook is sort of fixed on a6 now. Thus his counterplay is reduced, while on the other hand the attacker can work with zugzwang by waiting moves with his rook. All true, but the devil is in the detail and exactly this famous game demonstrates some of the practical difficulties for the attacker. Kf6 Capablanca's only asset is his king, which arrives at the centre first and therefore obstructs its white counterpart. 54...f5?! Again the timing for an offensive on the kingside, starting with the pawns, is completely off. 55.Kf3 g5 56.hxg5 hxg5 57.Ke3 Kg6 58.Kd4 Kh5 59.Kc5 f4 60.gxf4 gxf4 61.Kb5+- Black can resign. 55.Kf3 Ke5 56.Ke3 Establishing the opposition of the kings for the first time. A long-term dilemma for Black, because White can generate endless reserve tempi by moving his rook along the a-file. h5 Criticised by Averbakh as a mistake in principle, because of the weakening of the g5 square, an entry point for the white king into the black camp. However, it will be very hard for Black to do without this move for long. 56...Kd5 57.Kd3 In the spirit of Alekhine. Other plans with h4-h5 or g3-g4-g5 win too, but I think this is simplest. Kc5 58.Kc3 Black is already in zugzwang. 58.Rf4 This is a bit hasty, as Black can set up a nasty trick. Kd5! 59.Rxf7? Instead White has to return by Rf4-a4. Ke6!= 58...Kc6 Retreating gives ground to the white king and more or less just delays the problem of zugzwang. 58...Kb5 59.Rf4 f5 60.h5!+- The demolition move. 58...h5 Transposing to the game and thus accepting the standard pawn set-up is best. 59.Kc4 Kc7 60.Kb5 Re6 61.a6 Kb8 62.Rc4 Re2 63.Rf4 f5 64.h5! The demolition move again. Re5+ 65.Kc6 gxh5 66.Kd6 Ra5 67.Ke6 Rxa6+ 68.Kf7!+- I suppose Capablanca sensed the devasting effect of the demolition move and thus stabilised his kingside pawns early. 57.Kd3 Alekhine's idea is to first come closer to his a-pawn with Ke3-d3-c3, before fighting for the opposition. However, as the decision is made on the kingside, White has two very attractive alternatives to challenge the black king immediately. 57.f4+ Brute force. Maybe not elegant, but it is very easy to play for White from here. His king strives for the opposite direction of its colleague. Kd5 57...Kf5 58.Kd4 Kg4 59.Ra3 f6 60.Kc5 g5 61.fxg5 fxg5 62.hxg5 Kxg5 63.Kb5 Ra8 64.a6 Kg4 65.a7 Kh3 66.Kc6 Rg8 67.a8Q Rxa8 68.Rxa8 Kxg3 69.Rg8+! Knowledge of this technique is necessary. Kf3 70.Rh8 Kg4 71.Kd5+- 58.f5! A key pawn move to break up Black's kingside. A motiv from the game at a much later stage. gxf5 58...Ke5 Back into the opposition. 59.fxg6 fxg6 60.Ra3 Waiting move. The swap of the f-pawns will make it easier for White to invade the black kingside. Kd5 61.Kf4 Kd4 62.Kg5 Ke4 63.Rb3 Kd4 64.Rb6 Rxa5+ 65.Kh6! g5 66.hxg5 Ra3 67.Kxh5 Rxg3 68.Rb5+- 59.Kf4 Ke6 60.Ra1 60.Kg5? But not this hasty grab of the h-pawn, it ruins the win. Ke5 61.Kxh5 Kf6 To release his king from the edge, White has to give up his a-pawn in an undesirable way. 62.Kh6 Ra8 63.Kh7 Ra6 64.Ra3 Ke7! 65.Rf3 Rxa5 66.Kg7 Re5! 67.h5 Re4 68.Rf4 Re5 69.Ra4 Re4! 70.Rxe4+ fxe4 White has still some advantage in the upcoming queen ending, but it is a therotecial draw. 71.h6 e3 72.h7 e2 73.h8Q e1Q 74.Qf8+ Kd7 75.Qxf7+ Kc6 76.g4 Kb5 77.g5 Ka4 60...Kf6 61.Ra3 Waiting move, this time to transfer the rook to the 5th rank. Ke6 62.Re3+ Kf6 63.Re5 Kg6 64.Rxf5 Rc6 65.Rg5+ Kh6 66.Rb5 Rc3 67.a6 Ra3 The black rook has found its way into the back of the white a-passer, but its pressure on the g3 is not big enough to hinder the white king. 68.Rb6+ Kg7 69.Ke5! Rxg3 70.Kd6 Kg6 71.a7 Ra3 72.Kc7+ Kf5 73.Kb7 Rxa7+ 74.Kxa7 Kg4 75.Rb4++- 57.Ra1 The typical waiting rook move, at once. I think, this is the most principled way to handle the position, as it shortcuts the winning process. f6 To cover the hole g5. 57...Kf5 Clearing the way for the white king to the queenside is without a chance. 58.Kd4 g5 59.hxg5 Kxg5 60.Kc5 Kg4 61.Kb5 Ra8 62.a6 Kf3 63.Ra2+- 57...Kd5 If Blacks tries to preserve his pawn structure, the white king can infiltrate deep into his position. 58.Kf4 Ke6 59.Kg5 Ke7 60.Kh6 Kf8 61.Ra3 Kg8 62.Ra4 Two waiting moves to improve the rook, before continuing with the king's action. Kf8 63.Kh7 Ke7 64.Kg7 Ke6 65.Rf4 Rxa5 66.Rf6+ Ke5 67.Rxf7 Ra6 68.f4+ Ke4 69.Rf6+- 58.Ra4 Kd5 58...g5 The alternative is to hold the opposition as long as possible and then to look for counterplay on the kingside. 59.Kd3 Kd5 60.Ra1 gxh4 61.gxh4 Ke5 62.Kc4 Kf4 63.Kb5 Ra8 64.a6 f5 65.a7 Kf3 66.Ra2 f4 67.Kc6 Kg2 68.Kb7 Re8 69.a8Q Rxa8 70.Rxa8 Kxf2 71.Rh8+- The white king is not even needed on the kingside. 59.Kf4 As the route via g5 is closed, simply walking in with his king is not possible anymore. However, White can cut a path with his pawns. Ke6 59...Kc5 60.g4 Kb5 61.Ra1 hxg4 62.Kxg4 Kc4 63.f4 Kc3 64.f5 gxf5+ 65.Kxf5 So it happened. Kb2 66.Rf1 Rxa5+ 67.Kg6+- 60.g4 In fact White has several ways to proceed. Alternatively he can play f2-f3 first, with the idea of g3-g4 h5xg4, f3xg4 and then h4-h5 g6xh5, g4xh5. Which in the end results in the same pawn structure as after the text move. hxg4 60...Ke7 Accepting a weak pawn on h5. 61.gxh5 gxh5 62.Kf5 Kf7 63.Ra1 Again a waiting move to force Black's king out of the opposition. He either has to allow Kf5-g6xh5 or he will be too late in the race of both kings back to the queenside. Kg7 64.Ke4 Kf7 65.Kd5 Ke7 66.Kc5 Kd7 67.Kb5 Ra8 68.a6 Kc7 69.a7 Kb7 70.Ra6+- 61.Kxg4 Kf7 62.f4 White will exchange his f-pawn for Black's g-pawn, giving him a second outside passed pawn on the h-file. Kg7 62...Ke6 Can not prevent White's idea. 63.f5+ gxf5+ 64.Kf4 63.f5 Kh6 64.Kf4 gxf5 65.Kxf5 Kh5 66.Ra1 Kh6 66...Kxh4 67.Ra3+- With a nice zugzwang. 67.Ra2 Kh5 68.Ra4 A rook triangulation, abusing the respective position of the rooks to the extreme. Kh6 69.Ke4 Kg6 70.Kd5 f5 71.Ke5! 71.Kc5? It is never too late to spoil things. f4! 72.Kb5 Rf6! 73.a6 f3= 71...Ra8 72.a6 Ra7 73.Ra1+- 57...Kd5 58.Kc3 Kc5 59.Ra2?! The idea of a waiting move is good and putting the rook on the 2nd rank seems to protect the f2. However, in fact it achieves exactly the opposite. Thus Alekhine is on the way to inflict a problem on himself. 59.Ra1 Has the same waiting effect, but avoids tricks. So it is more accurate. Rc6 A try to exploit the defencelessness of the f2. 59...Rf6?! 60.a6+- 59...Kb5 60.Kd4 Rd6+ 61.Ke5 Re6+ 62.Kf4 Rf6+ 63.Kg5 Rxf2?! 64.a6+- In both cases the a-pawn goes through. 60.Kd3 60.a6?! In this moment it is a bit dubious, as it allows Black to establish a more tenacious defensive set-up. Kb6+ 61.Kd4 Ka7 Here White has to spend a tempo to prepare Kd4-e5-f4-g5. 62.Ra2 Re6 The black king has blocked the a-pawn, while the black rook builds a barrier for the white king along the e-file. White is still winning, but how to overcome this resistance will be talked about in the 60...Rf6-line later. 60...Ra6 61.Ke4 Kb5 Other defences like Kc5-d6-e7 or f7-f6 have been discussed in the 57.Ra1-line. 62.Kf4 Rf6+ 63.Kg5 Rf5+ 64.Kh6 Ka6 65.Ra2+- That is the position from the game in move 67. Here it is Black to move, not White, but that does not make much of a difference. 59...Kb5?! This way Alekhine's inaccuracy remains hidden behind the curtain. 59...Rf6! Normally, on moves of the black rook, White's reaction is to advance his passed a-pawn. But because of the nasty Rf6-f3+, he can't do that here. In general in the endgame the attacker should avoid such counter tricks like the plague. Mainly White has two ways to fix his problem. 60.Ra4 Trying to roll back one move. 60.Kd3 Ra6 61.Ke4 Directly invading with the king, although here White has to give up his passed a-pawn earlier than in many other variations. Kb4 62.Kf4 Kb3 63.Ra1 Kb2 64.Re1! The only way to win. Rxa5 65.Re5! Ra6 66.Re2+! Kc3 67.Kg5+- But finally the white king has infiltrated. 60...Kb5 This is no better than the acceptance of the repetition, but no worse. 60...Rf3+ 61.Kd2 Rxf2+ 62.Ke3 Rb2 63.a6 Rb8 64.a7 Ra8 Eating the white pawn on f2 has taken so much time, that Black is again without a chance on the kingside, despite his pawn majority. 65.Ke4 f6 66.Ra6 Re8+ 67.Kf4 Ra8 68.Rxf6 Rxa7 69.Rxg6+- 60...Ra6 61.Ra1 see 59.Ra1 61.Rf4 Rc6+ 62.Kd4 f5 63.Ke5 Kxa5 Again White's extra outside passed pawn is gone fairly early. 64.Rd4 Rc2 65.Rd6 Re2+ 66.Kf4 Rxf2+ 67.Ke3 Rf1 68.Rxg6 Kb5 69.Rh6 f4+ 70.gxf4 Rh1 71.Rxh5+ Kc6 72.Ke4 Kd7 73.Re5 Rxh4 74.Kf5+- With an easy 'Reaching Lucena'. 60.Kb3?! 'Gaining time' was Alekhine's comment to his last move for the second time control. However, it is a serious inaccuracy, as it gives Capablanca an unexpected chance to set up a very stubborn defence. Many endgame books hide the two pairs of moves 60 and 61, leading to a repetition of the position and continue directly with Alekhine's more resolute handling from move 62 on. 60.Rb2+ Moreover this rook check would have been a better choice, in the sense of Alekhine. Black has four legal moves and three lose on the spot. Ideal for a cheap trick, while a repetition is guaranteed. Kc5 61.Ra2 60...Kc5?! This also conceals Alekhine's second inaccuracy. 60...Rxa5?! In general going to the pawn ending is a crystal clear loss, but this one needs one accurate idea from White. 61.Rxa5+ Kxa5 62.Kc4 Kb6 63.Kd5 Kc7 64.Ke5 Kd7 65.Kf6 Ke8 66.f4!+- The battering ram f2-f4-f5 it is. 60...Rf6! Now this is even more tricky than one move before. 61.Kc3! Regretting his last move and humbly returning is the only option for White to keep the win. 61.f4? Placing the white kingsside pawns like this is always commiting, due to the weakness g3. So, I think it is unlikely Alekhine would have played it. However older engines like Fritz 15, Komodo 9 or Stockfish 8 give it as the best move. In fact, it already spoils the white win in an instructive way. Ka6! 62.Kc4 Rf5! Black builds a barrier with his rook along the 5th rank. 63.Kd4 Rb5! 64.Ra3 Rf5! 65.Ke4 Rb5 In order to make progress, White has to give up his a-pawn in one way or the other. Howsoever he does it, the black king can go back to the kingside just in time. 66.Rd3 66.Kf3 Or White can first exchange his g-pawn. Rc5 67.g4 hxg4+! 68.Kxg4 Rh5 69.Re3 f5+ 70.Kg3 Kxa5 71.Re6 Rh6 72.h5 Rxh5 73.Rxg6 Kb5 74.Rg5 Rh8 75.Rxf5+ Kc6 76.Re5 Kd6= Frontal defence. 66...Rxa5 67.Rd7 67.Rd6+ Kb7 68.Rd7+ Kc8 69.Rxf7 Ra3! 70.f5 gxf5+ 71.Kf4 Ra4+! It is all about the weak g3. 72.Kg5 Rg4+ 73.Kxh5 Rxg3 74.Rxf5 Kd7 75.Rg5 Rh3= 67...Ra3! Here, too, counterplay against the weakling is the only way. 67...Rf5? 68.Rd5 Rf6 69.f5!+- 68.f5 gxf5+! 68...Rxg3? 69.f6!+- 69.Kf4 Ra4+! 70.Kxf5 Rg4 71.Rd3 71.Rxf7 Rxg3 72.Rh7 Rb3 Here Black must switch to a lateral defence to push the white king away from the kingside. 73.Kg6 Rb6+ 74.Kxh5 Rb5+!= 71...Rg6! 72.Rb3 Ka5 73.Kf4 Ka6 74.Rb8 Rf6+! 75.Ke4 Rg6 76.Kf3 Rf6+ 77.Kg2 Rc6 78.Rb3 Rg6 79.Rf3 Rg7 80.Rf5 Rh7 Ugly, but just barely viable. 81.Kf3 Kb6 82.Kf4 Kc6 83.Kg5 Kd7 84.Kf6 Ke8 Just in time. 85.Ra5 Rh6+ 86.Kg5 Rg6+ 87.Kxh5 Rxg3 88.Kh6 Ke7 89.h5 Kf6= 61...Ka6! Capablanca's defensive concept from the game. Black blocks the outside passed pawn with the king and defends the kingside with the rook solely. Here, however, the white king is still very far away from the black kingside and it has to find a way to overcome the resistance of the black rook. Thus in the current situation, it is way more difficult to claim a win for White than in the game. 62.Kd4 Now Black has different ways to position his rook. In general, to overcome Black's resistance White should be ready to give up his a-pawn at any time. Also he shouldn't be afraid to exchange pawns on the kingside. As long as he remains with at least one last decisive pawn, obviously. Re6 A rook barrier along the e-file. 62...Rf5 A rook barrier along the 5th rank. 63.Ke4 Zugzwang, allowing White a little bit of immediate progress. Kb7 63...f6 64.f4 Because of the black weakness on g6, now f2-f4 is more helpful for White. Rb5 65.Ra3 Rc5 66.Rd3 f5+ 67.Ke3 Rc6 68.Kd4 Kxa5 69.Ke5+- 63...Rb5 64.Ra3 The rook transfer to f3 causes the collapse of Black's system quickly. Rb2 65.Rf3 Re2+ 66.Kf4 f6 67.g4! hxg4 68.Kxg4 Re4+ 69.Rf4 Re6 70.h5 gxh5+ 71.Kxh5 Kxa5 72.Kg6+- 64.a6+ Ka7 65.f3 White now calmly sets up on the kingside to drive the black rook from f5 and finally attack the black f7-pawn. Rf6 65...Rb5 66.Rd2 Rf5 67.Rd6 Kb8 68.g4 hxg4 69.fxg4 Ra5 70.Kf4 Kc7 71.Rf6+- 66.Ra3 Rf5 67.g4 Rb5 68.Kf4 Rc5 69.Kg3 Rb5 70.Ra4 hxg4 70...Rc5 71.Rf4 f5 72.gxh5 gxh5 73.Ra4 Rc3 74.Kf4+- 71.fxg4 Rb3+ 72.Kf4 Rb5 73.g5 Rc5 74.Kg4 Rc1 75.Rf4 Rc7 76.h5! Integrating the king again. gxh5+ 77.Kxh5 Kxa6 78.Kh6 Kb5 79.Kg7+- 63.Kd5 Re7 63...Rf6 This is switching to a third set-up, also not possible in the game. A barrier on the 6th rank by the black rook and pawns on f6 plus g6. 64.Ke5 Re6+ 65.Kf4 f6 However, now the g6 is weak once more. 66.Rd2 Kxa5 67.Rd8 Re5 68.Rg8 Rf5+ 69.Ke4! Rxf2 70.Rxg6 Kb6 71.Rh6 Kc7 72.Rxh5 Kd7 73.Rf5 Everything is just in time for White. Re2+ 74.Kf3 Re1 75.Kf2 Re6 76.Rf3 Ra6 77.Re3! Because of this cut-off the black king is denied to come over to the kingside. Ra4 78.Kf3 Kd6 79.h5 Ra1 80.Kf4 Rf1+ 81.Rf3 Rh1 82.Kf5! Rxh5+ 83.Kxf6 Rh3 84.Kg6 Ke5 85.Rf5+ Ke4 86.g4+- Reaching Lucena. 64.Kd6 Re6+ 65.Kd7 After the white king has crossed the 6th rank, the white rook can be transferred to f6 next. Re4 66.Rd2 Kxa5 67.Rd6 Kb4 68.Rf6 Kc3 69.Rxf7 Kd2 70.Rf6 Rg4 71.Re6! Again a necessary cut-off for the black king. 71.Ke7? Ke2 72.Kf7 g5 73.hxg5 Rxg5= 71...g5 71...Kd3 72.Re5 Ra4 73.Ke6+- 72.hxg5 Rxg5 73.Ke7 Rf5 73...Rg4 74.Kf6 h4 75.gxh4 Rxh4 76.Kg5+- 74.f4! h4 75.gxh4 Rxf4 76.h5+- Many positions with rook+h-pawn vs rook are unpleasant, but this one is a straight forward win, because the black king is offside. After all that, I think it is fair to say that White had a lot of work to do to ensure his win in this line. 61.Kc3 61.Ka4 For so long Alekhine tried to connect his king with his a-pawn. Here he could do so, but I suppose he dismissed it, because it is just the unpopular file on the edge. Nevertheless it is a serious alternative, as White has the strong idea of Ra2-c2+ and Ka4-b5 etc. Ra7 Covering the 7th rank against a possible Ra2-c2-c7. 61...Ra8 62.Rc2+ Kd6 63.Kb5 Rb8+ 64.Kc4 Rc8+ 65.Kd3 Ra8 66.Ra2 Ra6 67.Ke4+- The rooks are back, where they started. But the white king has gained one rank, a significant progress. White can now proceed like in the 57.Ra1-line, that is with Ke4-f4 and g3-g4. 62.Rc2+ Kd5 Keeping the black king in the centre. 63.Kb5 63.Kb4 Also possible, if White does not mind to roll back several moves. Rb7+ 64.Kc3 Rc7+ 65.Kd3 Ra7 66.Ra2 Ra6 67.Ra1+- The waiting move, when the kings are in opposition. 63...Rb7+ 64.Ka6! However, the white king can go in front of its pawn, which is just for a short time. The black rook can unfold some activity from the back side. Yet, White will promote his a-pawn and Black's counterplay on the kingside will be too slow, as usual. E.g.: Rb3 65.Rc7 Rf3 66.Kb7 Rxf2 67.a6 Rb2+ 68.Kc8 Ra2 69.a7 f6 70.Kb8 g5 71.a8Q+ Rxa8+ 72.Kxa8 gxh4 73.gxh4 Ke4 74.Rh7+- 61...Kb5?! Same position as two moves before, so see the comments to Black's move 59. 62.Kd4! Alekhine's king is finally on the right way to tackle Black's kingside. Rd6+ 62...Kb4?! At this moment this is almost as pointless as taking in a5 directly. 63.Rb2+! Ka3 64.Rb7 Rf6 65.a6 Rxa6 66.Rxf7 Kb2 67.Ke5 Kc1 68.Rf6+- 62...Kc6 The major alternative. The black king tries to hurry back to safeguard the kingside. 63.Ke5 Kd7 However, one way to a white win has been demonstrated in the 57.Ra1-line already. 64.Kf4 f6 65.g4+- 63.Ke5 Re6+ 64.Kf4 Ka6 So Capablanca has managed to change the role of the defenders. However, the white king is already on f4, where it can invade to the black pawns unstoppably via f4-g5-h6. 65.Kg5 Re5+ 66.Kh6 Rf5 White is completely winning in this position. He is up a king. That is, if White gives up his a-pawn and lets his rook join the kingside attack, it is king+rook vs rook in the fight for Black's pawns. Black's king is far too far away from the action. All White has to take care of is, that at least one of his pawns remains. "Completely winning" also means White has some error margin. So after some non-optimal moves he can still prevail, even without finding a study-like solution. 67.f4 It was Alekhine himself, who first criticised this move in his book "On the Road to the World Championship" in 1932. Because now the black rook can switch back to a side defence of the f7 and enjoy a bit more flexibility. The idea of the text move is to use the f-pawn as a battering ram by f4–f5, to soften up the black pawns. Even if it is not the fastest way to victory, it is a clear and good concept, leaving Black with no realistic chance to save the game. 67.Ra4?! Even if White is wasteful with his pawns it is just a question of technique. Rxf2 68.Rf4 Rg2 69.Rxf7 Rxg3 70.Rf6+ Kxa5 71.Rxg6 Rd3 71...Rh3 72.Kxh5 Kb5 73.Rd6 Rg3 74.Kh6+- The classical cut-off on the d-file. 72.Kxh5 Kb5 73.Kh6 Both white pieces support the h-pawn, while the black king is cut off horizontally. Kc5 74.h5 Kd5 75.Kg7 Ke5 76.Rf6!+- 67.Re2 A kind of mixture of the two ideas 67.f4 and 67.Kg7, also winning easily. Rf3 67...Kxa5 68.f4! Kb6 69.Re5 Rf6 70.Kg7+- 68.Kg7 Kxa5 69.Re7 Rxf2 70.Rxf7 Rg2 71.Rf3+- 67.Kg7 Simply attacking the base of Black's pawn chain, the f7, which is probably the most natural. Rf3 68.Rd2 The Soviet master Konstantin Klaman was the first, who proposed this method in the 60s. It is considered to be the most convincing and fastest way. Kxa5 69.Rd5+ The start of a 3–move combination to transfer this rook to the f-file with tempo. Either to f4 or f6, depending on which rank the black king will move to. Kb4 70.Rd4+ Kc5 71.Rf4 Ra3 72.Rxf7 Ra6 73.Rf6+- 67...Rc5 68.Ra3 Rc7 69.Kg7 Rd7 70.f5 gxf5 71.Kh6 f4 72.gxf4 Rd5 73.Kg7 Rf5 74.Ra4 Kb5 75.Re4 Ka6 76.Kh6 Rxa5 77.Re5 Ra1 78.Kxh5 Rg1 79.Rg5 Rh1 80.Rf5 Kb6 81.Rxf7 Kc6 82.Re7 The game was adjourned here for a second time. Capablanca resigned without resumption by a letter, in which he congratulated Alekhine for becoming the new World Champion.
1–0
  • Start an analysis engine:
  • Try maximizing the board:
  • Use the four cursor keys to replay the game. Make moves to analyse yourself.
  • Press Ctrl-B to rotate the board.
  • Drag the split bars between window panes.
  • Download&Clip PGN/GIF/FEN/QR Codes. Share the game.
  • Games viewed here will automatically be stored in your cloud clipboard (if you are logged in). Use the cloud clipboard also in ChessBase.
  • Create an account to access the games cloud.
WhiteEloWBlackEloBResYearECOEventRnd
Alekhine,A-Capablanca,J-1–01927Buenos Aires m(34)

Links


Karsten Müller is considered to be one of the greatest endgame experts in the world. His books on the endgame - among them "Fundamentals of Chess Endings", co-authored with Frank Lamprecht, that helped to improve Magnus Carlsen's endgame knowledge - and his endgame columns for the ChessCafe website and the ChessBase Magazine helped to establish and to confirm this reputation. Karsten's Fritztrainer DVDs on the endgame are bestsellers. The mathematician with a PhD lives in Hamburg, and for more than 25 years he has been scoring points for the Hamburger Schachklub (HSK) in the Bundesliga.

Discuss

Rules for reader comments


Not registered yet? Register

We use cookies and comparable technologies to provide certain functions, to improve the user experience and to offer interest-oriented content. Depending on their intended use, analysis cookies and marketing cookies may be used in addition to technically required cookies. Here you can make detailed settings or revoke your consent (if necessary partially) with effect for the future. Further information can be found in our data protection declaration.