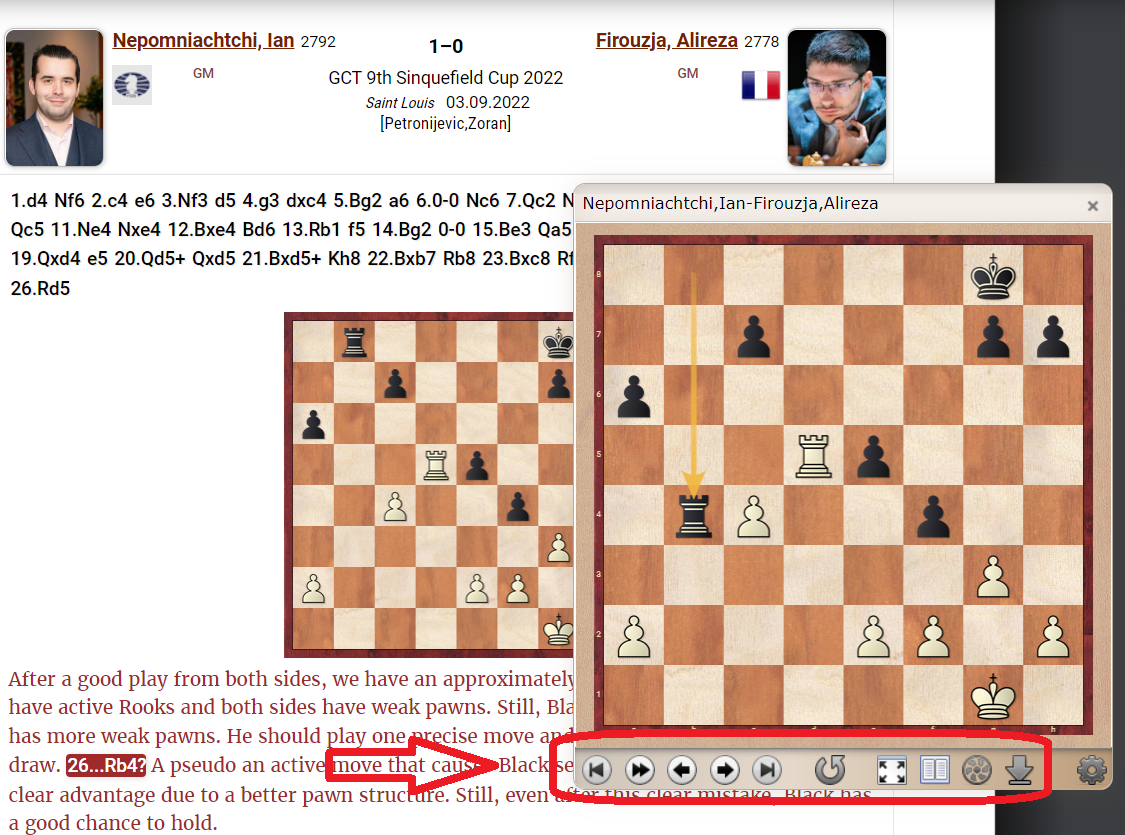
.png)

You might be inclined to believe the game notations below are just to be looked at and the moves played through in your mind. But as most of you know you can click on the moves to get a separate replay board, which you can resize and move to the best place on your screen. The popup board has full controls, and you can use the navigation buttons to advance the moves, as well as use an engine or save the game or position to your computer. In the engine window you can ask for multiple lines, or what the threat is, or see the positional evaluation of the position.
Black has two passed pawns and is certainly the one with the better chances, but White could still hold by balancing his active king and Black's own wide-open king in this fascinating queen ending.
With a single obvious check, White's fate is to be decided by which side he chooses to flee with his king. Should he try defensive measures on the king side, or aggressive on the queenside. A very instructive situation!
Activate the rook
No one is going to suggest Carlsen needs lesson in this most fundamental law of endgames with rooks, and despite being a piece down, with pawns to compensate, the World Champion's judgement is flawless.
It is hard to blame Saric for not finding such an unobvious move, but it is not a little surprising to learn that this endgame can be saved at all as the notes show. Well worth reviewing and the underpromotion to a knight is the cherry on top.
White starts with a piece up, albeit not for long as it will have to give itself up for the h-pawn, but in a sense the winning maneuver would still have left him up a piece... where it counts.