


They say a picture is worth a thousand words, and one of the most valuable annotation additions to ChessBase is the ability to add colorful arrows and highlighted squares. It is easy to gloss over, despite being even an invaluable addition to any player's arsenal. Consider this position and the comment below it:
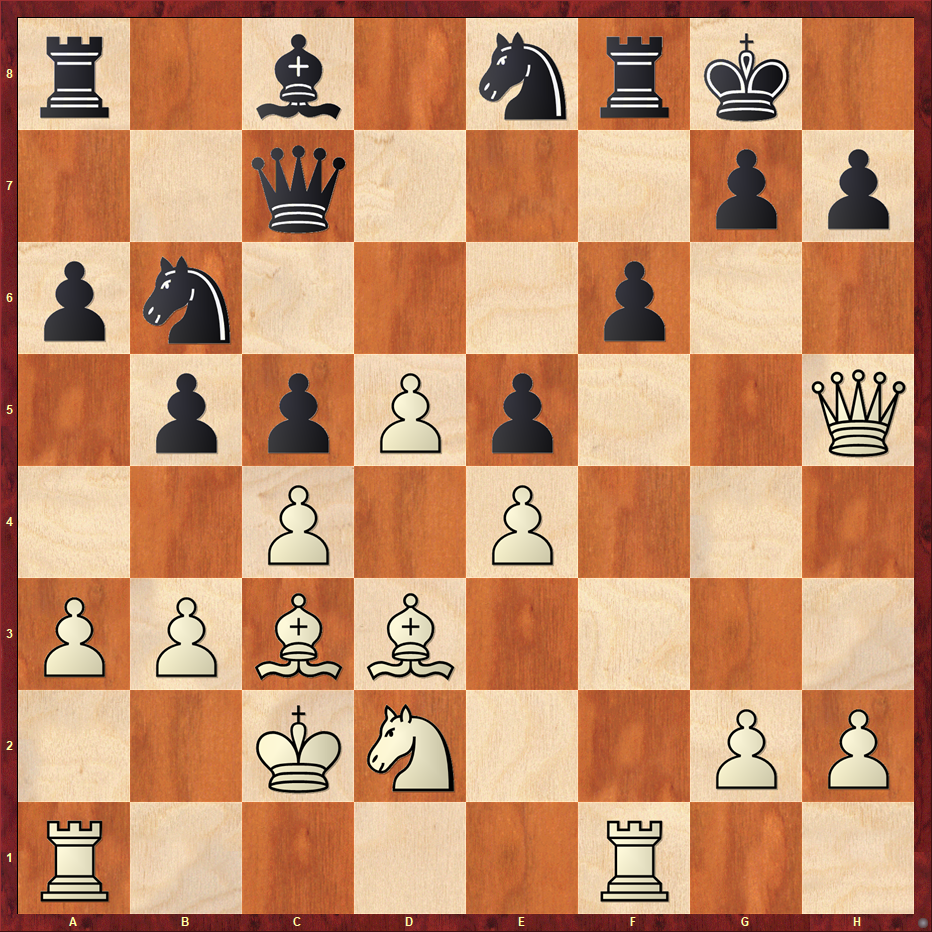
And here the plans for the two sides are clear. White will drive the g-pawn forward to attack the f6-square supported by the rook on f1, while Black will play his night to d6 where it will help mount enormous pressure on the c4-pawn and square.
The comments are clear and should not be hard to follow, but instead consider this alternative:
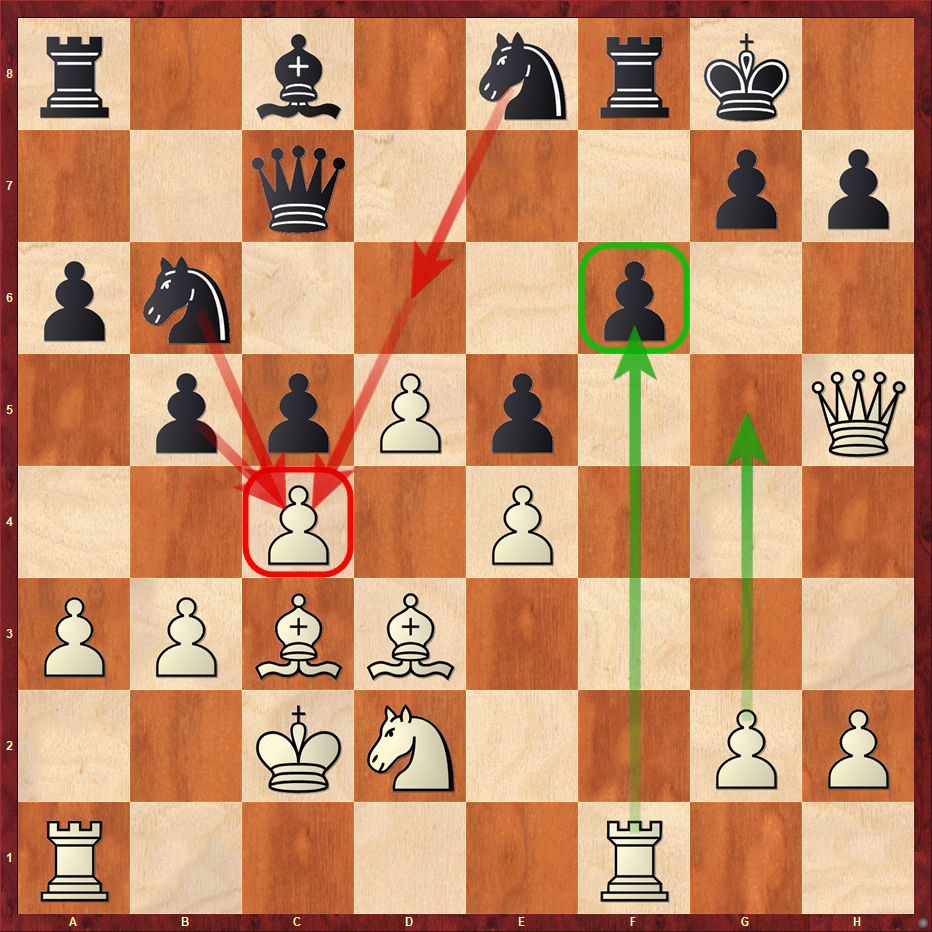
And here the plans for the two sides are clear.
It is striking how both tell the exact same story, but the second one is not only understood at a glance, but says the exact same thing as the first, albeit just a little differently.
Part of the challenge of adding and using these tools is that this time there is no menu option where I can just toss a big red circle to tell you where to click, nor is there a local menu to right click on to access for this. But don't worry, I have an incredibly easy tip for you to never forget how to use them.
The first step is to just have a board open in ChessBase or Fritz. To add a highlighted square, just press Alt on your keyboard and, while keeping it pressed, click on the square you want to highlight.
This will add a green highlight to a square. If you want to erase this, just do it again to the same square.
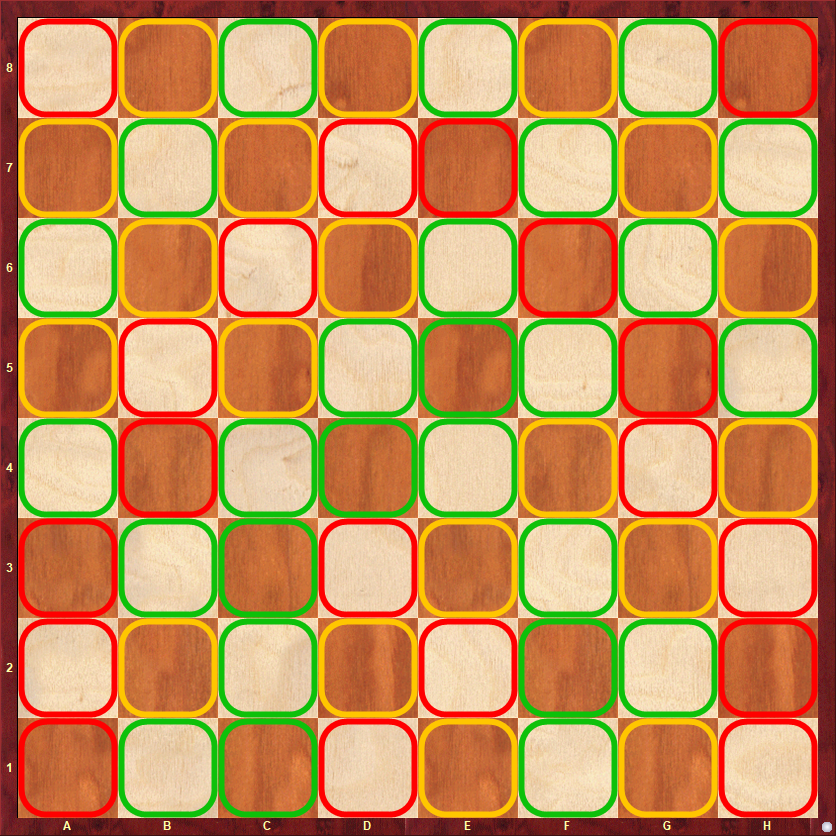
Now suppose you wanted to add a red highlight to your square, and not green. Press Alt+Shift (both keys at once) and click on the square you want to highlight.
Easy, you say? Well, adding a yellow highlight is just a matter of using the shortcut Alt+Ctrl, and this leads us to the valuable tip to remember this:
Tip - All three keyboard shortcuts start include the Alt key, so if you can remember to use the Alt key, then alone, or with Ctrl or Shift, it will allow you to add highlighted squares to the board.
If you understood and are comfortable adding highlighted squares, then the arrows will be that much easier. The principle is exactly the same, but instead of just clicking on a square you drag the mouse over the squares you want the arrow to cross.
Example: to create a green arrow from e2 to e4, press Alt then click on the e2 square and without letting go of the mouse button, drag the cursor to the e4 square and release the mouse button.
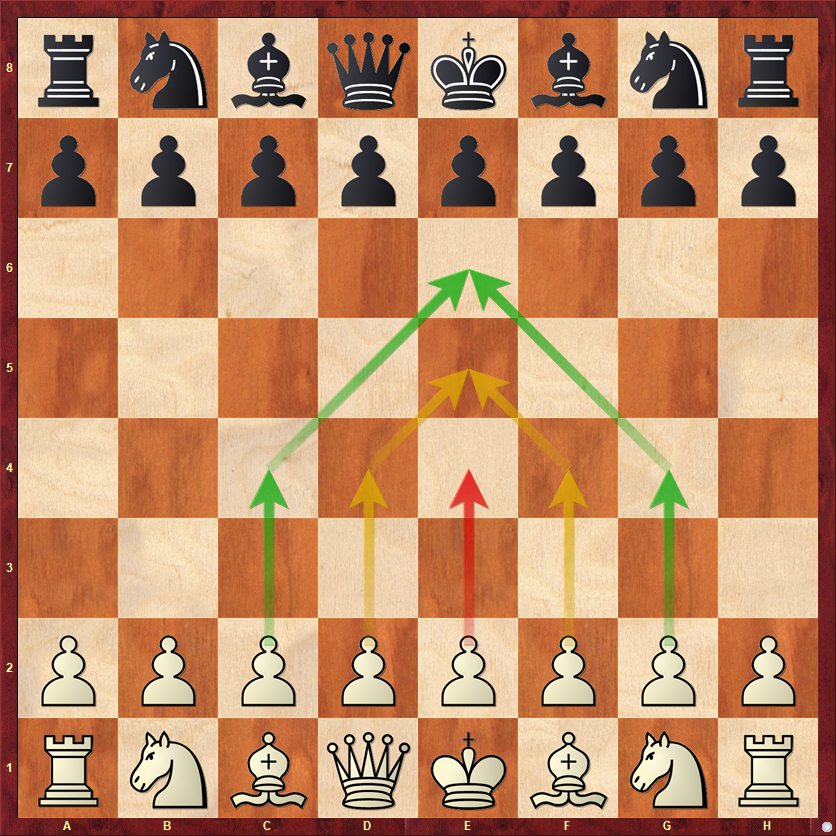
This principle will work for both yellow (Alt+Ctrl) and red (Alt+Shift) arrows as well.
Tip - The core principle for adding highlighted squares and arrows is the same: press Alt (alone or with Ctrl or Shift) and then drag the mouse cursor to the square you want the arrow to go to.
I strongly recommend you open a board and practice this a bit. If you do, you will remember how to use it that much easier.
In the next tutorial, you will learn how to create handcrafted training quiz questions.