
ChessBase 17 - Mega package - Edition 2024
It is the program of choice for anyone who loves the game and wants to know more about it. Start your personal success story with ChessBase and enjoy the game even more.
I was once at a chess competition where a somewhat inexperienced photographer, with a very nice camera, was walking around, somewhat lackadaisically snapping images with apparently no interest. I approached her and asked if she had gotten anything good, any image that she liked, and she complained that there was really nothing to it, and it was all the same. As a result, the photos she showed me did indeed all look the same, and there was no life in them.
I am quite sympathetic with the thought, but don’t agree with it, and told her as much. It is easy to get stuck with the idea of just a player portrait, or a picture of two players at the board, and envision this as a sort of photographic equivalent to Chaplin’s classic Modern Times.
The famous factory scene from Charlie Chaplin's Modern Times
If you are in charge of covering an event, then you do indeed have an obligation to the organizer and the media who depend on you, to cover all the basics. That part can certainly be repetitive, much as any job, but it is also fundamental. The top boards, the top players, all of them if there are only a few, must all appear at least once. As an editor and writer who often depends on them, nothing is more frustrating than to find yourself with a set of official images but not one of the champion. And yes, as incredible as it may sound, that has happened more than once.
Nevertheless, there are plenty of opportunities to break away from some of the drudgery, if you look around, and keep an open mind.
You may recall the suggestion to trim away the excess, and be clear on the photo’s focus. However, this same advice can be taken much further. Today’s cameras and smartphones offer such high resolution images that one could easily cut away large swathes and still have enough left to fill a high resolution screen and more. This means you can locate something interesting within the photo, possibly not what you had planned at first, and try to salvage it into a fresh photo with none the wiser.

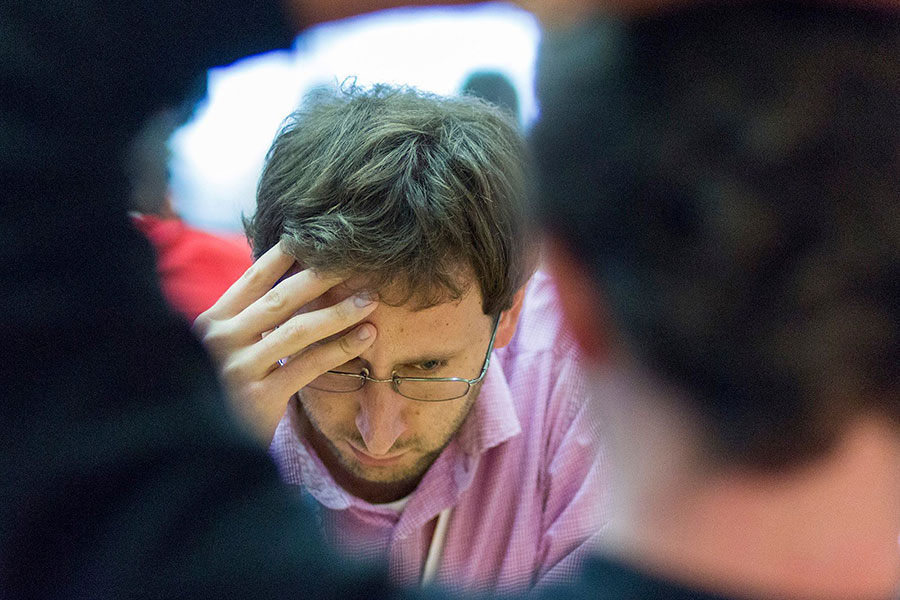
Here’s an example. In the photo above, I had just planned on a classic portrait shot of the player, and there was certainly nothing wrong with it. However, I became intrigued by the player’s glasses and the reflection in them. I then decided to trim away everything around them, and make them the focus and thus a new and second photo from the first.
“If your pictures aren’t good enough, you aren’t close enough.” – Robert Capa
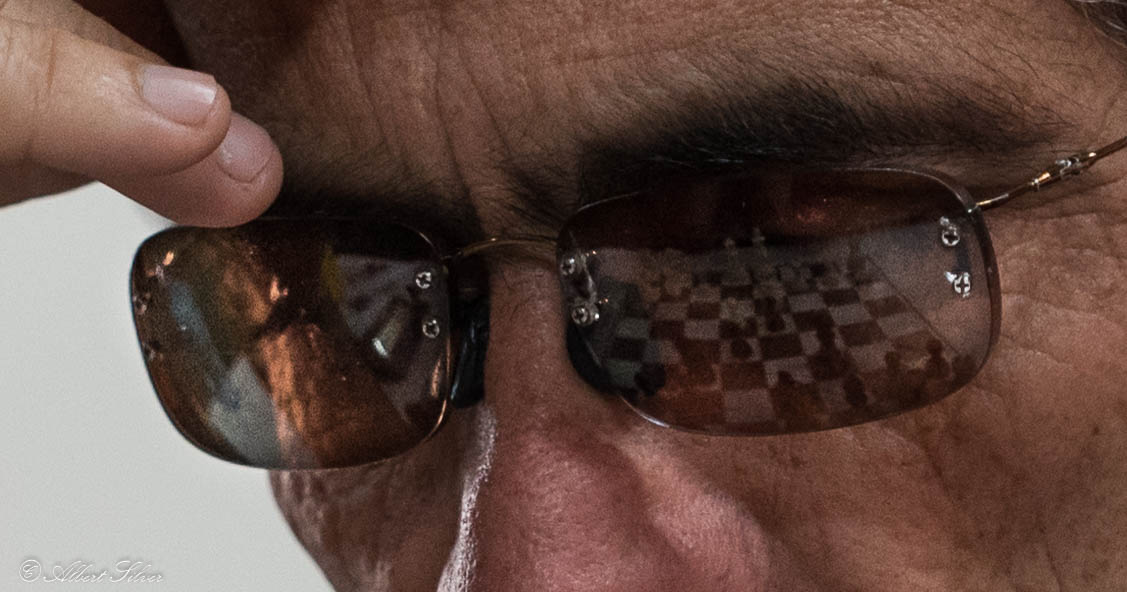
This image of the reflection in the glasses is a classic, but a good one to know. Always build up your internal portfolio of ideas.
“The more pictures you see, the better you are as a photographer.” – Robert Mapplethorpe
Trying to think out of the box can often yield good results. Even if the photo is not a success, it can lead to ideas for future ones.
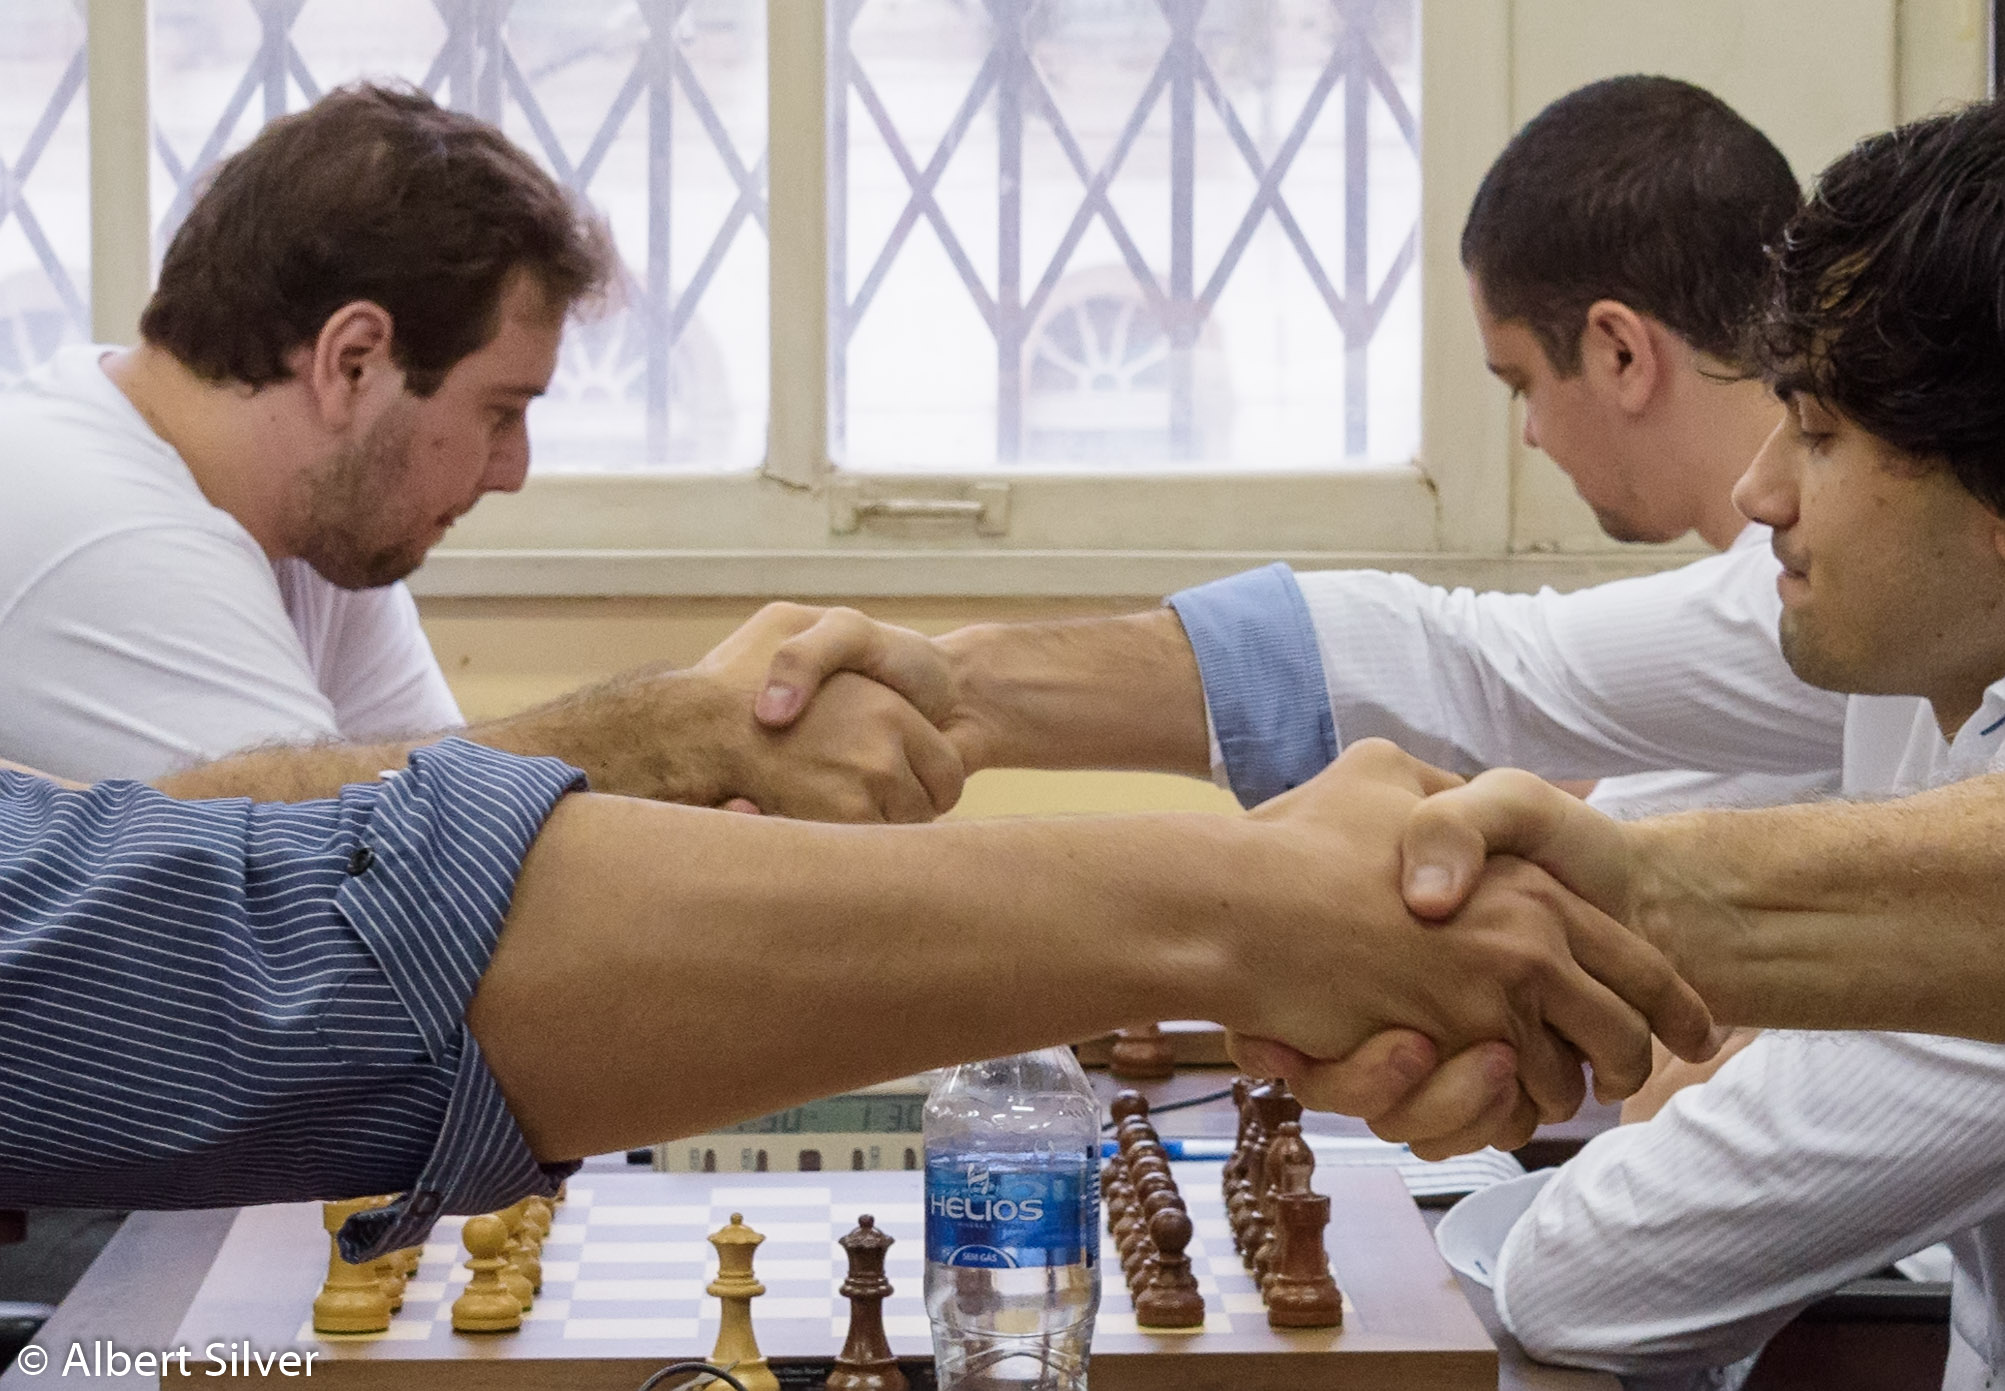
In another example, I became intrigued by the handshakes before each round at the Brazilian Championship, and decided to take it a step further. Since my interest was handshakes, they would be the focus.

This is another classic idea, using surrounding elements to frame a subject. You will find many examples and variations of this theme in photography.
Classic images include trophies, pieces and other items and closeups of other items.

Trophy shots are standard, but feel free to play around with them a bit, whether the angle or an extreme close-up.

Get your basics, but always experiment a bit. Trial and error are a part of the learning process.
Finally, never forget the humanity of the players, whether living their pain, joy or surprise on their face. Those brief glimpses can be the key to making the image. This also usually means patience and more patience. If you think many of the faces captured were the result of a lucky shot, think again. Usually, the frame is composed, and after that the photographer just waits, hoping to catch something more significant.
“There is one thing the photograph must contain, the humanity of the moment.” — Robert Frank
It would be a grave mistake to think that the photo ends after the shutter clicks and the image is saved to the memory card, or even the film. That is but the first step in the image’s life. The next step is called the post-processing, and is an essential part of the process. You can skip it, but are then missing out on an opportunity to help the photo achieve your vision. Many times, some of these simple post-processing techniques can really take an image to the next level. These effects can be achieved with many free programs, so don’t feel this is only achievable by using Adobe Photoshop or other professional software. (You'll find some suggestions at the end of this article.)
Black and White imagery is a fascinating topic, deserving an article on it alone, but beyond the specific aesthetics that it involves, there is also a more practical one: it can save a color photo. That phrase may sound like some incomprehensible Chinese proverb, but it means literally what it says. There are times when the colors in a photo just won’t work. Either they clash garishly, or are so much of a distraction that they affect the focus of the image itself. Transforming it into black and white is the most common solution for such instances.

In the photo above, the focus is the player, stretched out in deep thought. The problem is the very disruptive curtains in the rear that are unsightly with their orange/pink shade extending from end to end.
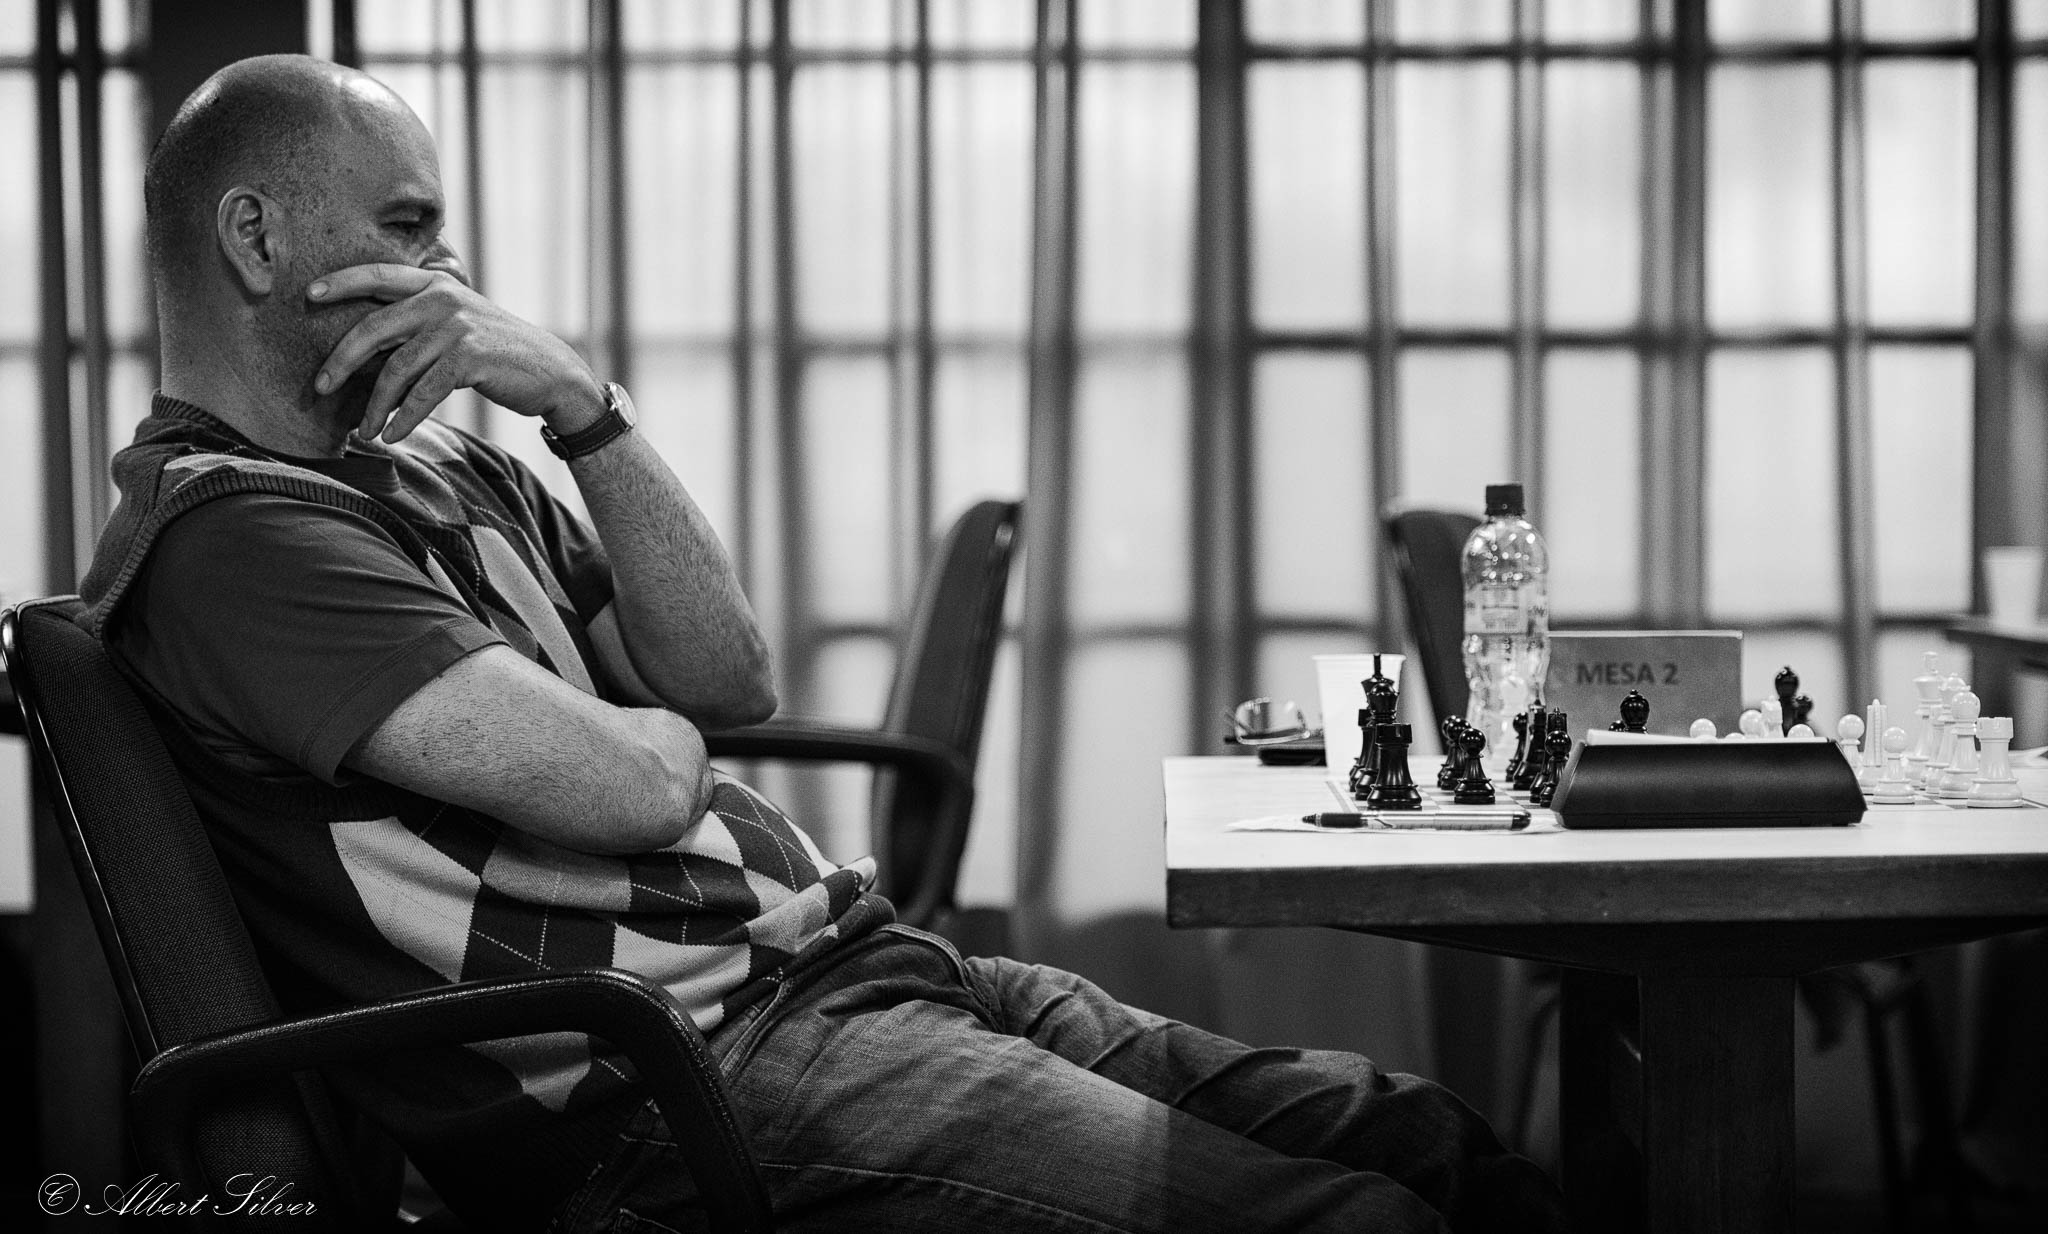
A quick switch to black and white has now neutralized the color, and returned the focus to the player. Please note that just flipping off the color is not enough to get a nice black and white result. Some work with contrast and more can bring real life to the photo.
Another trick you see is sometimes to use the brush to darken or lighten the background around the object of focus (usually the player).

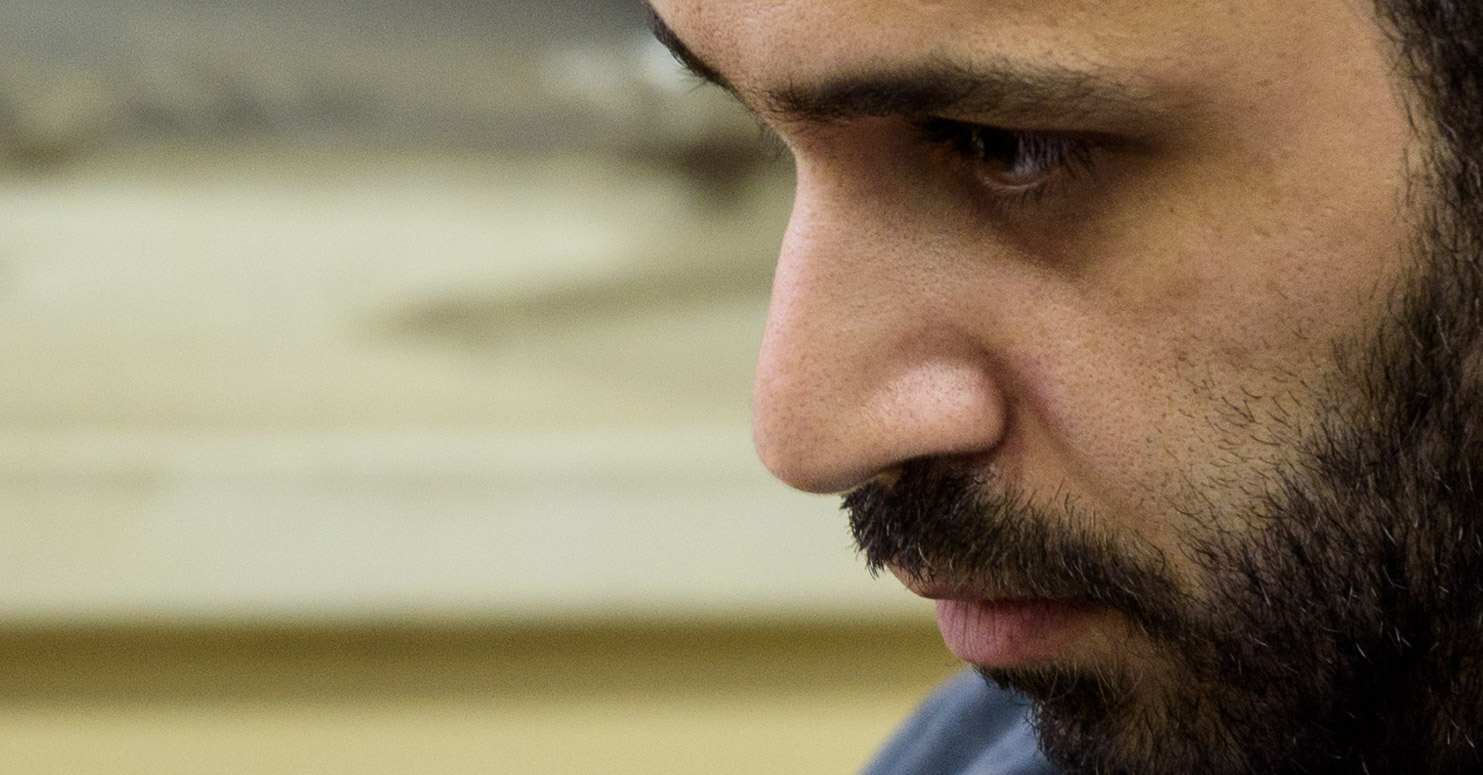
Consider the photo above of FM Hilton Rios. It is a perfectly decent portrait of him, lost in thought, and captures the moment well.
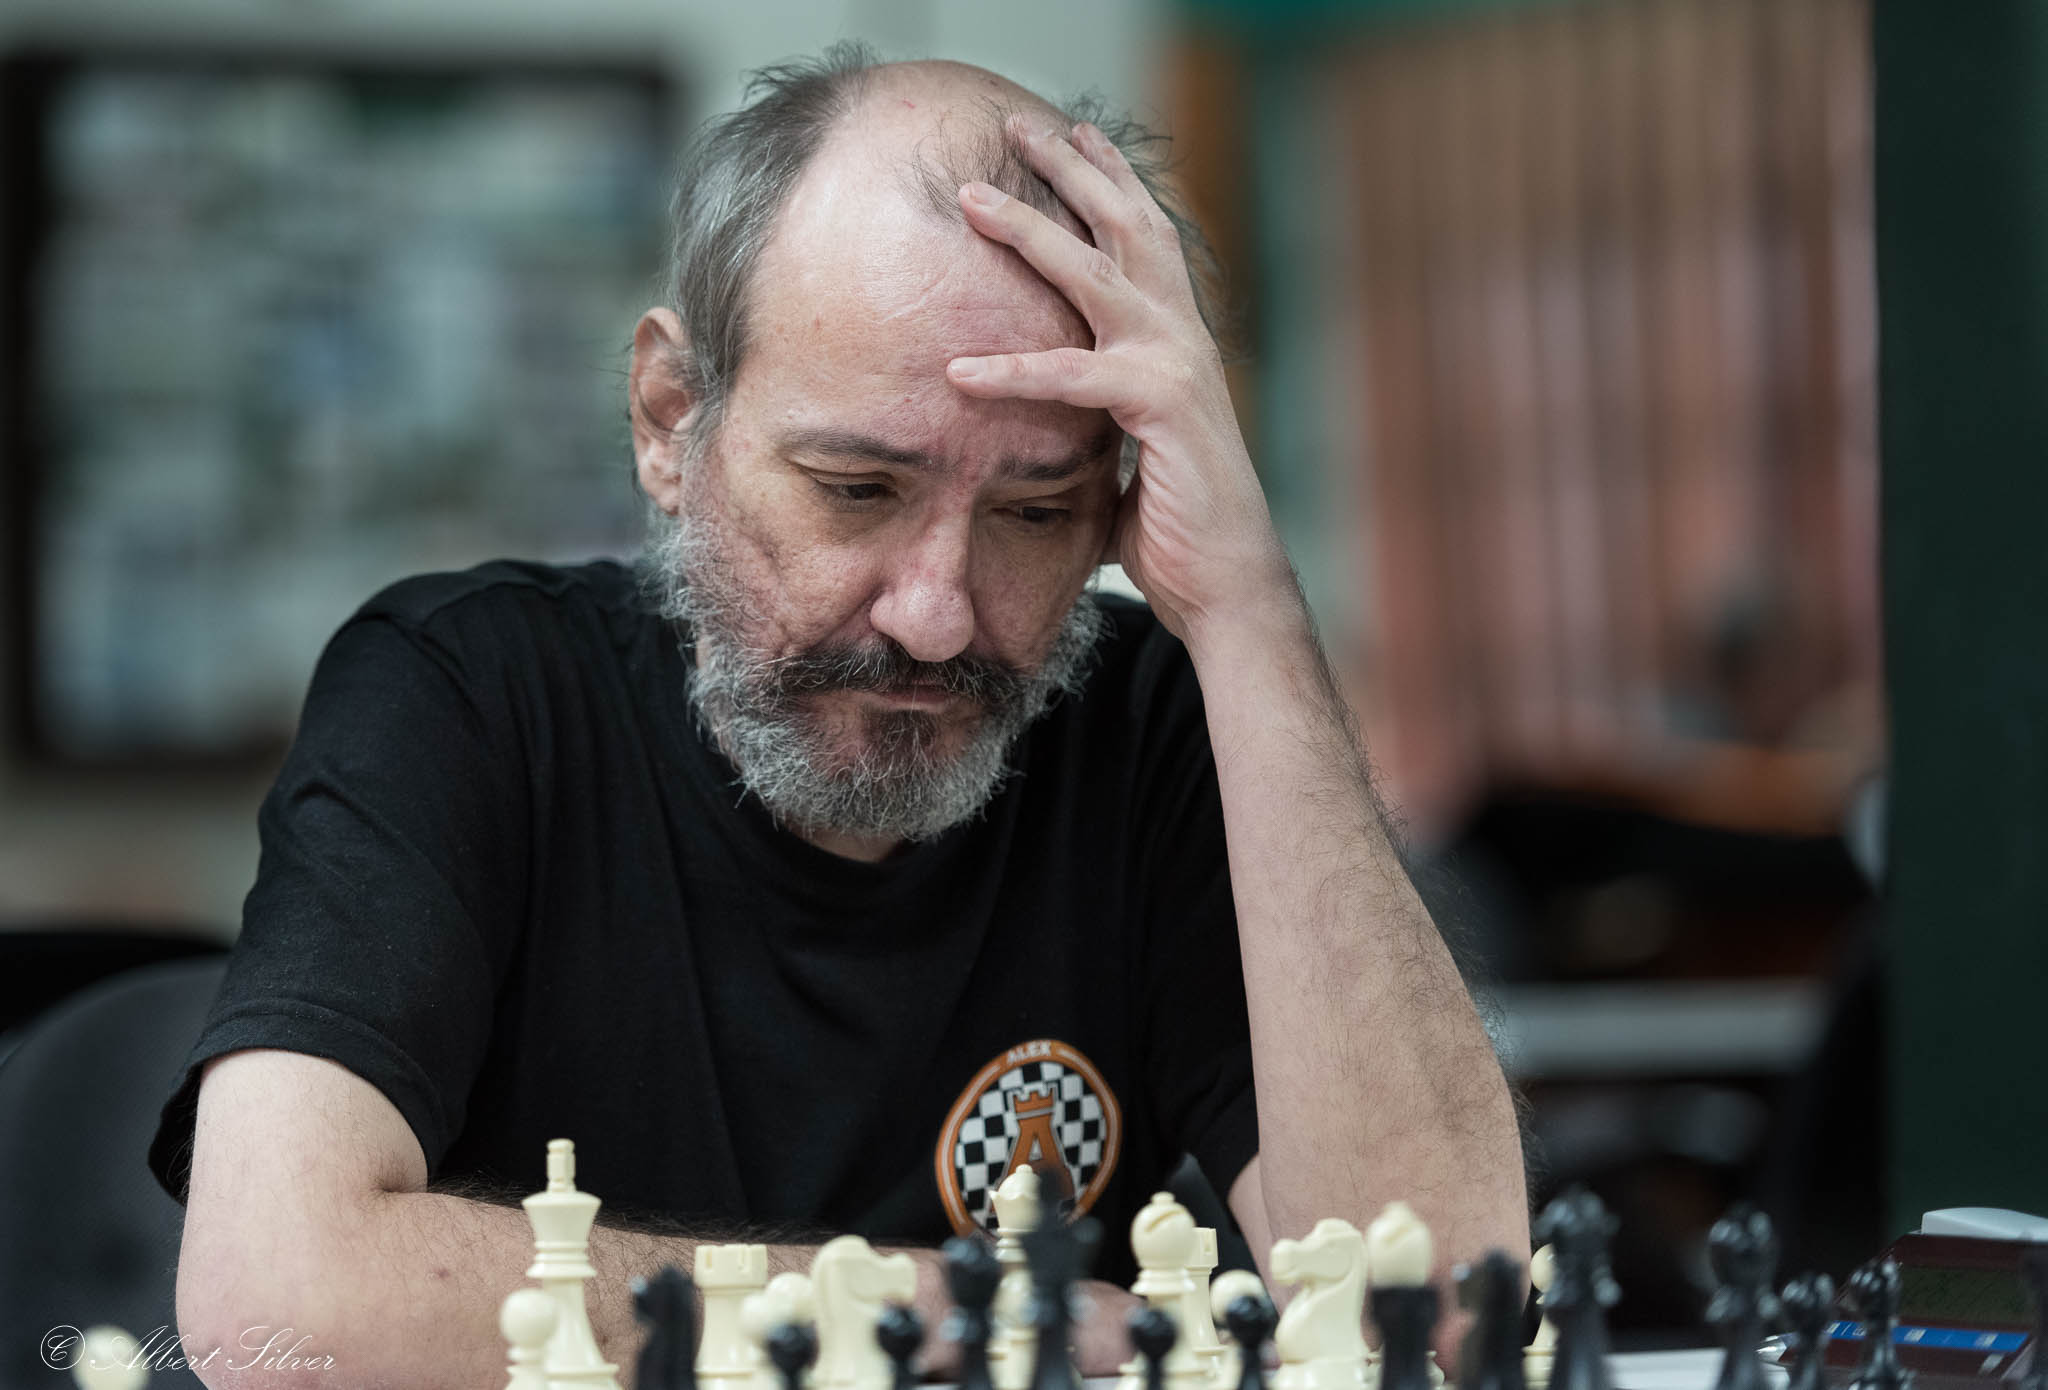
However, this can be intensified by darkening the background behind him. By doing this, his lighter tone becomes much more prominent and stands out more. Without being told it had been darkened, the chances are it would not have been noticed.

Portrait of Nihal Sarin at the Isle of Man | Photo: Alina L'Ami
In the image above, we have the exact opposite. Alina L’Ami has cleverly combined black and white with a lightening of the surrounding features so that IM Nihal Sarin draws your eye to him as the central-most and darkest object in the frame.
If you feel like trying to work on your post-processing skills, but aren’t willing to put down money for a program such as Photoshop, DXO Optics, or Capture One Pro, don’t hesitate to look at some of the top-notch free offerings.
GIMP — This is by far the most powerful image editor with a zero dollar pricetag on it. Don’t let that fool you though, as it can really give Photoshop a run for its money, and has tons of tutorials and plugins made by its very vibrant community.
Paint.NET — This program could be confused for something superficial in light of its similar name to the Windows app, but nothing could be further from the truth. It isn’t as powerful as GIMP, but it does have all the basics and is easier to master for a new user.
Google Nik collection — This is a series of programs that used to be sold for as much as $500, but after it was bought by Google, was made free. It is a set of tools that also work as standalone programs, or be used as plugins for Photoshop and Lightroom, of which my personal favorite is Silver Effex Pro, an outstanding Black and White tool.
“Your first 10,000 photographs are your worst.” – Henri Cartier-Bresson
Remember that photography is a skill that needs to be practiced to improve, and that results will come if you do so and try to raise your standard, but will take time. Still, that’s part of the fun. Happy shooting!