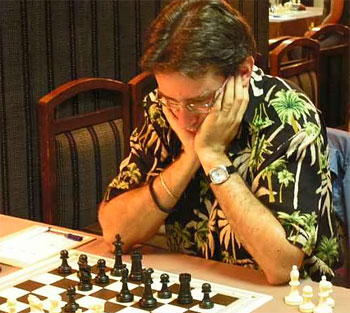


GM Mihail Marin in tournament play
The following express commentary was provided by Romanian grandmaster Mihail Marin, who is the author of a number of very popular ChessBase training CDs and articles for ChessBase Magazine. GM Marin will study the games of the World Championship tournament in much greater detail and provide the full results of his analysis in the next issue of ChessBase Magazine.
| Group A: Round 12 - Sat. Jan. 26th | |
| Loek van Wely - Vishy Anand | ½-½ |
| Vladimir Kramnik - Magnus Carlsen | 0-1 |
| Teimour Radjabov - Peter Leko | ½-½ |
| Shak. Mamedyarov - Boris Gelfand | ½-½ |
| Pavel Eljanov - Veselin Topalov | 1-0 |
| Michael Adams - Judit Polgar | 0-1 |
| Levon Aronian - Vassily Ivanchuk | ½-½ |
Another interesting round. The sensation of the day was provided by Carlsen, who outplayed Kramnik with the black pieces; something the Ex-World Champion is not too used to these days...

Veselin Topalov struggling in this tournament

Against Pavel Eljanov the former FIDE world champion took his fourth loss
The other "ex-", Topalov, also lost after launching a possibly unfounded sacrificial attack against Eljanov.

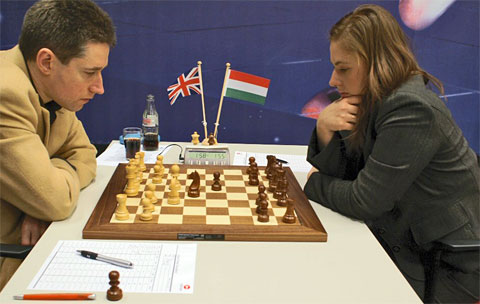
Top English GM Michael Adams received an endgame lesson by Hungary's Judit
Polgar
In Adams-Polgar, the generally dull Russian defence eventually led to an enormously complicated ending, where Black converted her advantage convincingly.

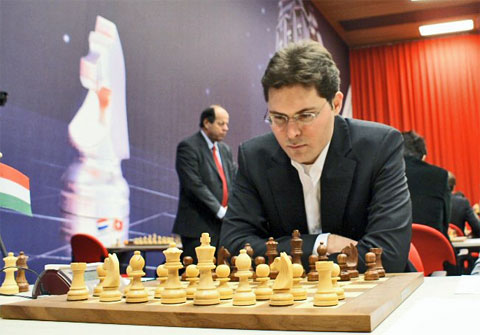
Peter Leko at the start of his round twelve game against Teimour Radjabov

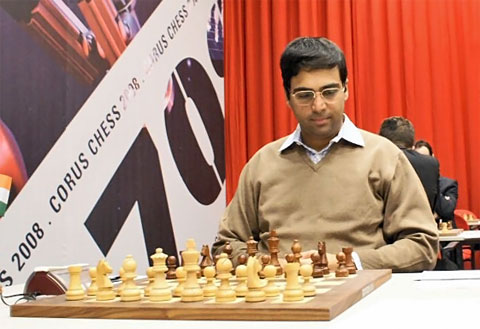
World Champion Vishy Anand at the start of his game against Loek van Wely

After three consecutive losses van Wely drew against Anand in round twelve
The other games ended in draws after the exhaustion of the practical possibilities. A special mention for Aronian-Ivanchuk, where the Uktainian managed to hold a theoretically drawn but nevertheless unpelasant rook endgame with a pawn down.
Adams,Mi (2726) - Polgar,Ju (2707) [C42]
Corus A Wijk aan Zee NED (12), 26.01.2008 [Mihail Marin]
1.e4 e5 Time passes... When did Judit play her last Sicilian? 2.Nf3 Nf6 3.Nxe5 d6 4.Nf3 Nxe4 5.d4 d5 6.Bd3 Nc6 7.0-0 Be7 8.Nc3 Bf5 9.Re1 Nxc3 10.bxc3 Bxd3 11.Qxd3 0-0 12.Rb1 Na5 13.Qf5 Re8 14.Bf4 g6 15.Qh3 Nc4 16.Ne5 Bd6 17.Nxc4 Bxf4 18.Rxe8+ Qxe8 19.Qf3 dxc4 20.Qxf4 Qe2 21.h3 b6 22.Qf3 Qxf3 23.gxf3 a5 24.Re1 Kf8 25.Re4 Re8 26.Kf1 f5 27.Rxe8+ Kxe8
|
Things have gone terribly wrong for Black in the middlegame. In the pawn ending his structure is worse on both wings. On the kingside, this is just too obvious, because of the presence of double pawns. On the other wing, where both sides have structural deffects, Black maintains an advantage because of the availability of the d5-square and of the possibility of the pawn break ...b5-b4. According to the principle of the two weaknesses (in a wider sense), having an advantage on both wings should be sufficient for a win. However, the basically closed character of the position, offers White reasonable hopes for building up a reliable fortress. Some reader might ask: "Well, such an ambiguous evaluation is characteristic for the middlegame rather than for a position where all the pieces have been exchanged! So, is it a win for Black or a draw?" Although my subsequent analysis claims to give a definitive evaluation of the position, for the time being I will refrain from any conclusions. I would rather emphasize the fact that the position is enormously complicated, both for the over-the-board player and for the analyst (the latter, with the help of the latest version of Fritz, a powerful engine which, by the way, does not always understand what's going on in this endgame either!). Let us compare it with the sharp game Carlsen - Anand from the previous round. The practical difficulties were caused by the numerous possible scenarios, each of them requiring separate treatment based on accurate calculation. There were about three different forms in which White could cary out the rook lift to the third rank, followed by its transfer to the kingside, while Black had at least two ways of reaction in each case (...g6 followed by ..h5 or ...h6 without ...g6). Concluding, the position faced the players with at least 3 x 2 = 6 difficult calculating... "exercises"! The situation is similar here. There are several possible evolutions of the structure on both wings. If we combine the independent scenarios from each side and take into account that wings tend to communicate with eachother, we reach a high number of possibilities that have to be taken into account. If we add that many of the critical positions require calculation of long variations we get a complete picture of the enormously complicated task facing both players. For the case that these abstract mathematical aspects failed to convince you that pawn endings can be just as complicated as a middlegame position, I would mention a game played between two of the greatest players of chess history (Karpov - Kasparov, Las Palmas 1996), in which both players erred alternatively, with White missing an obvious draw and then Black failing to find the winning continuation. As for the subsequent analysis (which might contain some mistakes still), I hope that it will give you the feeling that my general comments only revealed part of the grandious character of this type of positions...
28.f4 .White's desire to expand his breathing space is understandable, but I failed to find a winning plan after the more restrained 28.Ke2 . Here are some possible continuations: 28...f4 (In fact, Black's best practical chance would be to threaten ...Kg5-f4, which might force White play f4 anyway, transposing to the game continuation) 29.Kd2 Ke7 30.Ke2 Ke6 31.Kd2 Kf5 32.Ke2 b5 33.a3 Ke6 34.Kd1 Kd5 35.Kd2 c6 36.Ke2
|
Analysis diagram
36...c5 (Slightly trickier than 36...b4 when after 37.axb4 axb4 38.cxb4 Kxd4 39.Kd2 c3+ 40.Kd1 Kc4 41.Kc1 Kxb4 42.Kb1 Black cannot break through.) 37.dxc5 Kxc5 38.Kd1 b4 39.axb4+ axb4
|
Analysis diagram
40.Kd2! (White should rather give up the c3-pawn than allow the enemy king occupy the c3-square! After 40.cxb4+? Kxb4 41.Kd2 g5 42.Kc1 Kc3 Black wins easily.) 40...Kb5 41.Kc1 bxc3 42.Kb1 and Black cannot make further progress on the queensie, while the other wing is just too far, for instance 42...Kc5 43.Ka2 g5 44.Ka3 Kb5 45.Ka2 Kb4 46.Kb1 Kc5 47.Ka2 Kd5 48.Ka3 and White's counterplay is developing too fast to allow the king's transfer to the kingside.
28...Kd7 29.Ke2 Kd6 30.Kd2 Kc6
|
31.f3. Agagin, this move was not forced yet, but it looks like if White would have had to take the e4-square under control at a later stage anyway. For instance, after 31.Ke2 Kd5 32.Ke3 c6 33.Kf3? (the only way to prevent the enemy king's intrusion of White does not want to play f3) Black wins with 33...b5! 34.Ke3 (34.a3 does not prevent 34...b4) 34...b4 35.Kd2 Otherwise, White would lose his d4-pawn soon. 35...c5! 36.dxc5 Kxc5 and White is helpless against the combined threat of infiltration on the queenside or in the centre, for instance 37.f3 (Now or later, 37.cxb4+ is strongly answered by 37...Kxb4! which explains the necessity of the previous exchange of pawns on c5.) 37...Kb5 38.Kc1 bxc3 39.Kd1 Kb4 40.Kc1 h6 41.h4 h5 White is in zugzwang. His king cannot guard both wings anymore. 42.Kb1 Kc5 followed by ...Kd4-e3.
31...Kd6 32.Ke3 Kd5 33.Ke2
|
|
Analysis diagram
Black cannot make further progress on the queenside, but has to find a favourable moment to switch to an attack on the other wing. 41...h6 42.h4 h5 Before starting concrete action, Black has brought his h-pawn one step closer to the promotion line, forcing the enemy king to retreat at the same time. 43.Kb1 Kc4 44.Ka2 Kd4 45.Kb3 Ke3 46.Kxc3 Kxf3 47.Kd2
|
Analysis diagram
The position looks easily winning for Black, who has an active king and will win a pawn soon. However, there seems to be only one winning move here, and it should be said that it is not the most obvious! 47...Ke4!! (Paradoxically, 47...Kxf4 would let the win slip away. After 48.c4 , the plan given in the main line will fail for reasons that will be revealed later, while 48...Ke4 49.Kc3 Ke5 50.Kd3 Ke6 51.Kd4 Kd6 52.c5+ Kc6 53.Kc4 offers no winning chances at all. The exchange of passed pawns with 53...f4 54.Kd4 leads to a dead draw.) 48.c4 Kxf4
|
Analysis diagram
Remarkably, this position is a mutual zugzwang! 49.Kd3 (49.Kc2 is too passive because of 49...Kg3! followed by the advance of the f-pawn, with a won queen ending.) 49...g5! (Now, 49...Kg3 does not win because of 50.Ke2! Kg2 51.Ke3!) 50.c5 gxh4 51.c6 h3 52.c7 h2 53.c8Q h1Q
|
Analysis diagram
With his king on d2, (as in the case of the immediate capture on f4), White would draw by perpetual check, but here the king can escape after 54.Qc7+ Kg4 55.Qg7+ Kh3! and there is no check available along the third rank... Well, imagine that you would have to calculate all this without moving the pieces around and without any hint from Fritz...
34.Kd2 Ke7 35.Ke3 Ke6 36.Ke2
|
All these hesitations must have been caused by the desire to get closer to the time control. 36...g5!? From general point of view, this approach is correct. Once you cannot see very clearly what happens in case of an immediate queenside attack, you should make some progress of the other wing first. The exchange of one of White's double pawns will reduce his influence over the centre, providing the black king with more space of infiltration. At the same time, in certain lines Black would get his bishop's pawn to f4, obtaining an advantage of space on this wing. Another form of carryint out this plan would be 36...Kf6 . If White prevents ...g5 by advancing his pawn to h4, he would lose an important reserve tempo for the case of further zugzwang positions, while after 37.Ke3 g5 we would rach the game position. 37.Ke3. Adams wishes to mintain the control of the f4-square. The main alternative was 37.fxg5 f4! 38.Kf2 Kf5 If White refrains from defending his extra-pawn, Black would simply switch back to the aforementioned plan (...Kd5 and ...b5-b4), when the presence of the f-pawn on the fourth rank increases her chances for winning the resulting simplified ending. At the same time, 39.h4 does not save either: 39...Kg6 40.Kg2 Kh5 41.Kh3
|
Analysis diagram
An interesting moment: which side will have more reserve tempi available? 41...b5 (Only not 41...c6?? because iof 42.a4! when Black is lost because of zugzwang, for instance 42...b5 43.d5!) 42.a3 (Or 42.d5 b4) 42...c6 43.Kg2 Kxh4 44.Kh2 Kxg5 Black has won a pawn, but the win requires some accuracy still. It is not possible to make further kingside progress, while the enemy king is ready to launch a counterplay based on Kg4 in case of applying the familiar queenside plan. 45.Kh3 h5! Taking the essential g4-sqare under control, in order to slow down White's counterplay. 46.Kg2 Kf5 47.Kh3 Ke6 48.Kh4 Kd5 49.Kg5 b4 50.cxb4 axb4 51.axb4 Kxd4 52.Kxf4 Kc3 53.Kg3 Kxc2 54.f4 c3 55.f5 Kb3 56.f6 c2 57.f7 c1Q 58.f8Q Qc3+ 59.Kg2 Qxb4 with a won queen ending. 37...Kf6
|
|
|
White loses the f4-pawn, when the g4-pawn will decide easily. My conclusion is that the ending is winning for Black, but extremely difficult to play. Of course, there is no fun for White to defend such positions, but there are many far from obvious black inaccuracies that could spoil the game. Although Judit's evaluation of the plan based on a rapid advance of the b-pawn seems to have been too pessimistic, her decision to open a new front on the other wings first is very instructive from general point of view. Finally, I would add that I am more confident about the fact that 28.Ng3 would have more or less won in the Carsen-Anand complicated middlegame than about some of the lnes examined above. Ending can be really complex... 0-1. [Click to replay]

Ready to go: a fine endgame win by the strongest woman who every played
chess

Game of the day: Vladimir Kramnik vs Magnus Carlsen
Kramnik,V (2799) - Carlsen,M (2733) [A30]
Corus A Wijk aan Zee NED (12), 26.01.2008 [Mihail Marin]
1.Nf3 Nf6 2.c4 e6 3.Nc3 c5 4.g3 b6 5.Bg2 Bb7 6.0-0 Be7 7.d4 cxd4 8.Qxd4 d6 9.Rd1 a6
|
|
|
However, this move is completely unfamiliar to me, although I can see it is quite logical. The knight overdefends the e6-pawn, enabling the advance of the f-pawn, while also sustaining an eventual ...b5.. 17.Nf3 17.h4 would have been more prudent. 17...f5! The radical advance of the kingside pawns is a thematic method of counterattack in situations like this, when White's pieces are crowded in the centre without sufficient coordination. For the Hedgehog players, one famous game is Tukmakov-Ribly, 1982 Interzonal, in which Black simply won a piece with ...f5, ...e5 and ...e4. Here, Black's achievements will be of pure strategic nature, but this will be of decisive importance for the further course of the game. 18.Nc3 g5 19.Qd2 g4 20.Ne1 Bg5! 21.e3
|
After being forced to weaken his f3-square, White finds himself in a very unpleasant situation. He has very few possibilities for active play, while his king will be in permanent danger (especially in case of some simplifications). Having excellent control in the centre, Black can improve hisposition at his own leisure, which Carlsen will do with astonishing... maturity. 21...Rff7 22.Kg1 Ne8 23.Ne2 Nf6 24.Nf4 Qe8 25.Qc3 Rg7 26.b4 Ne4 27.Qb3 Rge7 28.Qa4 Ne5 29.Qxa6 Ra7 30.Qb5 Qxb5 31.cxb5 Rxa2 32.Rc8+ Kf7 33.Nfd3 Bf6 34.Nxe5+ dxe5 35.Rc2 Rea7 36.Kg2 Ng5 37.Rd6 e4 38.Bxf6 Kxf6 39.Kf1 Ra1 40.Ke2 Rb1 41.Rd1 Rxb4 42.Ng2 Rxb5 43.Nf4 Rc5 44.Rb2 b5 45.Kf1 Rac7 46.Rbb1 Rb7 47.Rb4 Rc4 48.Rb2 b4 49.Rdb1 Nf3 50.Kg2 Rd7 51.h3 e5 52.Ne2 Rd2 53.hxg4 fxg4 54.Rxd2 Nxd2 55.Rb2 Nf3 56.Kf1 b3 57.Kg2 Rc2 0-1. [Click to replay]

The hero of round twelve: Magnus Carlsen, 17-year-old Norwegian world class
GM
Pictures by Jeroen van den Belt