


GM Mihail Marin in his analysis kitchen at home in Romania
The following express commentary was provided by Romanian grandmaster Mihail Marin, who is the author of a number of very popular ChessBase training CDs and articles for ChessBase Magazine. GM Marin will study the games of the World Championship tournament in much greater detail and provide the full results of his analysis in the next issue of ChessBase Magazine.
Despite three relatively short draws, this was a very interesting round, with many spectacular moments.
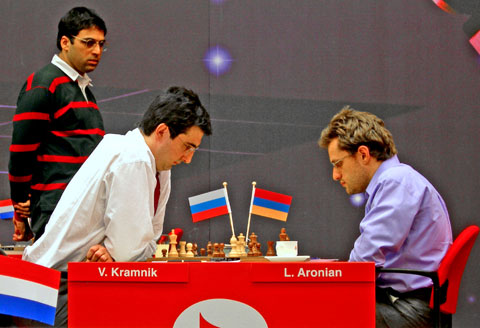
The longest battle (110 moves!) was Kramnik-Aronian. It offered us an interesting theoretical duel, culminating with a spectacular innovation by Kramnik, a complex (but rather short) middlegame phase and another "tablebases" drawn ending. For a while, play went along the theoretical recomendations and Aronian managed to hold his own. However, when Kramnik displayed his forces in a way that had not been analyzed before, the Armenian grandmaster went wrong and lost.
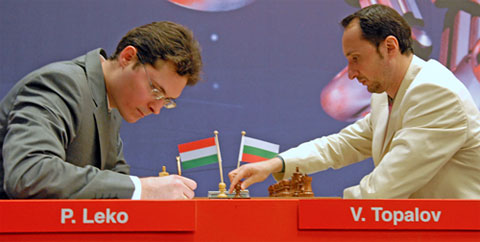
In Leko-Topalov a fashionable line of the Najdorf was played. The structure became slightly unusual and, although White enjoyed certain stability, it was mainly Black who seemed to aspire for an advantage. After the first time control, the position simplified to a (even more) assymetrical bishop ending, with an obvious advantage for Topalov, who went on winning.
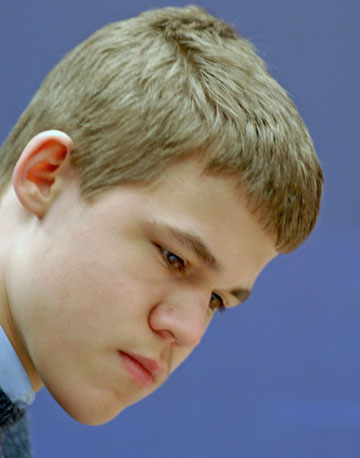
Magnus Carlsen, the tournament leader
In Carlsen-Polgar, Black's dynamism did not prove sufficient to match White's strategic advantage. Carlsen won two pawns and, very soon, the game.
In Mamedyarov-Eljanov White obtained a big advantage of space, but the blocked character of the position allowed Black defend successfully. A draw was agreed on the 66th move.
Despite a promissing start, with interesting opening play, the other three games ended peacefully rather early.
| Group A: Round 6 - Fri. Jan. 18th | |
| Loek van Wely - Boris Gelfand | ½-½ |
| Peter Leko - Veselin Topalov | 0-1 |
| Magnus Carlsen - Judit Polgar | 1-0 |
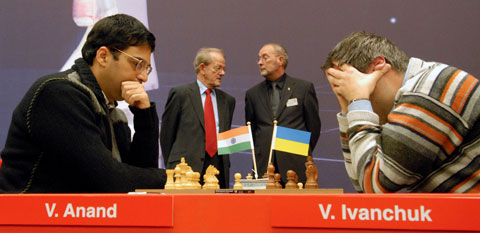
| Vishy Anand - Vassily Ivanchuk | ½-½ |
| Vladimir Kramnik - Levon Aronian | 1-0 |
| Teimour Radjabov - Michael Adams | ½-½ |
| Shak. Mamedyarov - Pavel Eljanov | ½-½ |

Kramnik,V (2799) - Aronian,L (2739) [D43]
Corus A Wijk aan Zee NED (6), 18.01.2008 [Mihail Marin]
1.d4 d5 2.c4 c6 3.Nf3 Nf6 4.Nc3 e6. Aronian has included this opening into his repertoire recently. His desire to avoid the Catalan and the g3-Queen's Indian against Kramnik is perfectly understandable. 5.Bg5 h6 6.Bh4 dxc4 7.e4 g5 8.Bg3 b5 9.Be2 Bb7 10.0-0 Nbd7 11.Ne5 Bg7 12.Nxd7 Nxd7 13.Bd6 a6 14.a4 e5 This is the start of a very interesting sequence of moves. However, I will not insist too much about it, since until the 24th move everything had been played already... 15.Bg4 exd4 16.e5. For the time being, both sides ignore the fact that the c3-knight is attacked and are more concerned about activating their play in a way or another. 16...c5 17.Re1 Nxe5 18.Bxe5 0-0 19.Bxg7 Kxg7
|
|
|
|
|
Analysis diagram
39.Qxf8+!! Qxf8 40.Re8 fxg2 41.Kxg2 Bc8 White will be an exchange up in the ending, but only further analysis will prove whether his winning chances are real. Over-the-board, this would be impossible to establish, of course, especially that reaching this position would require accurate calculation... 34...Rdd8 35.Bxc8 Rxc8 36.Qd5+ Qf7 37.bxa6 Qxd5 38.Rxd5 Rf7 39.a7 Ra8 40.Rda5
|
|
|
|
Just three rounds after the game Radjabov-Van Wely (remember? Maizelis, Averbakh...) we enter again the fascinating world of the tablebases. The same as in the previous case, human analysis and evaluations made three quarters of century ago prove entirely correct.
The first attempts to give an absolute evaluation were made in the '30s. The analysts conclusions were contradictory in the begining. In 1930, Rudolf Spielman stated that Black should hold a draw, but eight years later the incurable optimist Ilya Rabinovic claimed a forced win for White. Regarding these early disputes, Botvinnik remarked an essential drawback of the general approach. Theoreticians tried to analyse positions where the pawns were almost on their initial positions, which made the task unfairly difficult for the limited human powers.
In 1939 Belavenets started investigating the most favourable situation for White, when Black's king is cut on the back rank. He correctly assesed the position as winning and this provided other analysts with essential refference points. This led to an analytical emulation. Soon, the positions with pawns on h6 and f5 were practically exhausted, with the establishment of a relatively accurate distinction between winning and drawn positions.
However, further progress on the way to the truth was made when it was discovered that by maintaining his pawn on h5 in order to control the vital g6-square White increases his chances for success. We shall see an illustrative case in a comment from a more advanced stage of the game.
Keres discovered that White can confront his opponent with big practical problems by activating his king through the empty zone on the left side of the pawns, but his conclusion that this method would be winning is erroneous.
The first article that gave a complete and correct evaluation of the endgame was written (not surprisingly) by Botwinnik in 1941. He proved that Black should hold a draw if he is not forced to retreat with his king on the back rank. He recommended for Black the following defensive system: to maintain the king on f7 in order to prevent the activation of the white king. In case the danger of being pushed back arises, the king should go to g7 and, if checked along the seventh rank, to h6. This applies for the position with the h-pawn on the fifth line; after h5-h6, the king should go to h7. The rook should stay on a1 or around it, in order to be ready to check the white king from big distance. Sometimes, in case of concrete threats, it might be needed to move it to f1 or h1.
We are armed now with sufficient knowledge to move on.
|
58.Rg4 Ra1 59.Kg3 Rh1 60.Rh4 Ra1 61.Rb4 Kg7 62.Rb6 Rg1+ 63.Kf4 Rh1 64.Kg5
|
|
Analysis diagram
An important moment. In the absence of the h-pawn, Black would draw with ...Kg6. However, the h5-pawn prevents this saving move, allowing White advance hispawn further and win the game. 65.Kf5 Rh1 66.h6+ Kh7! With the other pawn on the second rank still, this is not the only posible move, but we can notice that Aronian masters the theoretical material available rather well. 67.Ra6 Rf1 68.f4 Rb1 69.Re6 Ra1. Everything like in Botvinnik's defensive scenario. 70.Rf6 Re1 71.Kg4 Ra1 72.f5 Rg1+ 73.Kf4 Rf1+ 74.Ke5 Re1+ 75.Kd6. Played in accordance with keres' plan, which, even though is not winning by force, leaves Black under pressure. 75...Rf1 76.Ke7 Rf2 77.Rf8
|
77...Re2+. This move does not spoil anything, but with more time on his clock (or more energy left) Aronian might have discovered that this was a good moment to eliminate the h-pawn with 77...Kxh6 . Apparently, Black is in trouble after 78.f6 but if we continue the analysis with 78...Ra2 (78...Rb2 is the same, because the distance from the enemy king is big enough.) 79.Rh8+ Kg6 80.Rg8+ we find the unexpected move 80...Kf5! which draws after 81.f7 Ra7+ 82.Kf8 (The only way to avoid immediate perpetual and the loss of the f7-pawn) 82...Kf6 and now it is time for White to find the only saving move 83.Ke8=.
78.Kf7 Ra2. 78...Rb2 is also good, but not 78...Rc2? when the distance separating the white king from the black rook is insufficient to allow effective counterattack: 79.Re8 Kxh6 80.Re6+ Kh7 81.f6 Rc8 (Black has to take the 8th rank under control whenever the enemy rooks occupies the e6-square. After 81...Ra2 82.Kf8 Kg6 White advances his pawn with check 83.f7+ , winning an essential tempo and the game.) 82.Re8 Rc7+ 83.Ke6 Rc6+ 84.Ke7 Rc7+ 85.Kd6 . Checks has come to an end and Black can resign.
79.Rd8. Botvinnik mentioned that after the activation of the king, the white rook is best placed on d7 or e7 from practical point of view, which justifies Kramnik's move. However, 79.Re8!? would have been trickier. Let us see what would have happened had Aronian played as in the game: 79...Ra7+? (79...Kxh6! is the only saving move, see the analysis below.; 79...Ra1? 80.Re6 leads to a position analyzed by Botvinnik. Here is his main line: 80...Ra7+ 81.Kf8 Ra8+ 82.Re8 Ra6 83.Re7+! Now, 83...Kxh6 allows the exchange of rooks with 84.Re6!+. Therefore, 83...Kh8 is forced, but we shall see that the king is exposed here, too. 84.Re6 Ra8+ 85.Re8 Ra6 86.f6! when 86...Rxf6+ loses the rook to 87.Ke7+!) 80.Kf8 Kxh6 81.Re6+ Kg5 (81...Kh7 is impossible because of 82.Re7+ In the game, such possibilities will not exist. The d7- and d6-squares (corresponding to the similar squares along the e-file) are not defended.) 82.f6 and Black is one tempo too late for the saving regrouping. He would need to play ...Kg6 and ...Ra8+, but the way it is 82...Kg6 loses to 83.f7+!
79...Ra7+. Again, Aronian misses his chance to immediately end the game in a happy way for him with 79...Kxh6= This time, the position is "almost" theoretical and its evaluation should have been easier to make than on the 77th move. Here is a possible continuation: 80.f6 Ra7+ 81.Ke6 (In the absence of the rook from the 6th rank, 81.Kf8 leads to an immeidate draw after 81...Kg6) 81...Ra6+ 82.Ke7 Ra7+ 83.Rd7 Ra8! 84.Kf7 Ra1 85.Re7 Kh7 86.Re6
|
Analysis diagram
I once had this position in an over-the-board game and my opponent failed to find the only saving move, 86...Ra8! (After 86...Ra7+? 87.Kf8 he soon resigned. The line 87...Kg6 88.f7+ is familiar to us already.) 87.Re8 Ra7+ and White cannot make further progress.
80.Kf6. Nothing really interesting will happen for a long while now, except for the fact that Aronian probably became more and more tired. 80...Ra1 81.Rd2 Rb1 82.Ra2 Rb3 83.Rh2 Rb1 84.Rh4 Rb8 85.Kg5 Rg8+ 86.Kf4 Ra8 87.Kg5 Rg8+ 88.Kf6 Ra8 89.Re4 Ra1 90.Re8 Ra2 91.Re1 Ra3 92.Rh1 Ra2 93.Kg5 Rg2+ 94.Kf4 Rf2+ 95.Ke4 Re2+ 96.Kf3 Ra2 97.Ke4 Re2+ 98.Kd4 Rd2+ 99.Ke3 Ra2
|
100.f6. As far as I know, this setup has not been investigated by humans. It is Kramnik's merit to have found this excellent practical chance. The far advanced pawns are very dangerous if sustained by the rook, even if the king is temporarily far from them. Exhausted by a long defence and with little time left, Aronian will soon go wrong in a position that started becoming unfamiliar to him.
100...Ra7 101.Rf1 Kg6! The only move. The passive 101...Rf7? loses to 102.Ke4 Kg6 103.Ke5 Ra7 104.h7! (Winning an essential tempo) 104...Rxh7 105.Ke6 and Black can resign.
102.Ke4 Ra4+. From practical point of view, 102...Ra8! would have been best, and if 103.Ke5 then simply 103...Kxh6= We can see that the control of the back rank is esential. 104.f7 Kg7 stops the pawn while after other moves Black can start checking.; The neutral 102...Rb7? would bring the rook too close to the king. 103.Kd5 Rb5+ (103...Kf7 also leads to interesting play: 104.Rh1 Kg8 105.Ke6 Rb6+ 106.Kf5 Kh7 107.Rf1!? Not the only move, but a very instructive one. The rook is placed in advance behind the pawn, anticipating the king's departure. 107...Rb7 108.Ke6 Rb6+ 109.Kd5 Rb5+ 110.Kc6 Rb8 111.f7 Rf8 112.Kd6 winning.) 104.Kc6 Rb8 105.f7 Rf8 106.h7! (A familiar method. White wins a tempo) 106...Kxh7 107.Kd7 and Black will lose the rook soon. 103.Kd5
|
|
White has forced his opponent to occupy passive positions with his pieces, having defended his pawns at the same time and can safely approach with his king. 108...Rb8+ 109.Kc6 Rc8+ 110.Kd6. A dramatical and very interesting game in all its phases. 1-0. [Click to replay]


